Such adventures I am having this summer! The entire month of July was focused on weaving, and a lot of it was tapestry. Lucky me! I am indulging in a couple of weeks of recuperation right now, because last winter while I was far from home and missing all my weaving compatriots, I signed up for everything I could find online–and it all happened in July. Now I realize that I no longer have the energy of a 30-something so I need a bit of down time to recharge my batteries!
Yesterday I saw Rebecca Mezoff’s most recent blog post. It’s about weaving circles in tapestry. It was perfect timing for me to see since I’d just finished teaching a beginning tapestry class at the Weaving Center at Hartford Artisans, and we ended the course by weaving part of a circle. I think Rebecca’s idea would work well for weaving a small circle on just a few warp threads. In the long run I think weaving angles, curves, and circles involves a lot of attention to the turns made to create the shape. Turns that occur on low warps, ie an uncovered warp where the turn happens, will make a smoother line.
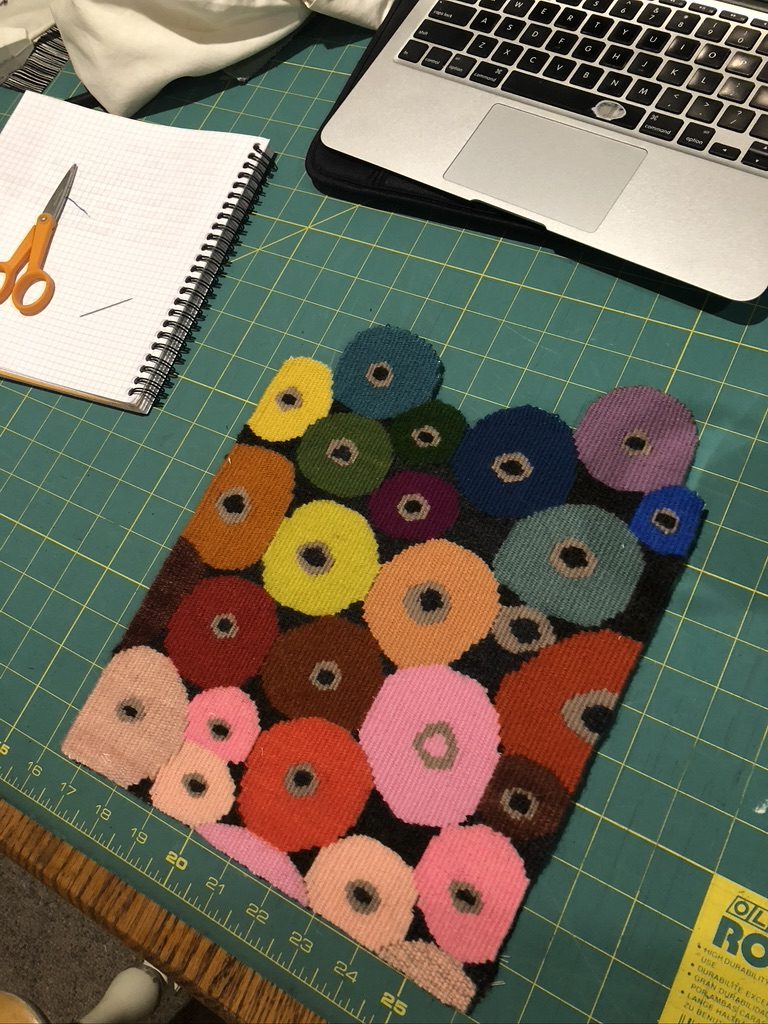
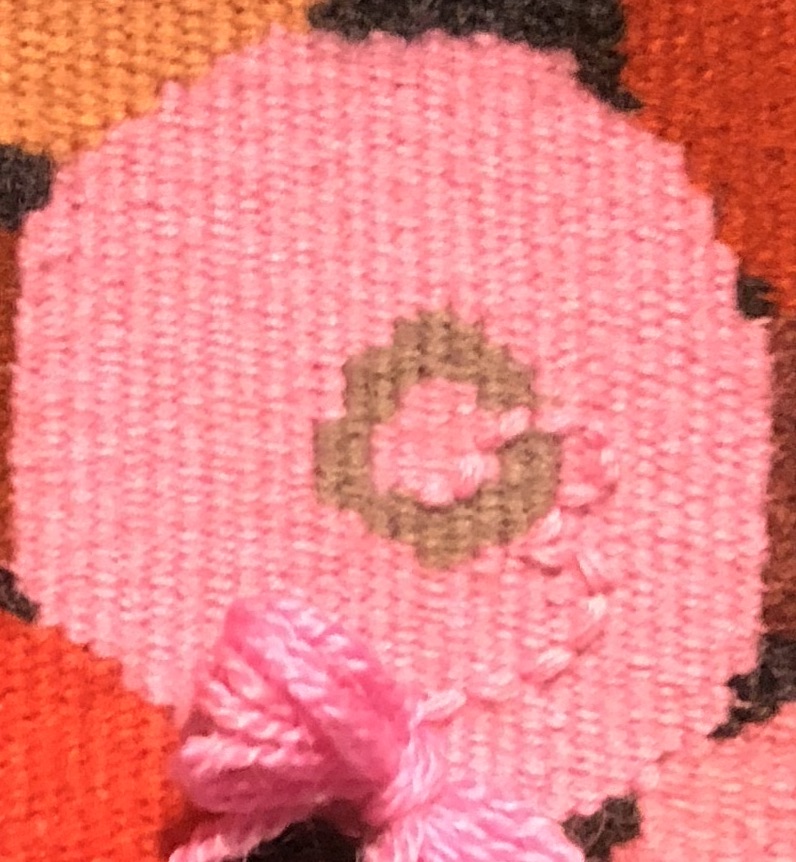
Some of these circles ‘read’ better than others, and those are the ones that had more turns on a low than on a high. Rebecca also talks about weaving a rather long straight area at the sides of a circle. This is what we Wednesday Group weavers call the ‘ears’ of the circle. If you don’t weave enough of the flat side you’ll end up with an oval when you have woven further up the circle. On the other hand, sometimes those long runs turn into something that looks like ears! Here is a close-up of the ‘ears’ on the pink circle from the photo above.
There is a lot to consider when weaving angles or curves. During my tenure in the Wednesday Group, Archie Brennan made a diagram of the process of weaving a circle for us. I now share it with my students, knowing he’d want it passed on to others. It’s complicated and takes quite a bit practice, but ultimately it’s worth putting in the practice time in spades!
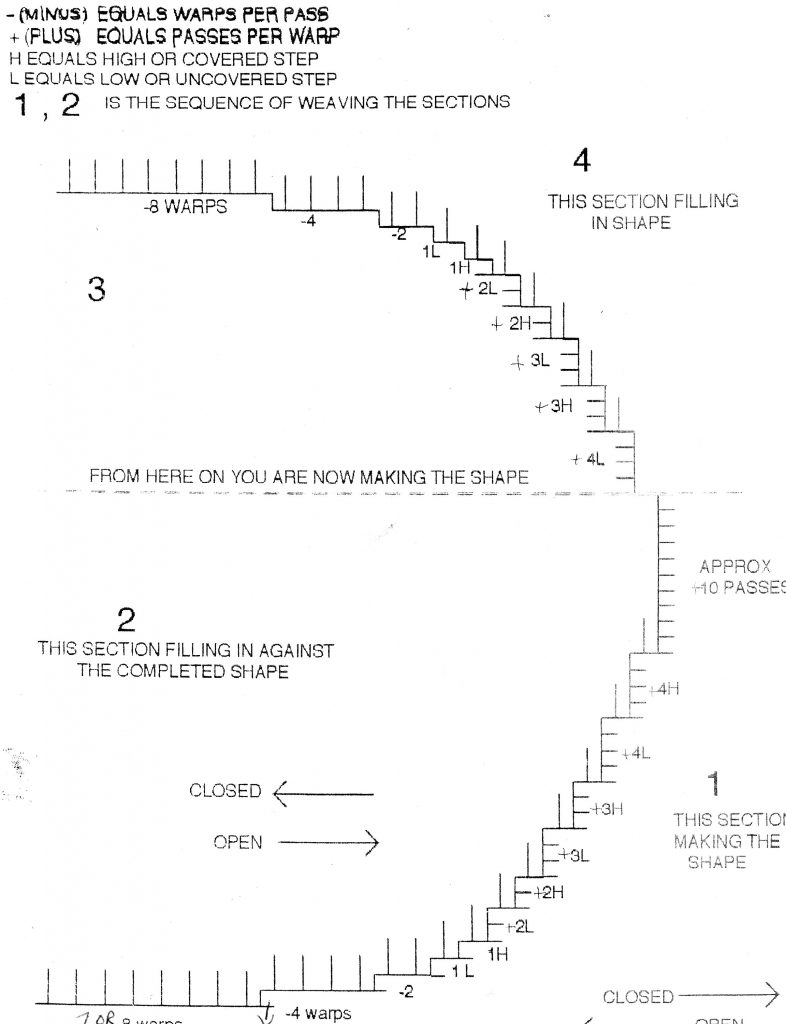
The key to reading this diagram is that a minus sign before the number (-4) means how many warp threads to move over for the next pass. A positive number (+3) describes how many passes to make turning on the same warp thread before moving to the next warp for the next pass.
For beginning students this exercise serves two important purposes. This is the first time students ink on to their warps. Archie always recommended using a Sharpie pen called “Rub a Dub,” which only comes in black. That can be a bit worrisome if you are weaving with a white weft, but I’ve never had any bleeding of ink occur, althought I haven’t woven much white. Archie did use a lot of white and off-white, and that is why he recommended this particular pen. Students learned to ink on in the Gobelins manner, which is to place the warp on a flat surface to bring the warps into one plane, such as placing the portable loom on a book or a piece of wood, with the cartoon situated where needed behind the warp. The process is then to lift each warp thread individually and mark however many dots on that thread are indicated by the cartoon. Then move to the next warp thread. The technique of making the dots is to hold the pen still against a warp thread while twirling the warp thread with the other hand in order to make a small mark that encircles the warp. This way, if the warps should begin to turn during weaving you will still see a clear mark.
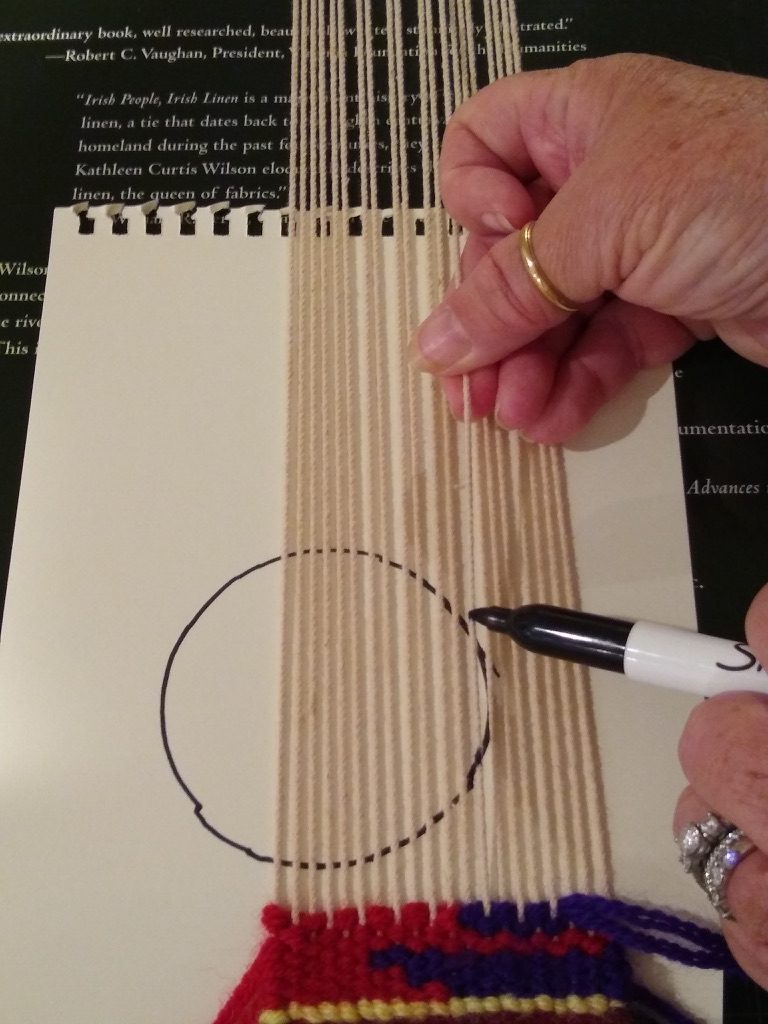
The second part of the exercise is to weave the partial circle that is now inked on the warp. You weave the background first, and each turn you make involves a choice of turning on a high or a low. Mostly you’ll be turning on every warp in this example, which has a warp sett of 4 epi. For the flat bottom I’d be sure to turn on a low, and if possible I’d try to move over by an even number of warps for the second turn, so it would also be on a low. That will give the flat bottom that Rebecca mentions in her post. After that I’ll mostly likely be turning on every warp thread, and as the curve gets steeper I’ll be making multiple turns on each warp thread. This is where I will want more turns on the lows than on the highs, as they build. So after a warp that I’ve chosen to weave two passes on a low, I would never weave more than two passes on the adjacent high. Once I’ve got a low that needed three passes I would then be open to weaving three passes on a high. And so on…
This is a lot of information, given quickly. There is always more than one way to accomplish something, but since I value Archie Brennan’s suggestions above most others, I wanted to share this! It does require practice! Have a go!