Category Archives: weaving

Knitting to the Rescue!

It’s sad for me to report that my looms are in the same condition as when I arrived home.  Life has gotten in the way of my plans…

While I was determining the most pleasing way to thread the pattern for the JOY (Just Our Yarn) yardage project, I had my semi-annual visit to the dermatologist and discovered that a worrisome spot on my arm had become melanoma.  I noticed this spot had changed to something of concern back in January, but I could not get to a doctor then since we had already sailed away to tropical waters.

Still, the news was a bit shocking to me.  I was already beyond Stage 1, so removal of lymph nodes was mandatory on top of removal of the offending spot which ended up being much bigger than what shows on the skin.  It’s all behind me now.  I got a consultation with a surgeon at Smilow Hospital at Yale, and the surgery was only a week later.  Whew!  Two weeks later I got the news that my lymph nodes are clear and that the surgeon got clear borders around the malignant cells.

Yet I’m still not weaving…. The long cut on my arm and the smaller incision in my underarm severed quite a few nerves, and regaining use of my arm is going to take longer than I imagined.  That’s a small price to pay for getting rid of the melanoma, and I can certainly knit and also do bobbin lace.  And every day I am doing arm motions to improve my dexterity.  Very strangely, I have all kinds of odd sensations in my arm all the way down to my hand:  burning, stinging, numbness.  It’s very strange.

Meanwhile,  back to talking about weaving.  Diane and Cathy from Just Our Yarns gave a program to the Connecticut weaving guild last November, in which they demonstrated using two completely different handpainted yarns for warp and weft.  One of the slides showed a scarf woven with a warp of one of their skeins painted from the cool side of the color wheel–mostly blues and purples.  The weft was a brilliant contrast of oranges, yellows and peaches.  You cannot always purchase colorways that you see and like in JOY yarns since they do not repeat any of their handpainted designs exactly.  But I found two contrasting handpainted that should give a similar effect.

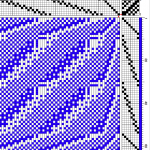
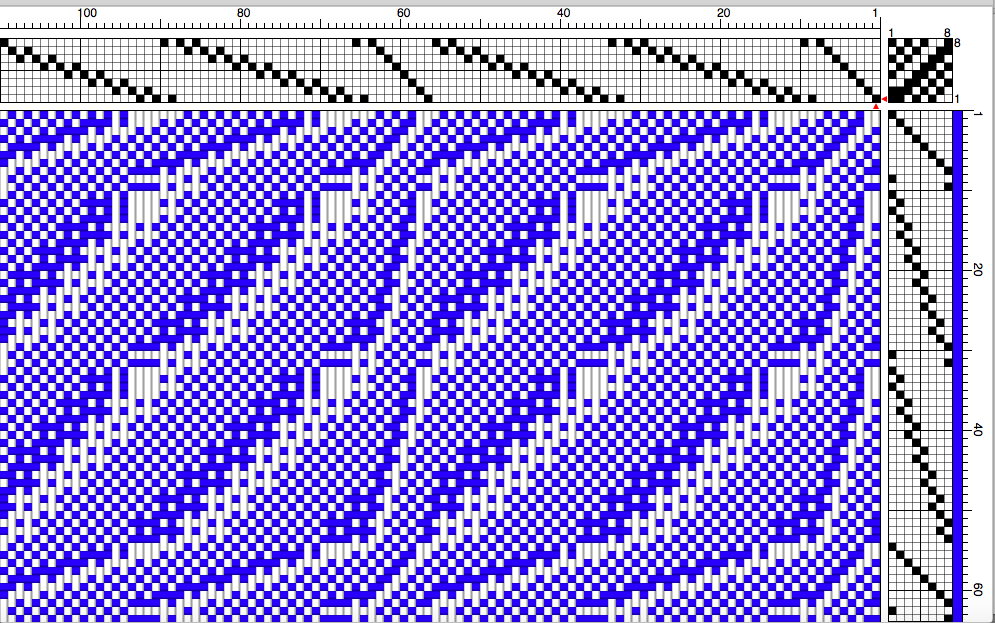
I chose a twill weave structure called “Raku” by Carol Bodin from the book Sixy Scarves for Sixty Years from the Weavers’ Guild of Greater Baltimore.  Here is a partial view of my plan.

Screenshot 2016-06-27 07.48.25

The long warp and weft floats should show off the color contrast of the warp and weft nicely. My warp is mostly muted greys, purples and blues, while my weft is a blend of peaches and creams. The sett will be 35 epi so those floats won’t be too long.

Now, the BIG question:  Should I flip the threading at the center of the warp and have the second half of the threading lean the opposite way?  Should I flip every other repeat of the sequence??  Should I just thread the whole thing in one direction and cut the fabric and turn it as needed for whatever I end up making?

I’ve favored each of these ideas at different times, and at the moment I’ve come full circle back to leaving the threading alone.  It would certainly help if I already knew what I will make with the finished fabric.  Typical of me, I have focused on the intrigue of working with this yarn rather than what I might do with fabric.  The warp is 17″ wide on the loom and I plan to weave 5 yards.

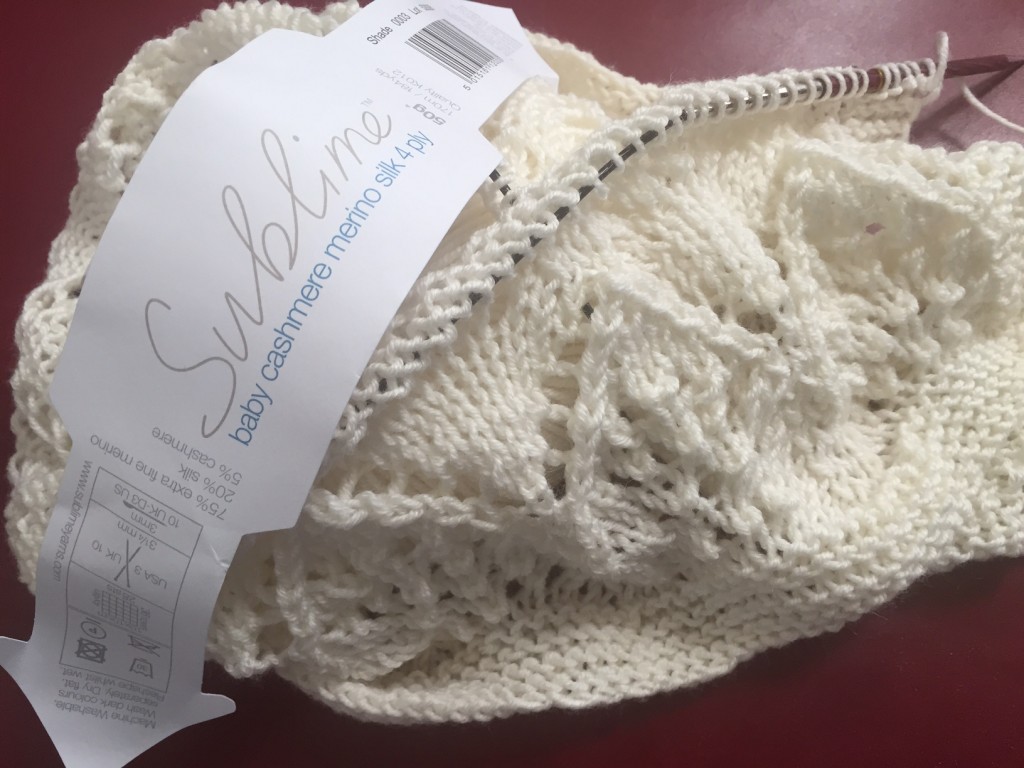
Meanwhile, as I ponder what to do about that threading,  I’ve been knitting and doing some Idrija lace on a bolster pillow.  I don’t even have to prop up my right arm on pillows anymore in order to knit, so I’m definitely improving.  This baby blanket is moving along nicely.  Interestingly, after looking at innumerable lace patterns, I ended up choosing a Eugen Buegler pattern.  He has designed lace patterns for many years and you can see many of his designs at the link above and on ravelry, as well as in numerous books by XRX.  He designed the first lace shawl I ever knitted, over 20 years ago.  I actually went to the local knitting store as I felt myself coming down with the flu in order to make sure that I had something to knit while I would be stuck in bed.  I still have that shawl…. in butterscotch colored, fine merino yarn from Grignasco.

But back to knitting for little baby Ozzie.  Here is the baby blanket as shown on Ravlery. It is called “Lace Plumes Baby Blanket” and is available as a downloadable pattern from Fiber Trends. Thank you, Eugen!  I’m using “Sublime Baby Cashmere” which I ordered from Jimmy Bean’s Wool.

I’m now further along than this photo shows because I work on it almost every evening, and then I realize that evening is not a good time for getting a photo.

IMG_2357

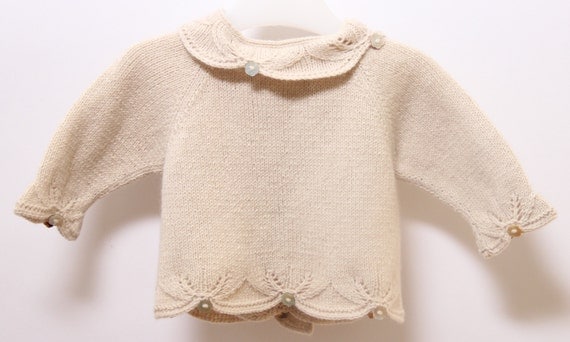
Next up will be this adorable sweater from Little French Knits on Etsy.  It’s a bit feminine, but, since I am so smitten with this little gem, I am clinging to the fact that, should our little bundle of joy be a boy,  they have traditionally dressed in rather delicate clothes as newborns.  This is just too lovely to pass on. Oui?

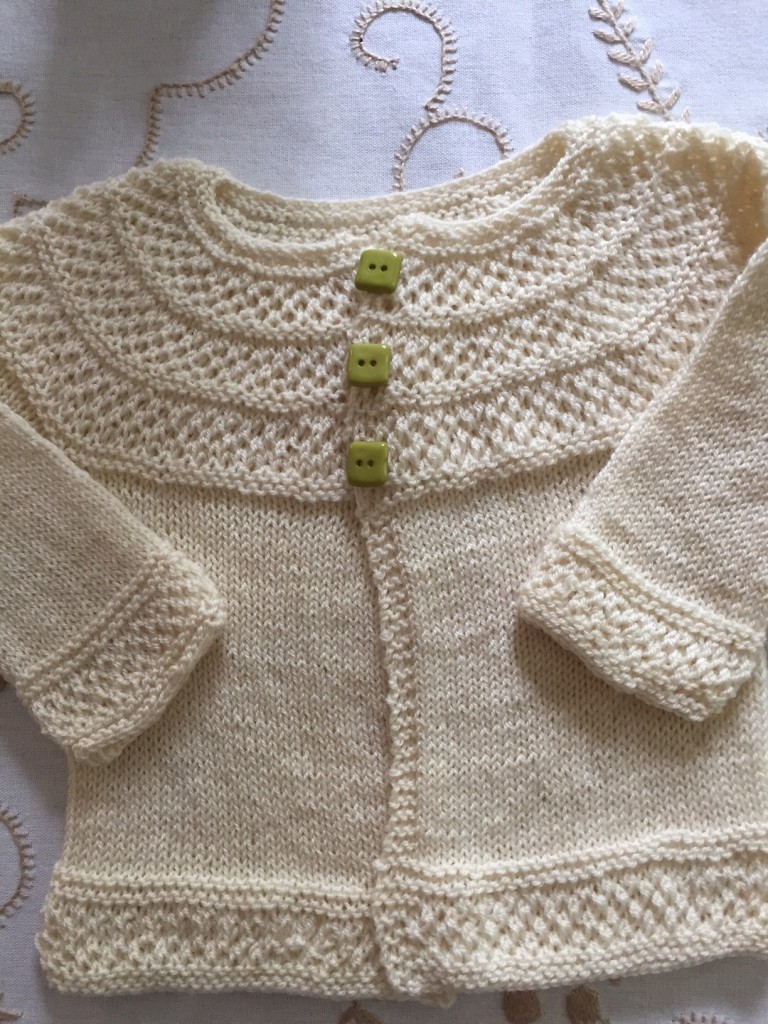
I have not yet shown a photo of the first sweater I made for our future little one.  The pattern is a design by Sephanie Pearl McPhee called Nouveau-ne.  It is delicate and fun to knit without being overly feminine.  I used Plymouth Yarns “Perlina” which is 100% merino which I bought at my LYS, Saybrook Yarns. The pattern has a matching bonnet style hat that I have finished but did not photograph yet.  There are also booties which I have not yet started.

IMG_2352

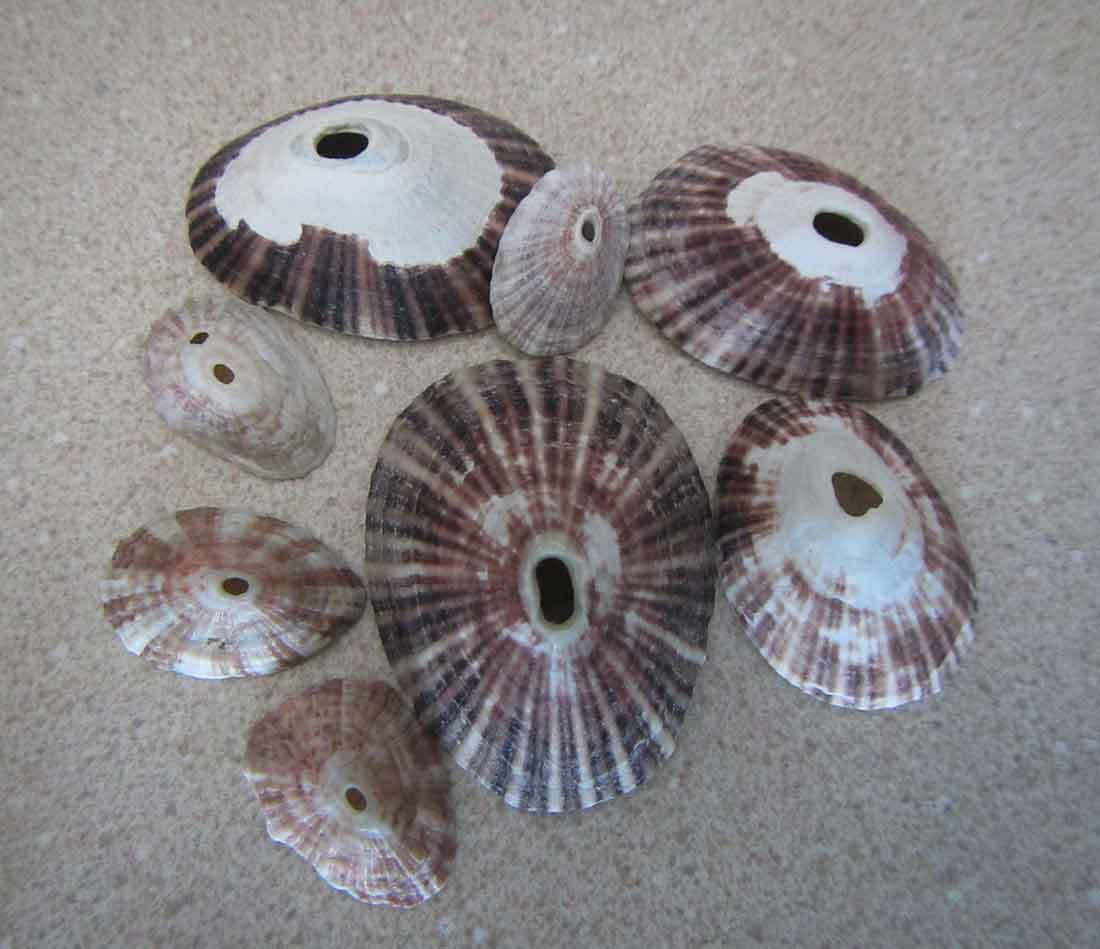
I have little limpet shells from the Bahamas that I will use as buttons instead of what I’ve shown here.  I lent my stash of limpets to a friend, and as soon as I get them back I’ll pick out the tiniest ones for buttons on this sweater.  I think it will be wonderful to have a little embellishment from our travels on our grandchild’s first sweater.  Aren’t I clever??

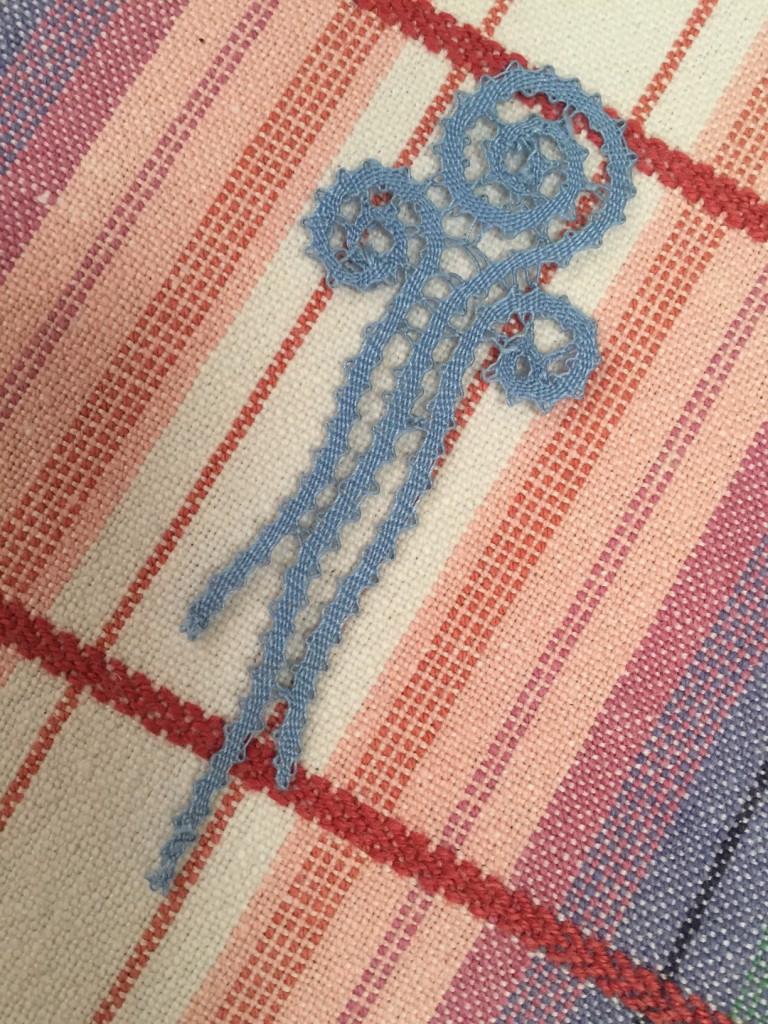
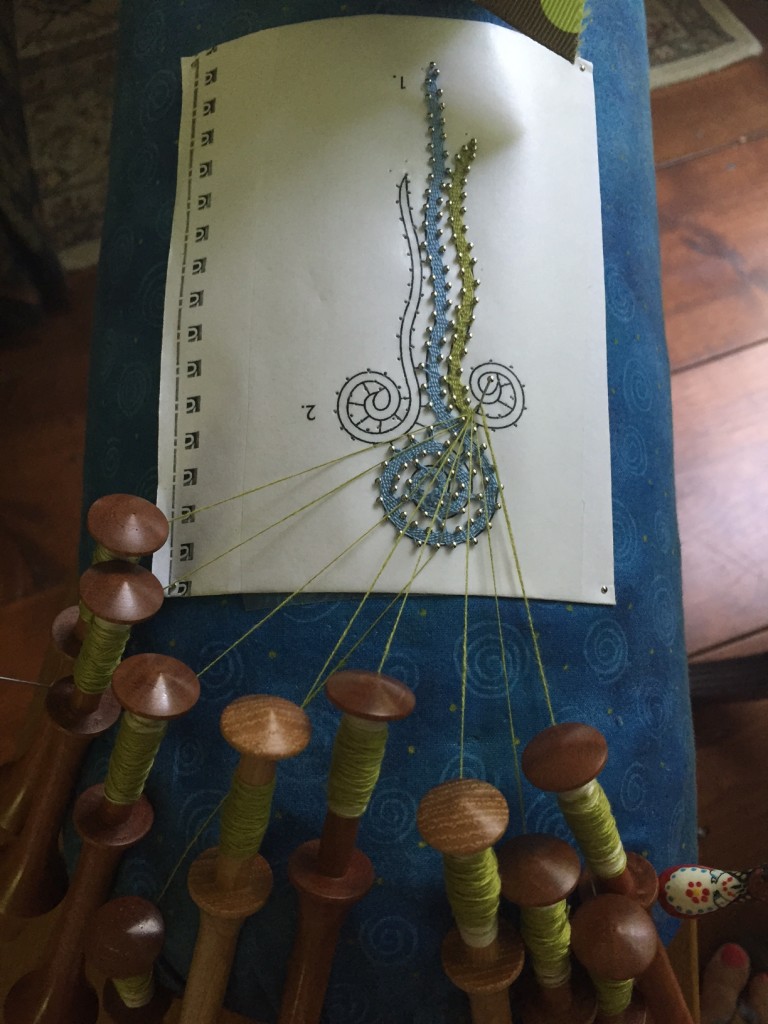
And I turned my attention back to the little Idrija lace ‘doodah’ that I started at the lace retreat back in May.  This little organic shape reminds me of a fiddle head fern or some kind of sea creature.  I’ve decided to make this two more times in a combination of blue and green.

IMG_2362 (1)

Second fiddlehead doodah in progress.  As you can see, the piece is woven upside down. On the next version I will make the central ‘squiggle’ in green and the side ‘squiggles’ in blue.  Then I plan to attach them to one of my summer tops.  Hopefully soon!

IMG_2365

So the past month has been taken up with the excitement of a first grandchild and the fears of having cancer–cancer that managed to progress past stage 1 before I got diagnosed.  It’s been an emotional roller coaster, and as usual, handwork– mostly knitting– has saved the day.  It took a full month to get diagnosed, have an initial consult with a surgeon, have the surgery, and get the pathology reports.  Waiting may not be the hardest part of being sick, but it’s certainly not easy.  Making these little projects and dreaming about future projects is what kept me sane during those long weeks.

Today I stumbled on this book of animal themed pom-poms made by a Japanese woman. She has captured the essence of each animal. After making each pom-pom with a mix of colors to imitate the animal’s fur, she adds details with needle felting.  I looked for the book online, hoping to order it, but so far I only found it on Japanese Amazon with no ability to order from the US.  I shall try harder.

And here’s a video of the author making a bear and teaching others the technique.

Just another little idea for Baby Ozzie to tuck away.  I hope I can find the book!

Adriana, Nancy, Dazmira, Hidalgo!

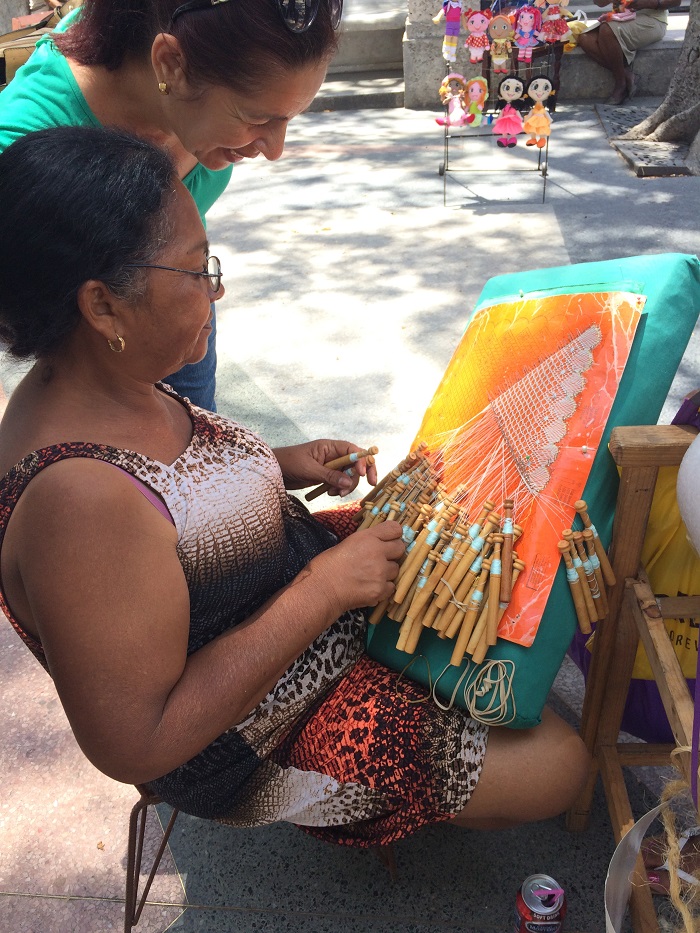
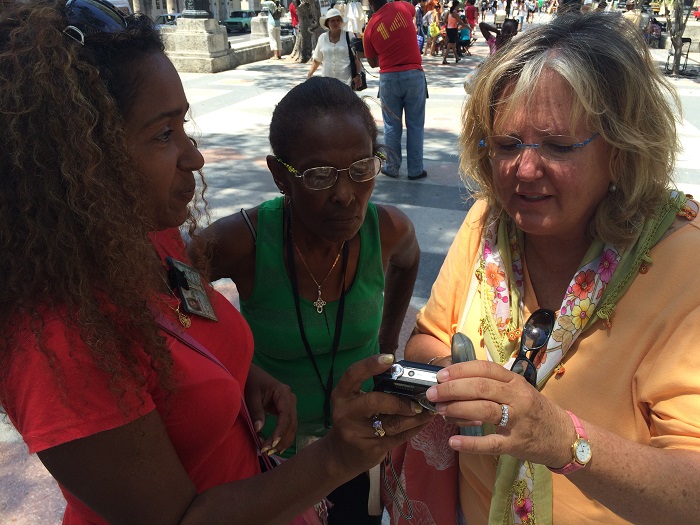
Everyone turns out on Sundays in Havana. The weather is always fine, so why not? I found more women crowded around Adriana late Sunday morning., and we had another session of exciting talk about handwork.

Since Adriana’s table was not covered in other people’s work in need of her advice, she showed us the progress she has made on her lace blouse. She is more than half finished. Very soon I became too involved in conversations to take any photos, so I’m glad Bob took a lot!

4-25-16a 003

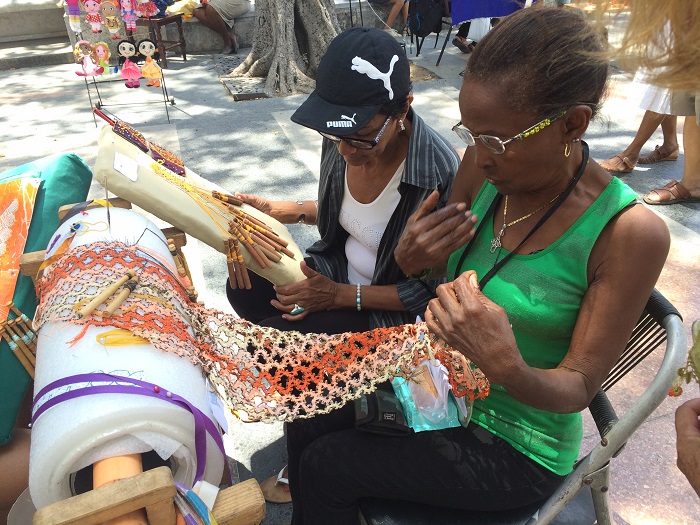
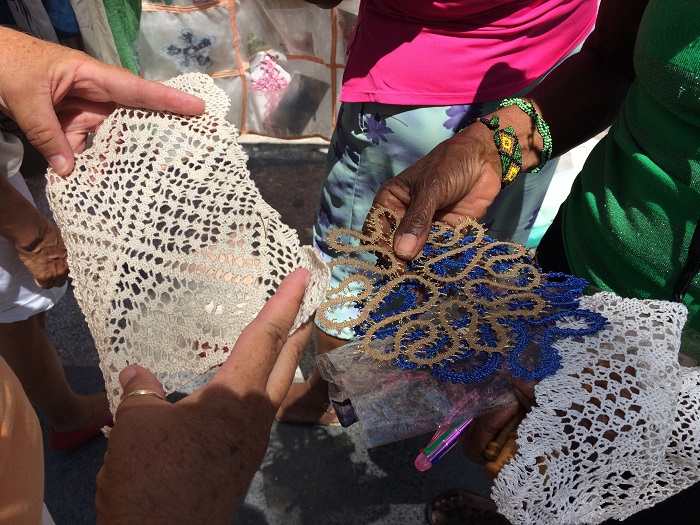
Look at the wonderful work these women are doing. A beautiful bobbin lace (bolillo) piece.

4-25-16a 005

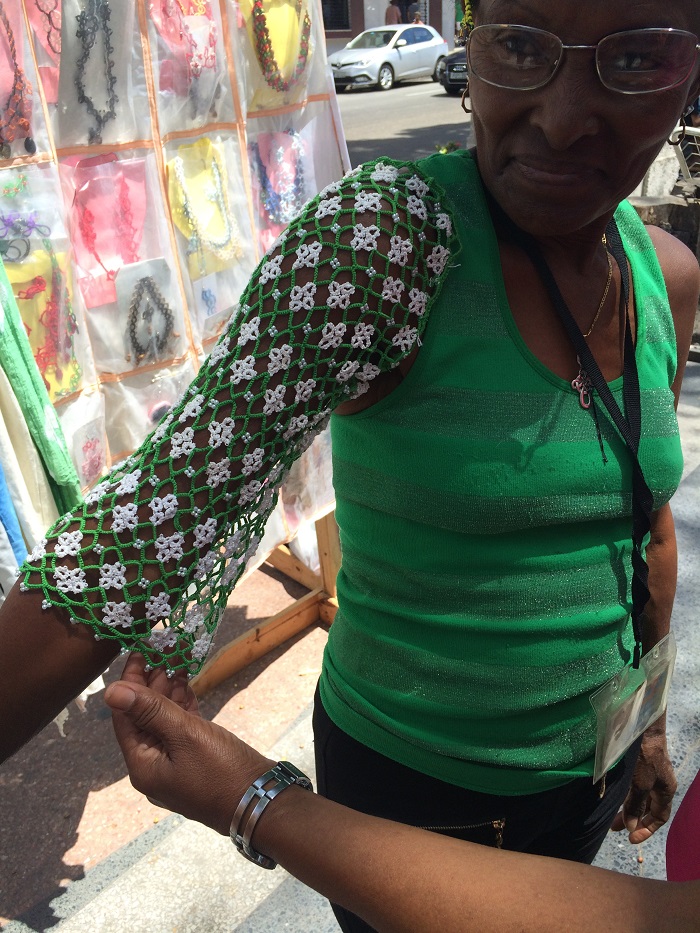
Tatted sleeves, anyone? I would never have thought of it! This is tatting with pearl beads, and is a stunning piece. In black and white it would make the most elegant eveningwear, attached to a silk tunic. The tatting was perfectly done. Doesn’t it look fabulous on Adriana? She did not make it, but since she was wearing the perfect green tank top she had to model it!

4-25-16a 026

I happened to wear one of my Turkish scarves, which all the women loved. They asked to take photographs of it because they want to try their hands at crocheting this type of edging with fun, dangly flowers. I bet they’ll have it figured out in no time!

4-25-16a 008

Dazmira has her own booth nearby Adriana, where she displays her crocheted blouses, little girls’ dresses, handbags and hats. She buys large containers of the pull-tabs from beer bottles for $1 CUC (about $1.15 US) with which she embellishes many of her handbags and hats. She also crochets with plastic shopping bags and old video tapes. You can find her on Facebook as Dazmira.  I’ll post a link when I get home.

As is typical in Cuba, you cannot give a gift without getting something in return, though this has taken almost two months for me to realize. I think this is what caused some awkwardness when I gave away some spools of tatting thread to the teacher at the Women’s Federation in Santiago. Here, though, it was wonderful to see Adriana’s face light up with the spools of lace thread I brought for her. She showed me a baby’s outfit she made with this type of fine cotton. She took the pattern for a handkerchief edging (perfect square opening in the center for the neckline) and adapted it to make the bodice of a little boy’s one-piece suit. I got weak in the knees when I saw the lace bodice on this outfit, but I could not bring myself to buy it. I don’t have any grandchildren yet, and I don’t want to jinx it!

Instead I bought two beautiful pieces of tape lace and a small Torchon centerpiece.

4-25-16a 031

Adriana gave me a pair of tatted earrings done in navy and pale blue with fire polished crystals! I treasure them!

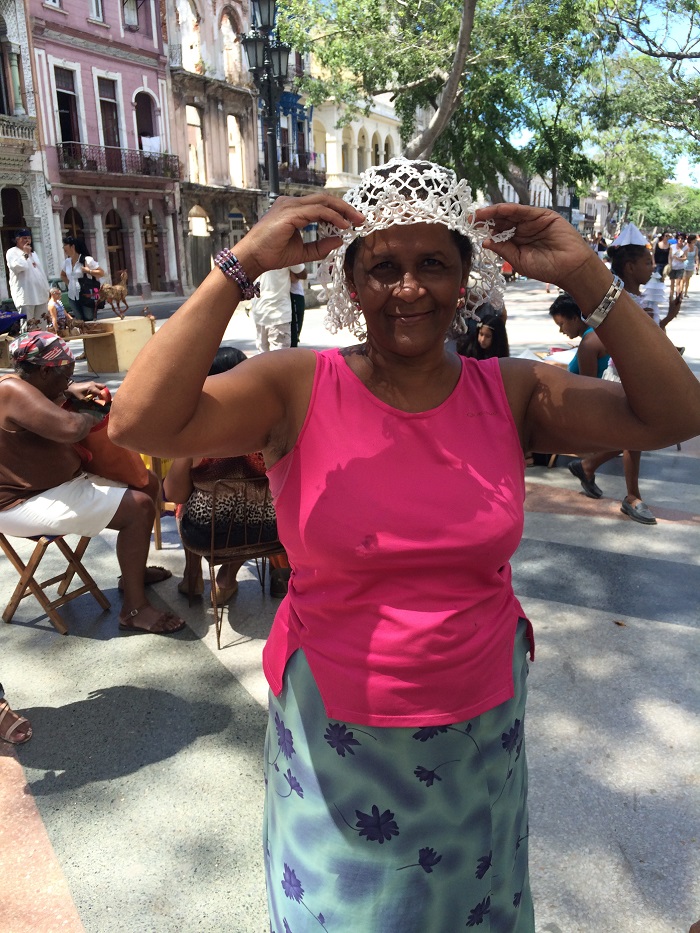
I don’t remember this woman’s name, but she turns out a lot of elaborate tatted projects. She made the interesting green and white beaded sleeves, and here she is modeling (against her will) a lacy tatted hat that has not been starched yet. It will be such a frivolous and fun accessory when it’s finished.

4-25-16a 037

The materials available in Cuba dictate the projects these women make. Most of the cotton threads are thicker than we are familiar with for doing tatting or bobbin lace. If I’d known so many of these women tat, I would have brought much more of that. Ah, well.   The tatting projects and bobbin lace projects are done with cotton that is considerably thicker than what we use in the US. Some of it looks like cotton floss, but even thicker—almost like a 12 strand floss. I can see it is NOT easy to work with in tatting because it splits so easily. Still, these women manage very well.

Adriana believes that they can now receive mail from the US. Boy, I hope so. I will send them more fine threads to work with. They oohed and ahhed over the threads I brought with me, and of course you can fit a lot of thread in a small package. The problem will be with mail service between the US and Cuba, and hopefully Adriana is right that things have already changed.

Internet in Cuba is challenging since it is rationed, so although there is plenty of information online these women cannot access it.   I bet it will be at least a month before I settle back into taking internet access for granted when I get home. It’s been highly frustrating here!

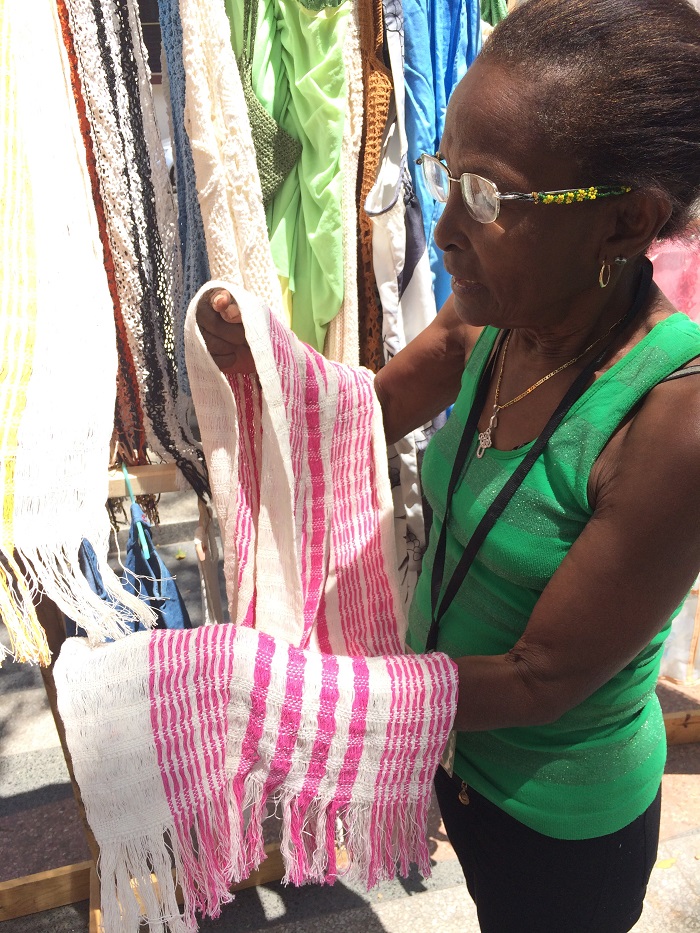
There were two handwoven scarves on Adriana’s display. When I questioned her about them she told me they had been woven by a man. I made all kinds of motions to describe a rigid heddle loom, and she was nodding her head through my whole pantomime, so I think that’s what was used to weave these scarves.

4-25-16a 023

Adriana is very interested in having instructions to make a simple floor loom, so I will be on the lookout for that when I get back home. I have not found any handweaving in Cuba, and she confirmed that herself. She did not know the word for handwoven in Spanish, nor the word for ‘loom.’ She was calling it the ‘machina por maya,’ the machine for fabric, until I wrote down the word ‘loom’ for her in her notebook.

Hidalgo joined us again, and Adriana teased him that he already knows so much about handwork he should start crocheting himself! And that’s when I learned that he paints, and sculpts and does woodworking in his free time. The people who have booths on the Paseo del Prada are very interesting, and I know I would enjoy getting to know them better! I hope we can stay connected through email…we have all exchanged email addresses.

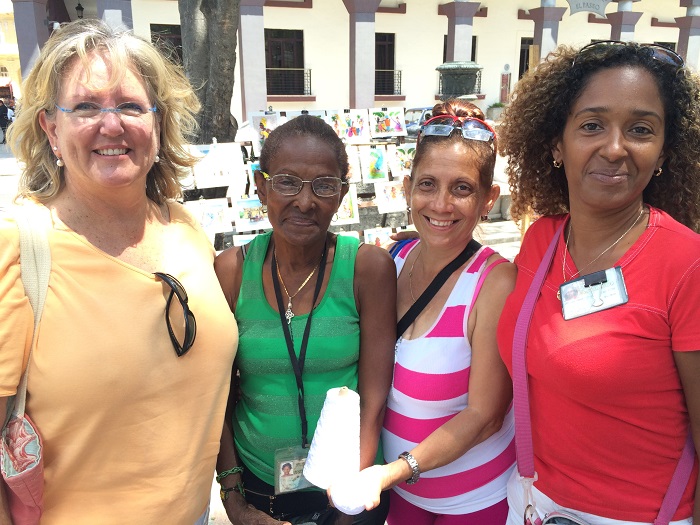
In the end we discussed the value of handwork. When I said that not many women do handwork in the US, and that when they see it for sale many women are shocked at the price we ask for handwovens, lace, knitting…etc. These Cuban women agreed. They said young women in Cuba want inexpensive, manufactured garments. We agreed that in both the US and in Cuba women who do handwork are the biggest supporters of textile handwork! We buy from each other! In the photo below, from left to right: me, Adriana, Nancy, and Dazmira.

4-25-16a 020

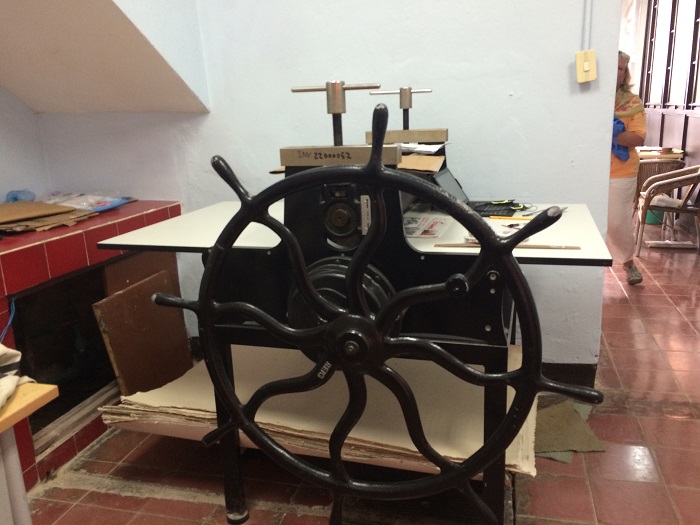
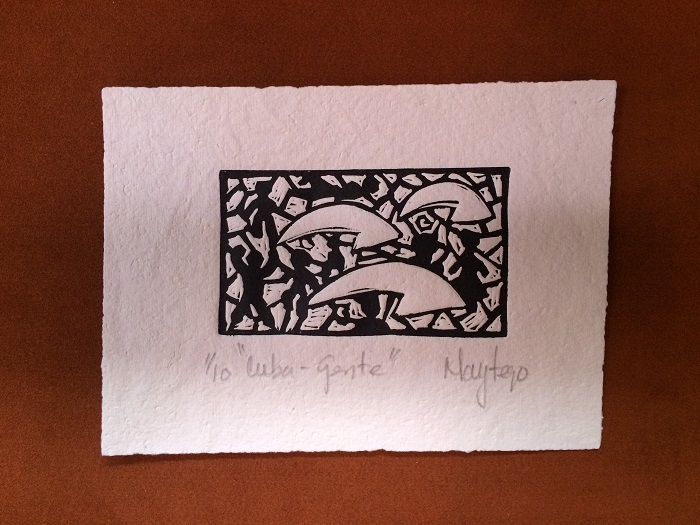
Later in the day, near the restaurant we enjoyed on Mercederes we found a small gallery of woodcut prints. A group of artists were working together, sharing a printing press that had been donated by Unicef.   The gallery itself was part of a beautiful historic building.

4-25-16a 039

4-25-16c 002We ended the day with an early dinner at an outside café called Dominica, where the music was more intoxicating than the mojitos! First a band of men playing xylophone, bongos, guitar, saxophone and string bass, followed by a ‘girl band’ playing keyboard, saxophone, bongos and string bass, with a wonderful female lead singer. Beyond mariachis there are some other interesting percussive instruments, including a hollowed out gourd that has grooves incised along one side. You play it by rubbing a stick across the grooves, and it adds a wonderful rhythmic nuance to bongos and mariachis. I don’t know what it’s called—maybe it’s just called what it is!—a gourd. I love the rhythms of Cuban music— samba and bossa nova. Fantastic! You cannot sit still to this music, which must by why Cubans, and many tourists, are always dancing!


Exciting Stuff

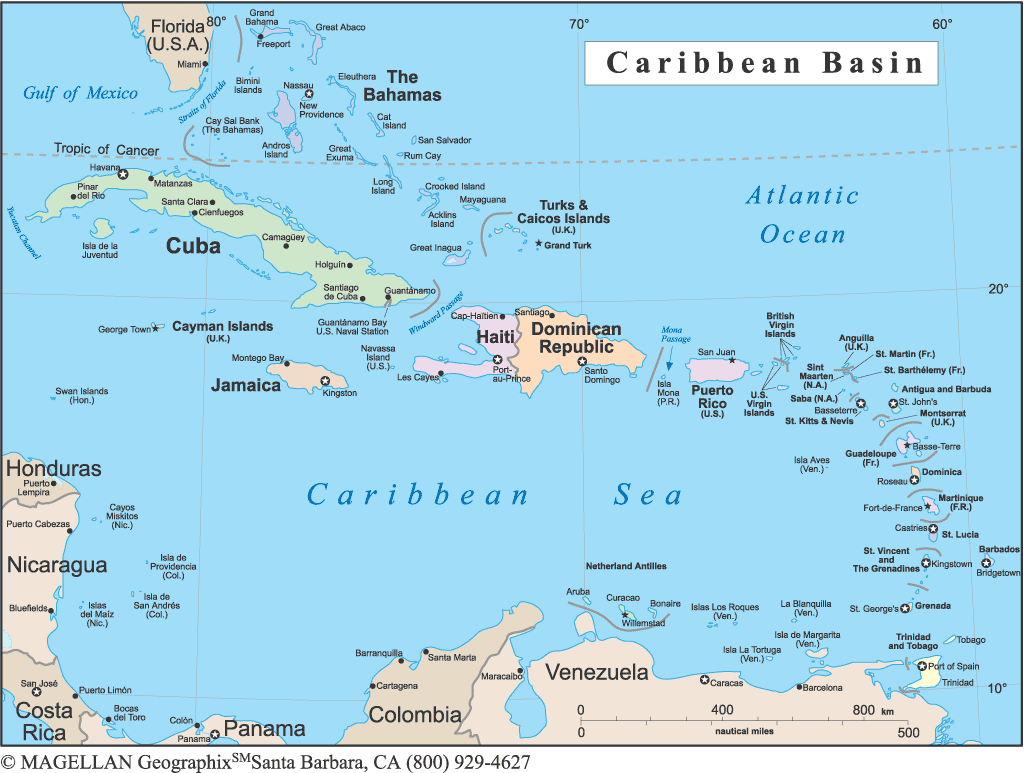
We are leaving the safe confines of Over Yonder Cay later this morning.  I’m excited and more than a little nervous about what lies ahead.  The winds are still challenging, so for some of this week we will be looking for another good hiding place to stay safe.  Rather soon we will be headed out in the Atlantic to Great Exuma — specifically to a large settlement called Georgetown where we can get good provisions for our last 6 – 8 weeks of sailing.  From Georgetown we will either leave for Cuba or we’ll sail east to Long Island and leave from there.

This map shows a bit more than you need to know.  Can you find the tiny Great Exuma and Long Island in the Bahamas chain? You can click on the map to ‘bigify.’  We’ll sail down past Crooked Island and Mayaguana and Grand Inagua without stopping, and then go through the Windward Passage between the eastern tip of Cuba and the western tip of Haiti.

We’ll sail past Guantanamo on the eastern most tip of the southern coast of Cuba–well offshore as the Coast Guard requires.  Then we’ll make landfall at Santiago de Cuba.  The trip from Long Island will be around 350 miles and will take us about 3 days.  It’s important that we arrive at Santiago de Cuba in daylight, and I hope that we can also go through the Windward Passage during daylight.  That is one of the busiest shipping lanes in the world.  So, yes, I am very worried about that! Am I scared?  Like you cannot believe!  I’ve been repressing this part of our trip for months now, and now I must face the fact that it’s almost time to do it.

So, farewell to lovely Over Yonder. Here’s Bob standing on one of the greens overlooking the Atlantic. We’re not golfers, but all the greens were wonderful to visit, just for the views!

1-IMG_2077

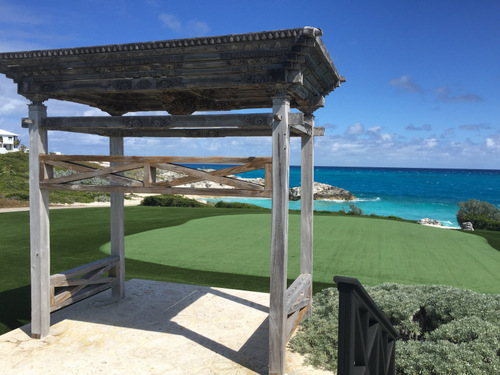
And here’s the pavilion at the ocean side beach we visited a couple of times. Can you tell how windy it is?  A couple of times we brought our books to read, but the view is just so arresting it was hard to read.  And with the wind howling it was hard to read through watery eyes!

4-IMG_2080

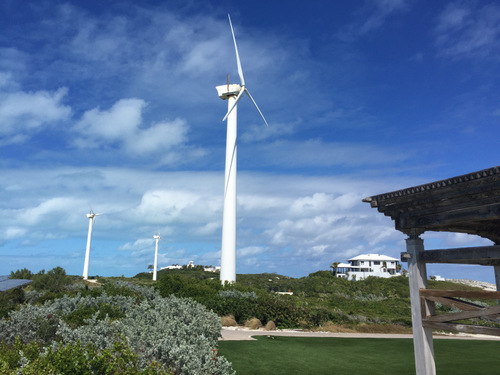
And here are the wind generators–the sight that makes Over Yonder Cay so easily recognizable, with the main house in the background.

3-IMG_2079

These pavilions built for meditation and yoga practice are new since we last visited here.  There are several of them, all from India–just another wonderful part of the Over Yonder setting that makes it so hard to leave.

2-IMG_2078

It will be sobering to return to the real life of sailing and looking for shelter!

I thought this would also be farewell to easy internet and cell coverage.  I’ve spoken to both kids now– to our older son who is in Amsterdam on business and who will spend this week in Paris and Geneva as well. And to our younger son in San Francisco.  I’ve written a lot of emails. But now Bob has pointed out to me that as long as there is a cell tower on a nearby island (and they are on almost all the islands now), we’ll be able to use the not-so-smart phone we got for the Bahamas as a hot spot.  Whew!  I’m not off the grid yet! Whew!

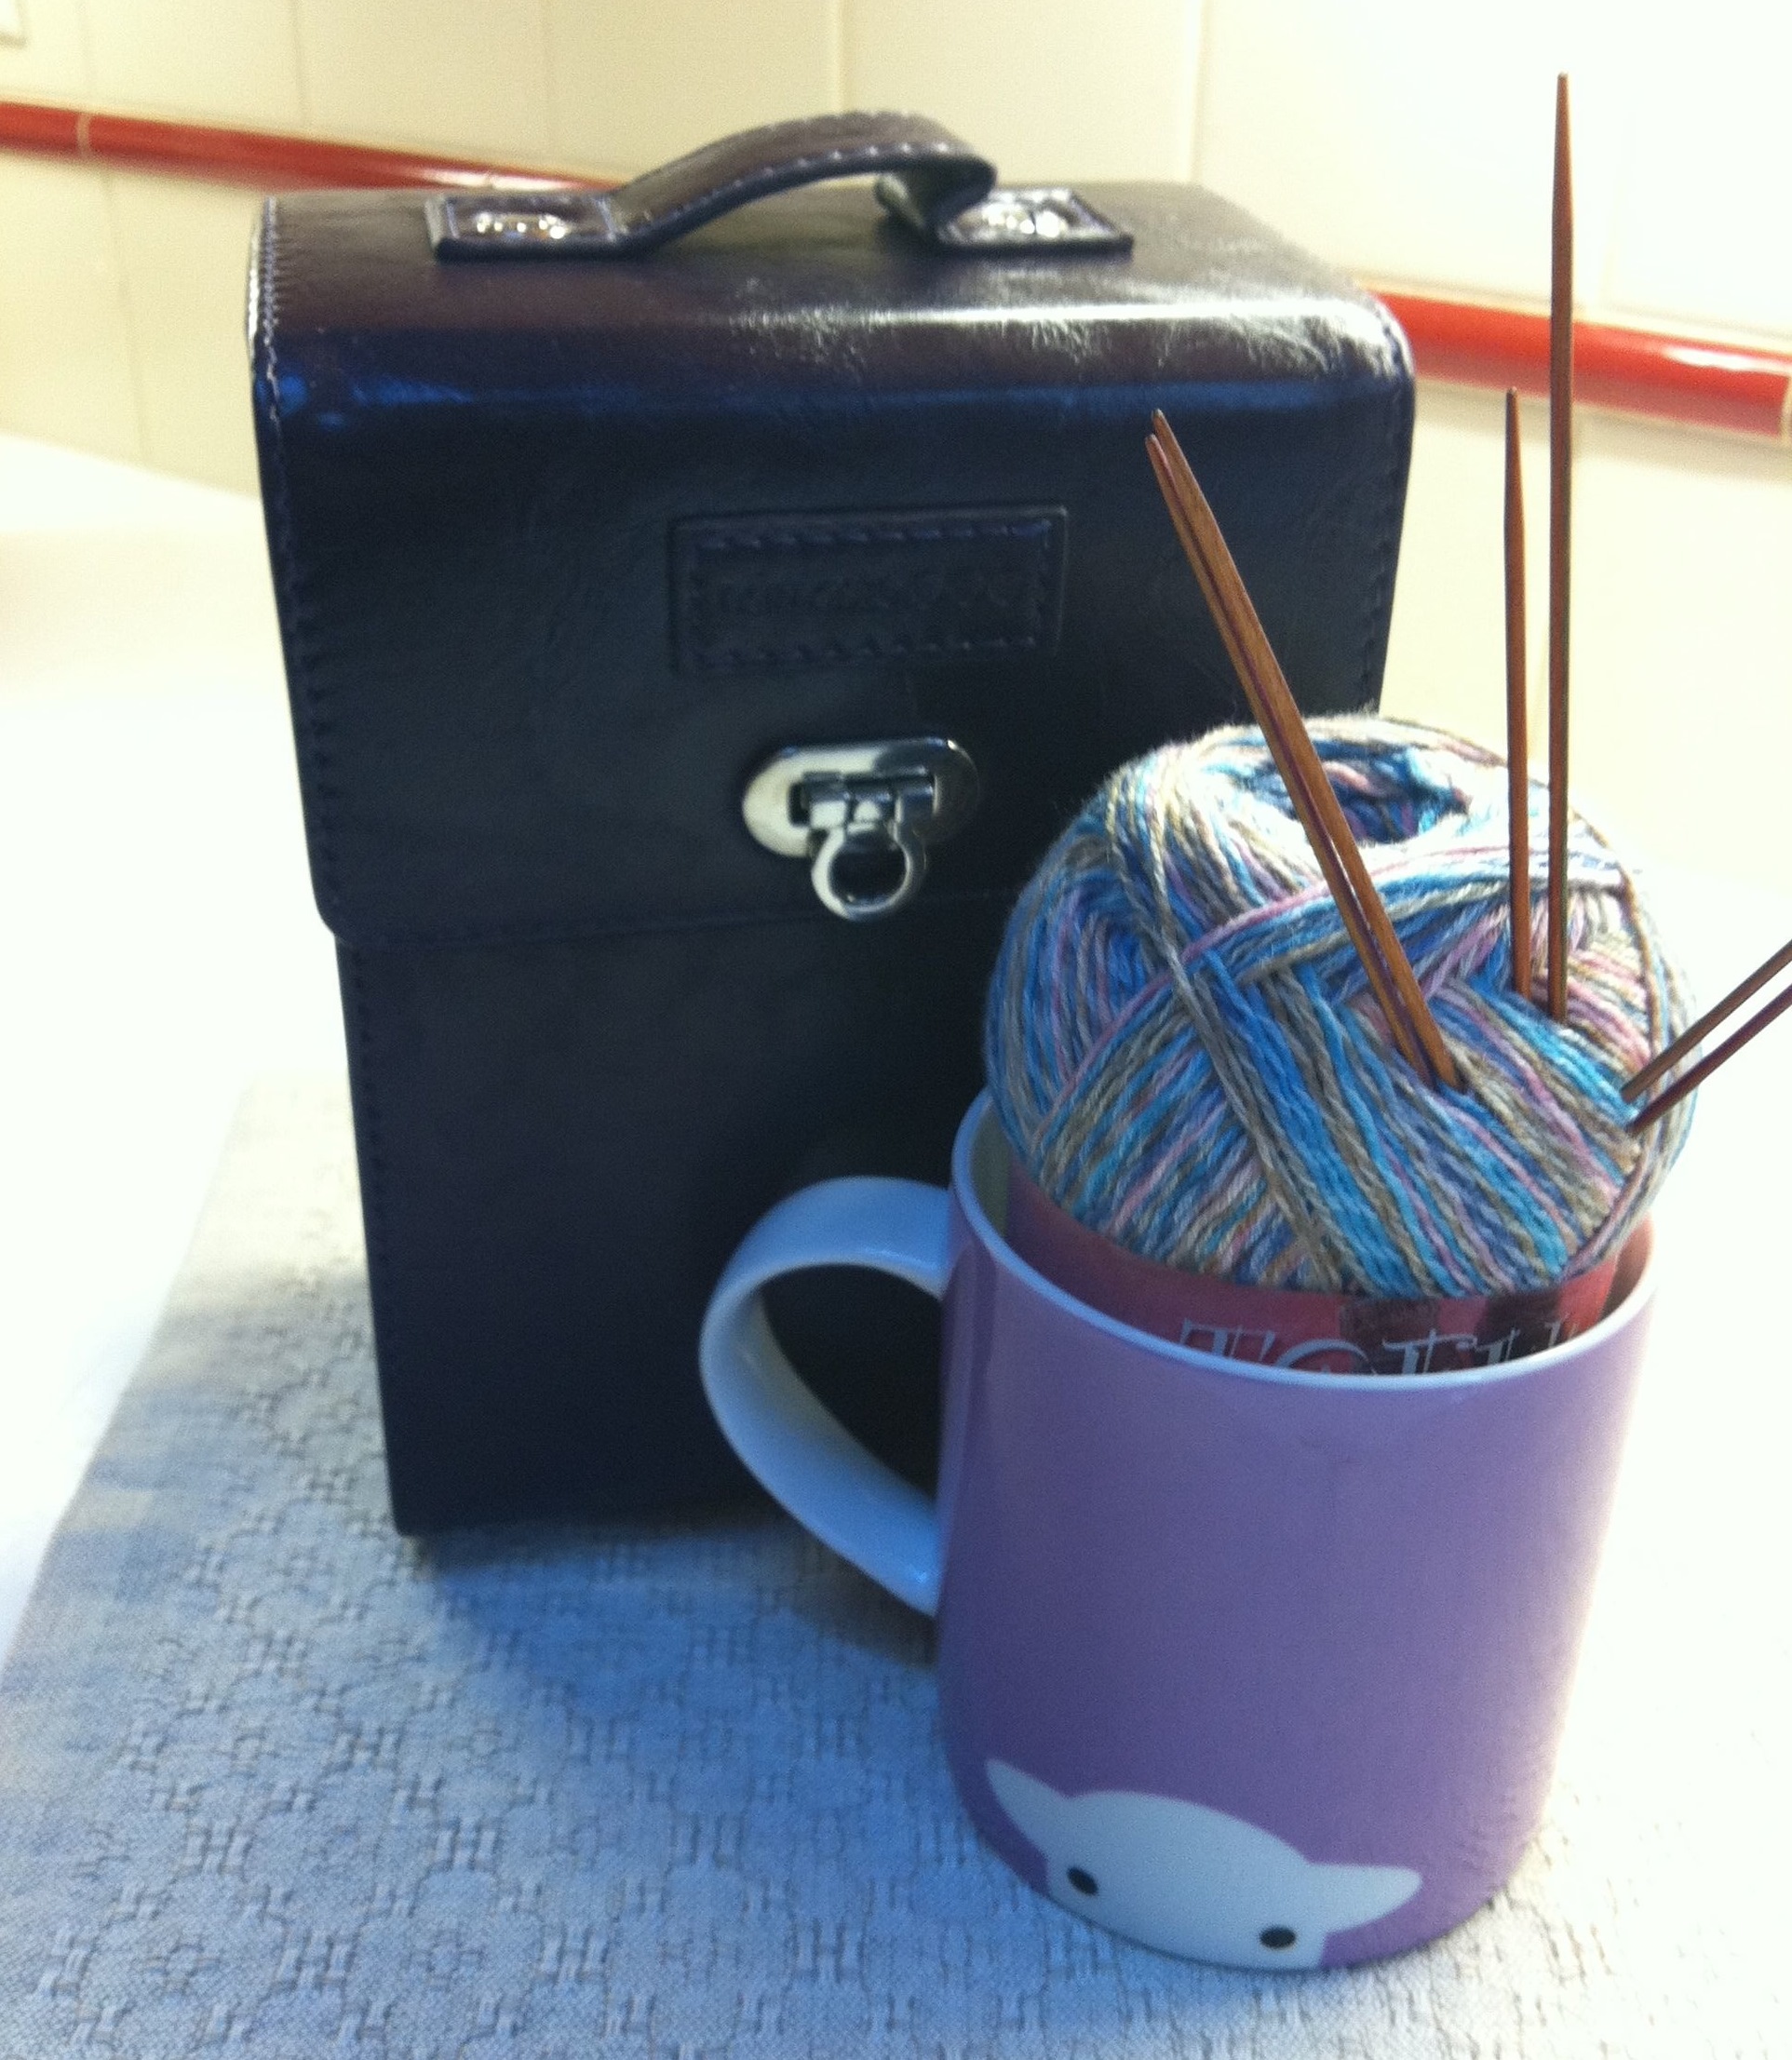
This morning I got an email from the friend who is weaving a lunch bag to coordinate with my sheep mug.  This was a guild project that started a couple of years ago.  In case you don’t remember my mug, I’ll remind you!  My younger son gave it to me a fews years ago.

And here is the warp that my friend Susan has created to go with my sheep mug!  The stripe colors she has chosen are all the colors that the mugs come in–isn’t that a great idea? It’s fabulous, and yes!!!! I’m excited!  Susan has promised to send more photos as the weaving progresses, so I’m also excited about being able to watch this fabric grow and turn into a lunch bag!

5-Lunchbag fabric Susan Morrison


Sericulture in Connecticut and a Workshop with Sarah

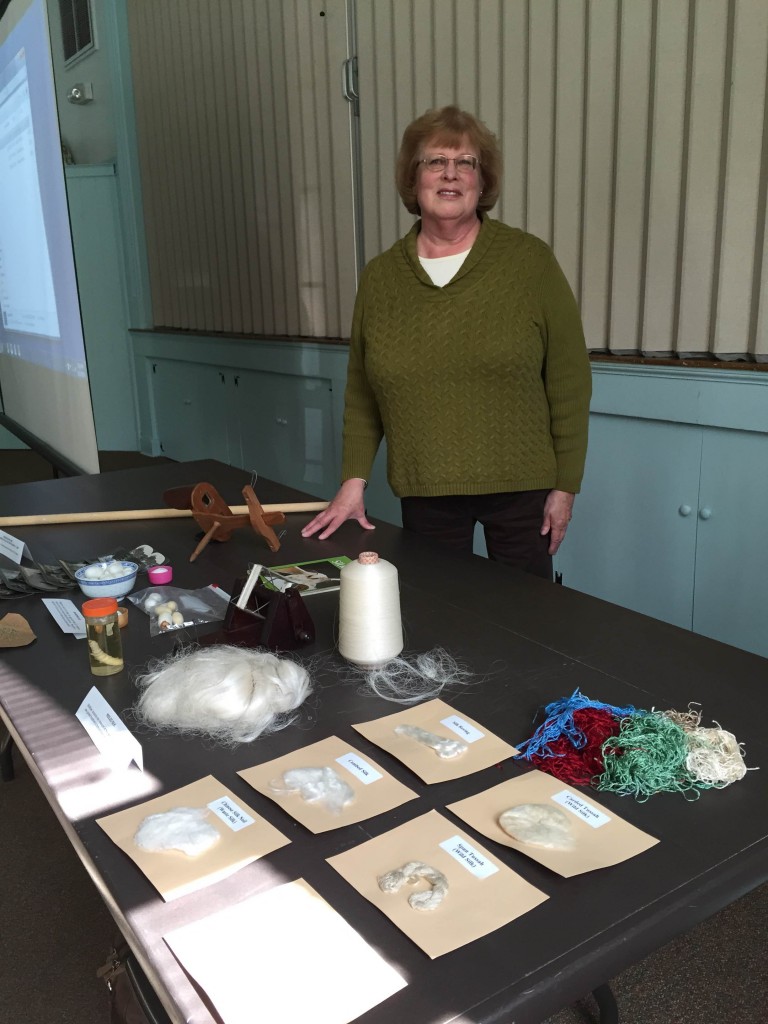
That title is a mouthful.  Initially, I just liked the sound of “Sericulture in Connecticut,”  but I could not write about that when I’d also just spent a fabulous three days sewing with Sarah Fortin!  Some week!   I guess if all weeks were as educational and productive I’d be wiped out all the time. Who knew there was a silk industry in Connecticut?  I did not.  I certainly knew that China and other Asian countries have had  silk production since the dawn of time.  And I knew that by the Renaissance, European countries wanted to grow their own silk worms so they could stop buying costly silk from China that involved the long and treacherous journey on the silk roads.  Well, it turns out that the English wanted to see if silk could be successfully cultivated in the American colonies.  The experiment started in the area from Virginia to Georgia, around 1650.  This is the same period in which the English experimented growing indigo in the southern colonies as well.  A century later the southern colonies were focused on cotton and tobacco, and an experimental silk culture had started in Mansfield,  an area east of Hartford.  This was a cottage industry in which farmers were encouraged to plant black mulberry trees in their orchards, and their wives raised the silkworms and learned to reel the silk. The program was presented by Ann Galonska from the Mansfield Historical Society.  She has been researching the silk industry in this part of Connecticut for a number of years and she also decided to try her own hand at raising silk worms.  She was able to feed the caterpillars on the leaves from the few remaining black mulberry trees in the area.

1-IMG_1551

Interestingly, Ann told us that silk worms put on 80% of weight during the last week of their caterpillar cycle.  They go through so many mulberry leaves that she has to replenish the leaves multiple times a day.

Ann brought silk cocoons, silk worm eggs, a silk worm preserved in a jar (formaldehyde?), and various samples of different silk preparations.  She showed slides of the various silk mills that cropped up in the area.  Hanks Silk Mill ws the first mill in the US, established in 1810.  As time went by more mills were established:  Chaffee Silk Mill and Mansfield Silk Company, until by 1869, there were eight mills in the area. She showed bills where farmer were paid for the silk they delivered, as well as ledgers of bartering with silk as payment for household goods.

She showed an adverstisement from 1834, urging farmers to buy mulberry trees to add to their orchards: 100 black mulberry trees for $3 – 5.  Hard to imagine, even given the cost of things back then.  By the end of that decade the same 100 trees cost $500.  And that is even harder to imagine!  Silk was a profitable industry in this area for a couple of decades, but the decline began when people started buying saplings of the white mulberry tree, which was known to be preferable to black mulberry.  Ann said these trees survived the first couple of winters in Connecticut which happened to be mild, but when a more typical New Engalnd winter ensued the white mulberries were not hardy enough to survive.  And most of the farmers had cut down their black mulberry trees in order to plant the white version.  While raising silk worms swiftly declined at this point, the mills hung on well into the 20th century using imported silk.  You can find more information, along with early  20th c. photos of some of the mills at the historical society’s website.  And there are tours of the mills at certain times of the year.  Now that would be a treat!

Much of last week I spent at a workshop with Sarah Fortin, learning to sew a garment from handwoven fabric.  This is far from my forte (ha ha!)–so far that I would say I am completely inept at making a flattering garment.  So to cut into precious handwoven fabric for a likely-to-fail attempt at making a jacket made me pretty uncertain about taking this workshop.  I brought a nice selection of commercial fabrcis to choose from:  a length of Harris Tweed, two lengths of wool melton, and a selection of other wool crepes and one chenille that I thought might work up as something interesting.   Somehow, in the tote bag of fabrics I also included a very precious length of wool fabric that Rabbit Goody wove, and that I bought from her as a remnant, about 20 years ago.  This piece of yardage was far more precious to me than any of my own handwoven fabric, and I cannot explain why I took it with me to the workshop!

Naturally, when I showed Sarah my fabric choices, I began listing all the reasons why I would not consider cutting into the Rabbit Goody fabric.  And naturally, Sarah listed all the reasons why I should.  In the long run, Sarah (with enthusiastic support from the rest of the workshoppers) won this debate.

1-Sewing with Rabbit Goody fabric

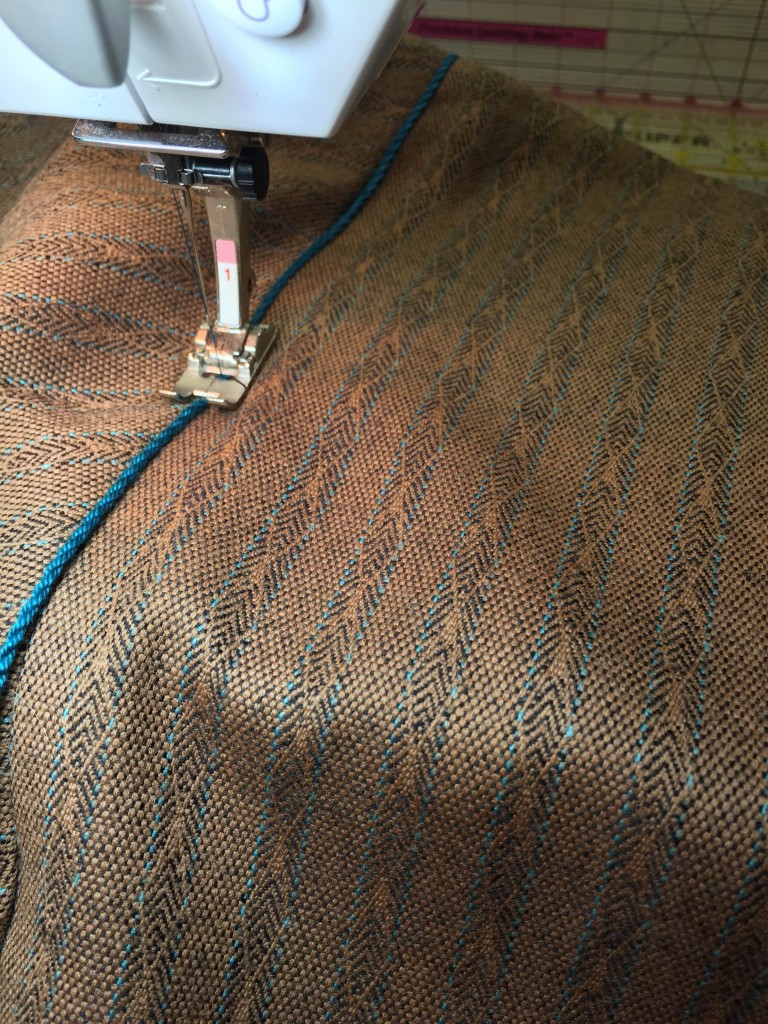
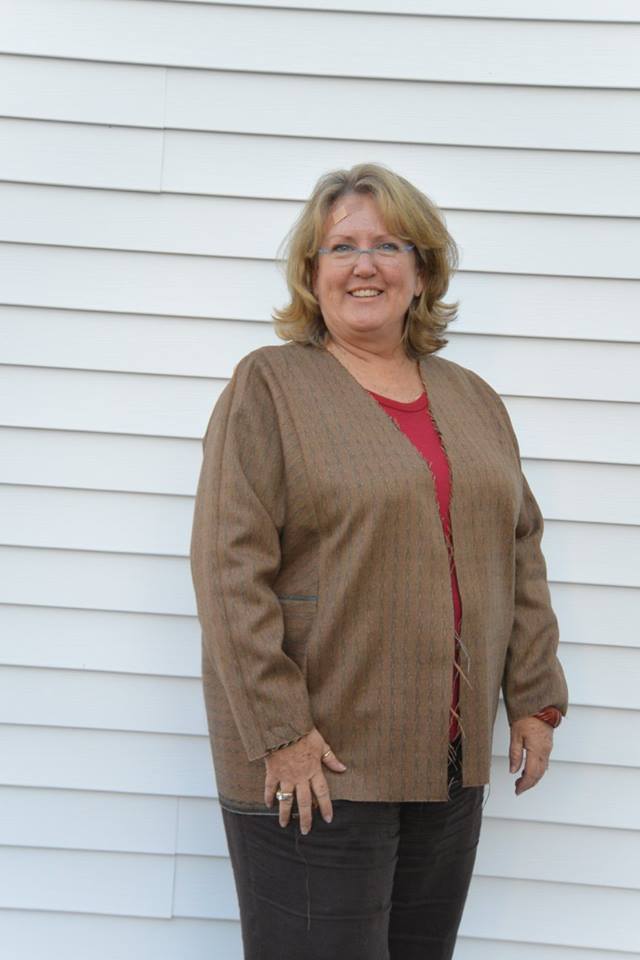
I have to say it was not easy to cut into that beautiful fabric.  The sewing was enjoyable and ate up most of the workshop time.  When I reached the last seam in assembling the jacekt I suddenly got very anxious.  I knew it would be time to try it on.  It still had a lot work to do–all the embellisments I’d planned as well as all the finishing for the sleeves and the hem and attaching a front band.  But it was at this point, when all the pattern pieces were together, that I could try on the jacket, and I did not want to do it!  Sarah came with me to a more private area where the others could not watch, and I put it on.  I was very shocked to find that I loved it!  ….and that it fit so well.  Whew!  All credit for this  goes to Sarah, of course, for helping me size the pattern before cutting it out.  And of course she was right– better to enjoy this fabric as a garment– the very reason I bought it in the first place, rather than hiding it away in my stash.

Sarah Fortin workshop me

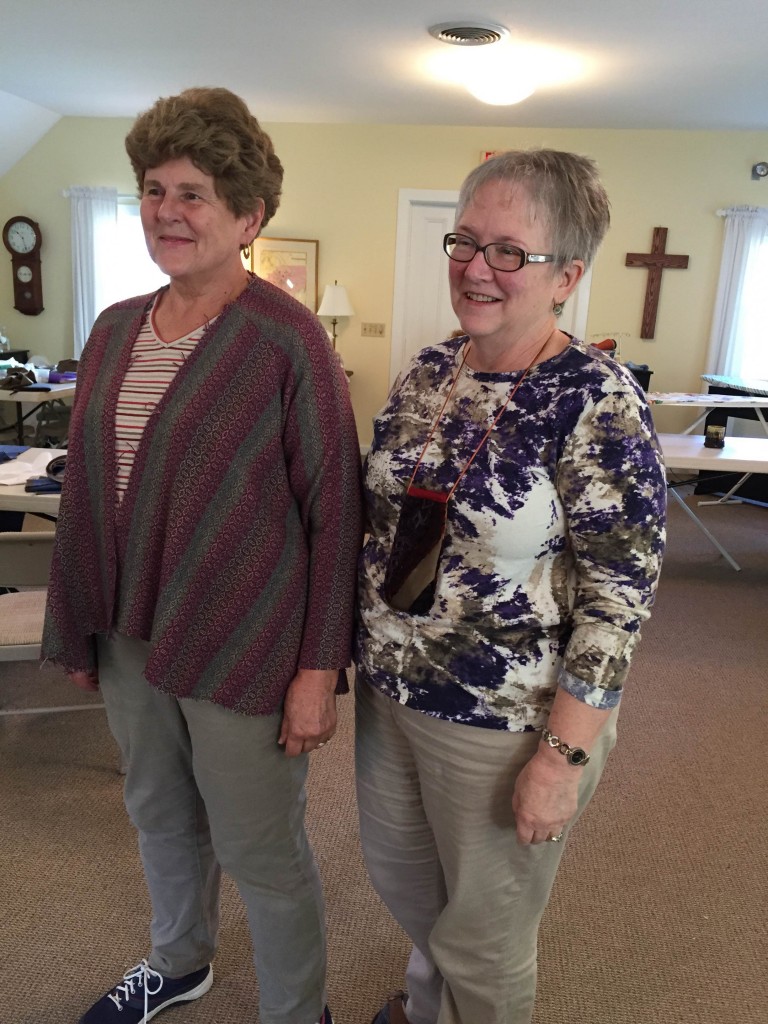
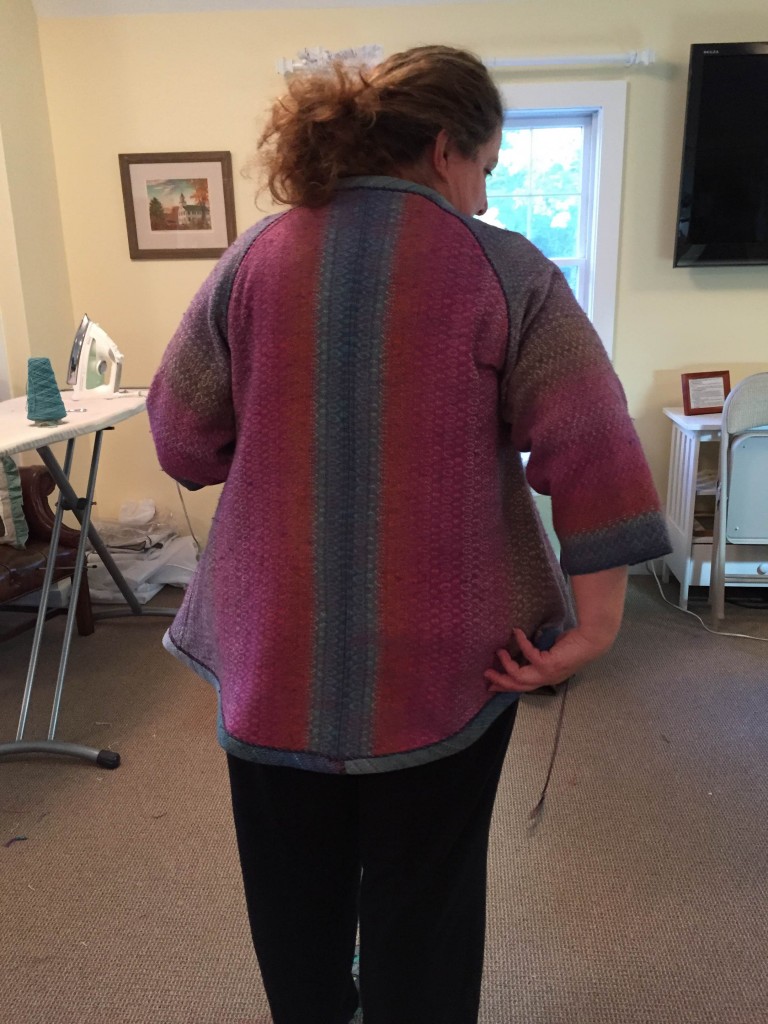
Everyone made a successful jacket during our workshop.  Marjie, who is likely our most accomplished seamstress, finished her jacket first. The pattern she used is called the ‘swing’ jacket. Look how pleased both Marjie and Sarah are with the outcome!  The rest of us are are sighing over this and hoping ours will turn out as well!

3-Sarah Fortin workshop

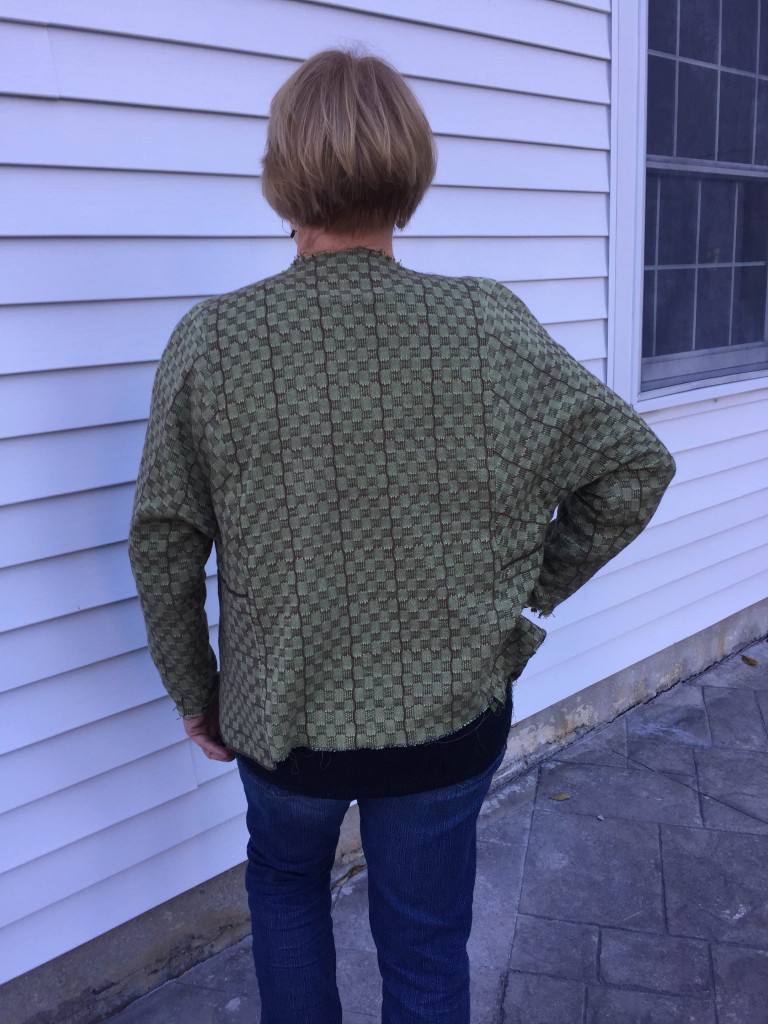
Last day of class, more people are approaching the finishing! This is Jody’s jacket, a wonderful fabric woven on a warp at Vavstuga. The coloris quite off–it’s actually a great mixture of two greens and brown.  Jody made the same pattern I did, called the “bias sleeve” jacket. I think Jody’s jacket is the most successful combination of weave structure and garment design.  It’s a beauty and it looks fabulous on her!

2-Sarah Fortin workshop Jody

One more finished swing jacket with terrific color placement!

4-Sarah Fortin workshop swing coatSome of us will be getting together again this week to continue to work on our finishing.  I’m now a bit confused about my sleeve finish and how to put on the front band.  I’m hoping some of the more experienced sewers (that would ALL of them!) can give me some pointers.  Also, Sarah has offered to answer any questions so I think I will email her.  I’d better get to it!

Past Wedding, Full Forward on Inspiration!

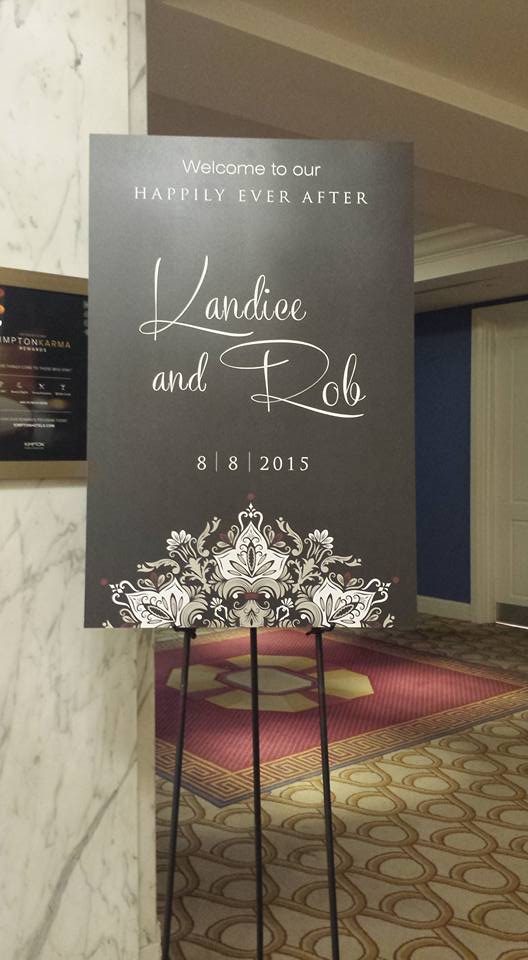
First a moment of shamless personal happiness:  our older son was married over the weekend in Baltimore.  It was a glorious event!  I enjoyed every detail of it starting with our private time with the almost newly weds when we arrived on Wednesday evening last week, right through to the after-wedding-Sunday-brunch.  It was a small wedding, but the honored guests came from as far as San Francisco and Denver and Florida, to as close as right down the street.  It was a congregation of close knit friends and relatives.  It couldn’t have been better!

rob and kandice wedding begins

 We invited our very oldest friends–two couples we’ve known since long before either Rob or Chris were born–Chris and Pat and LeaAnn and Garrett– and a dear friend, Craig, who has been more than an uncle to our boys….and my sister Sheryl and her family–Carl, Madison and Chloe.  It was perfect!

Elevator selfies are certainly the rage now!

IMG_1282 The wedding party was large for so small a wedding– 6 bride’s maids, 6 groom’s men,
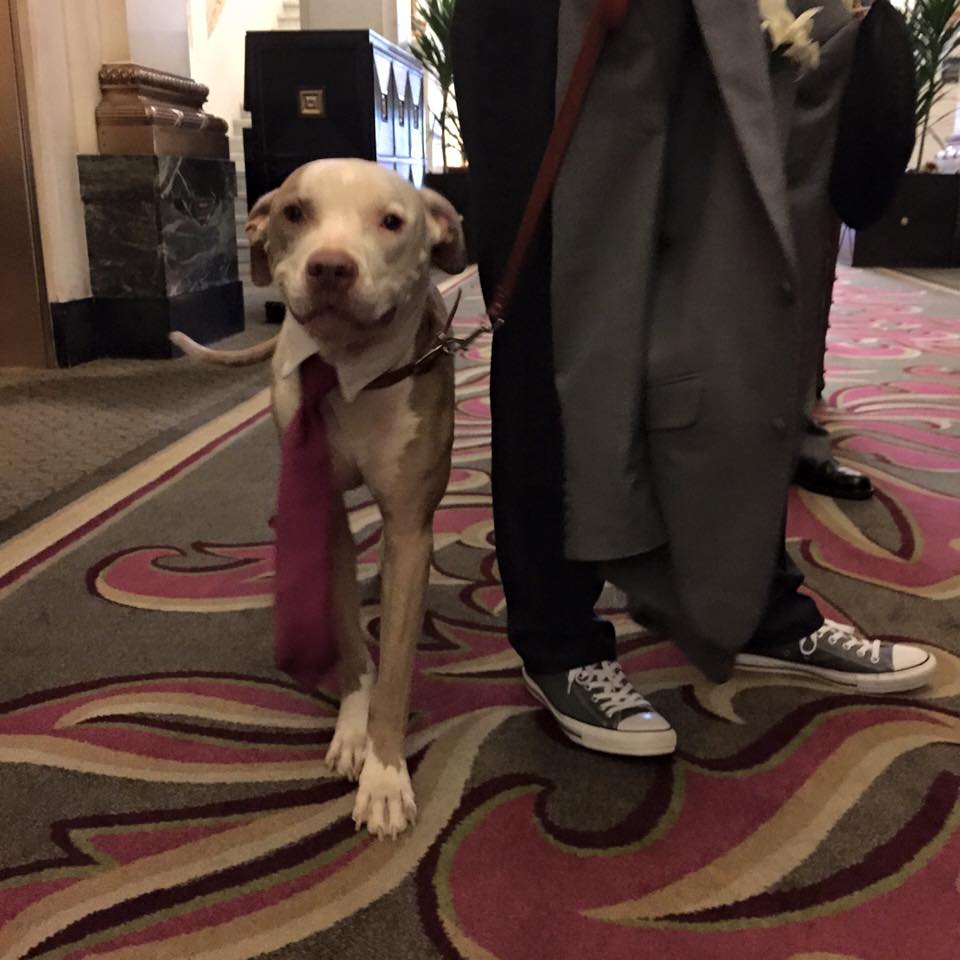
1 groom’s dog, 3 flower girls, and 2 ringbearers.  The groom’s dog may have stolen the show.  After walking down the aisle with the groom, he then gave the groom a ‘high-5’ moments before the bridesmaids entered.

rob and Kandice wedding Bosun procession

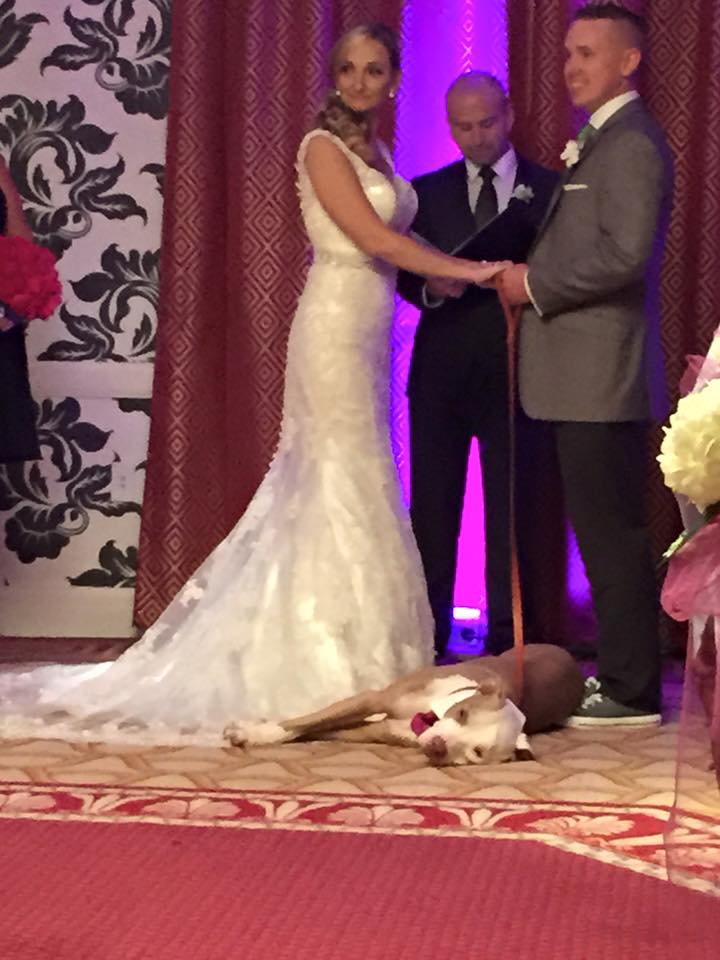
 He lay down peacefully between the bride and groom when the vows began.

Rob and Kandice wedding vows with Bosun

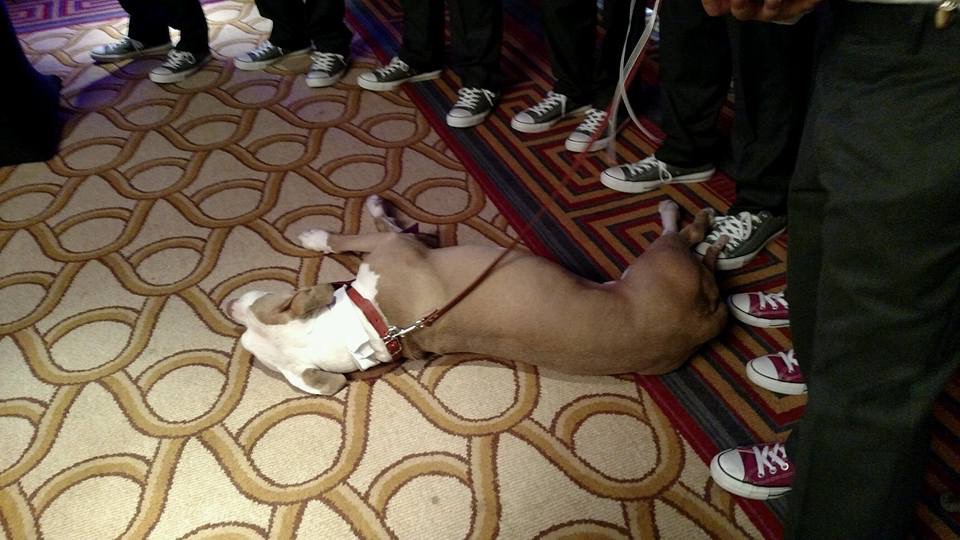
When he began to make nesting movements with the bride’s beautiful wedding dress, he made no fuss at being moved in front of the groomsmen. Just look at all those Chuck Taylors!

Bosun and groomsmen

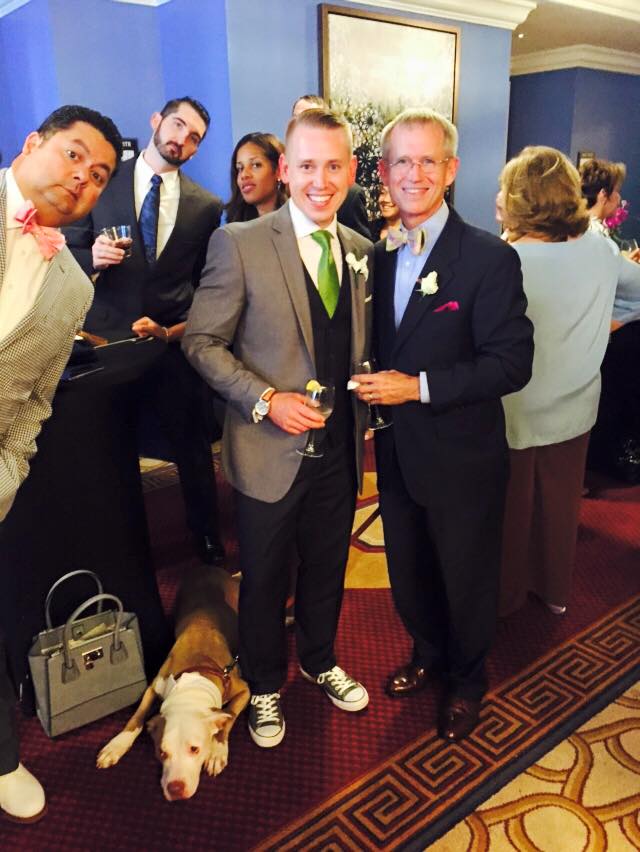
He got to spend a few moments at the reception before he was sent up to the bridal suite to to relax with a very attentive friend.

rob and kandice wedding rob and dad bosun

Here are more moments from the day… I loved every minutes of it!

IMG_1266

Photo ops in the beautiful Hotel Monaco in Baltimore.

IMG_1274

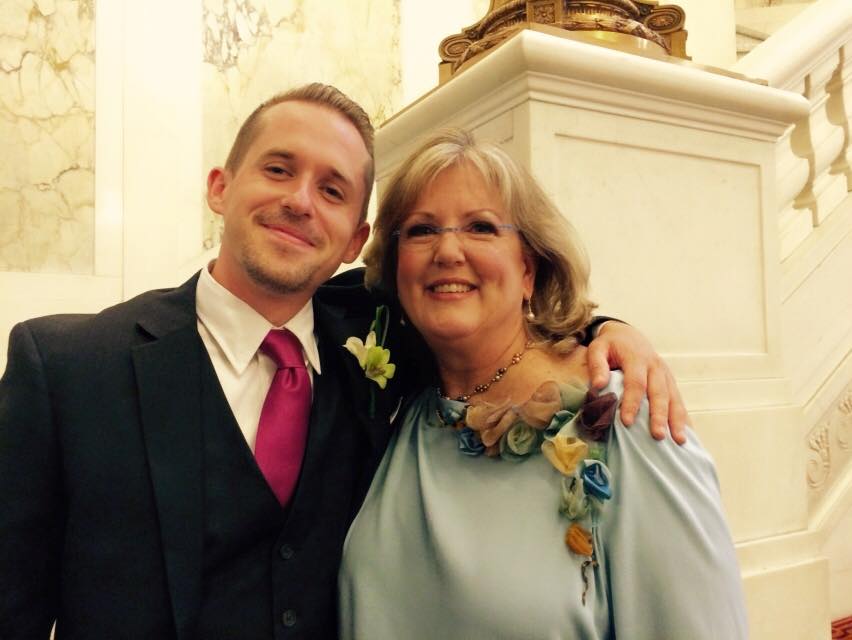
The best man and the mother of the groom–moi!

rob and kandice wedding Chris and me

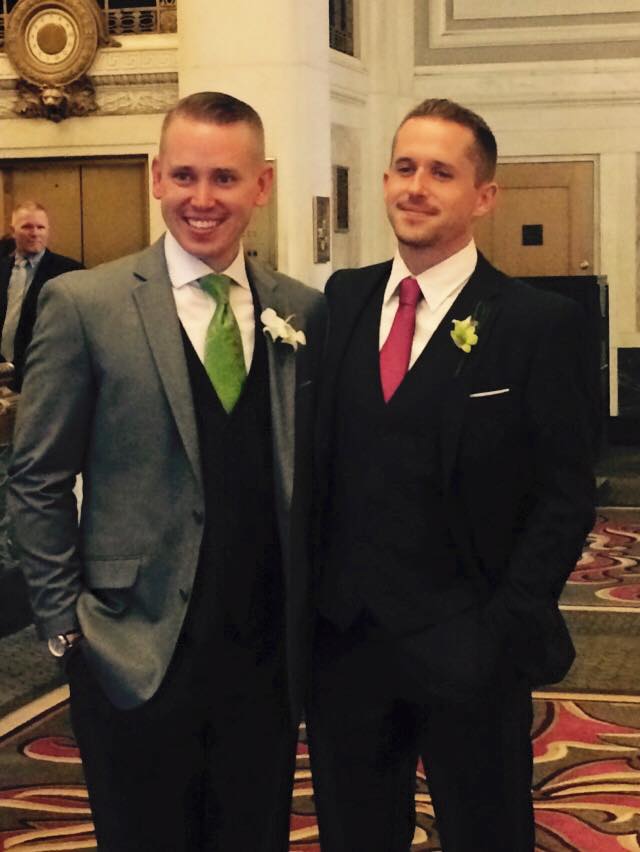
I am shamelessly proud of these two young men–the groom and his best man brother!

rob and kandice wedding rob and chris

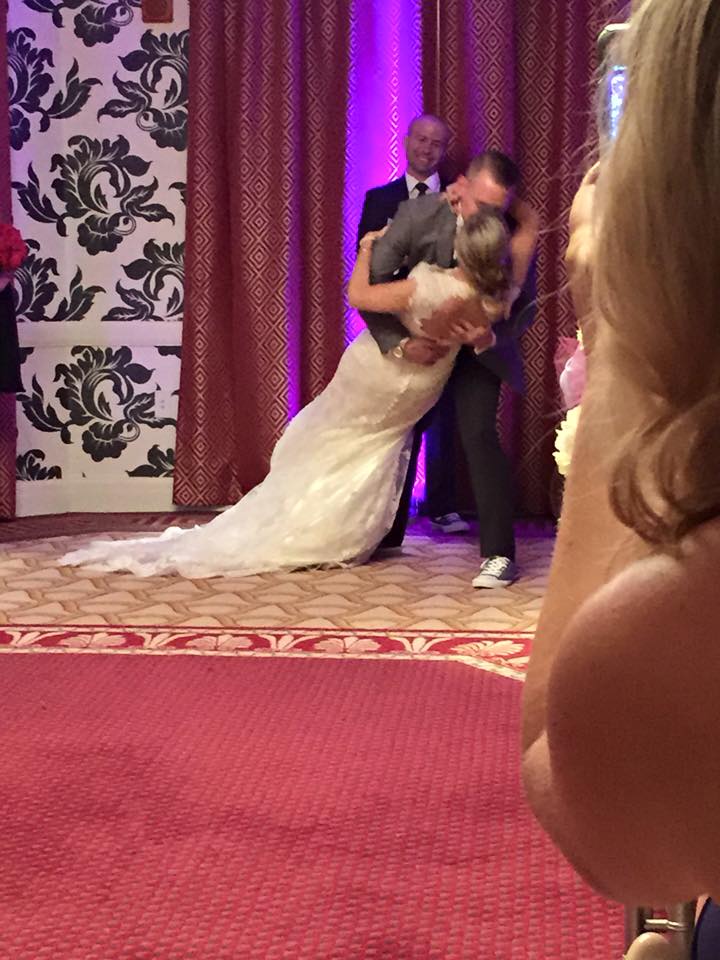
The finale of the ceremony!

Rob and Kandice wedding the kiss

That wonderful moment for any mother of the groom!

IMG_1276

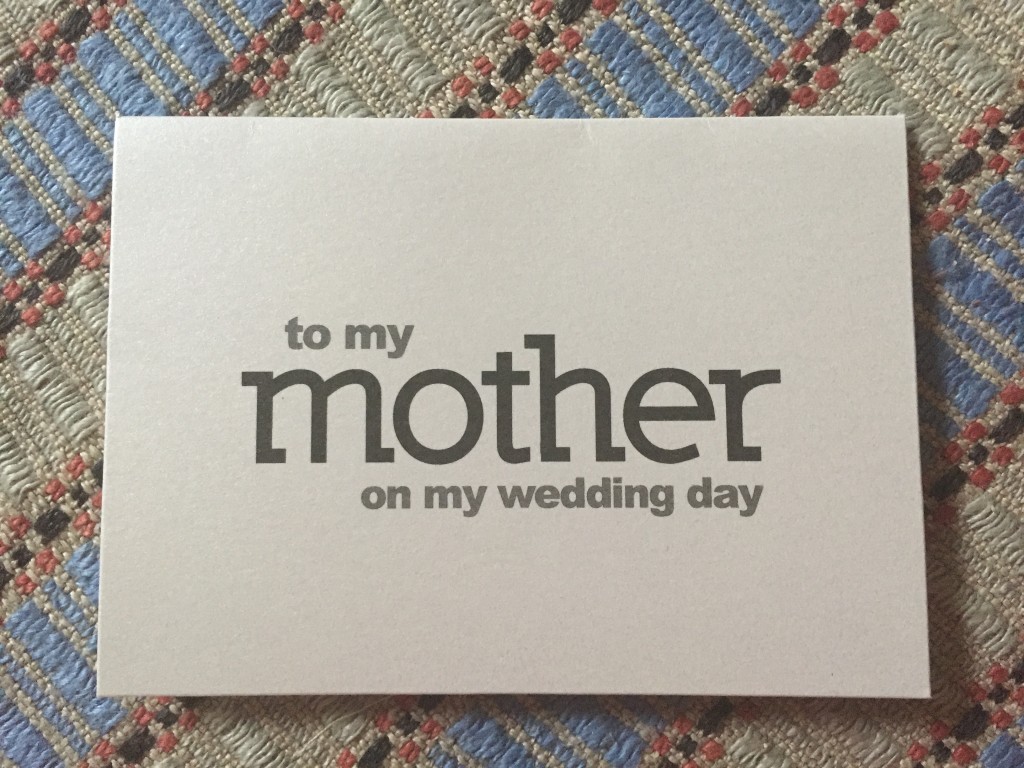
The very best moments of this weekend aren’t documented with photographs.  It was spending some wonderful time with both our sons, our new daugher in law, our friends, my sister and her family.  It was finding two very sweet handwritten notes from my son thanking us for so much, acknowledging what a wonderful relationship we’ve had over the years behind us and the years to come.  This note arrived with a gift just moments before I left our room to go down to the ceremony.  It just doesn’t get any better!
IMG_1283

With a little help from my friends (there’s always a Beatle theme when our family is together) Bob and I hosted a brunch for the newly weds on Sunday morning at their new house in the suburbs of Baltimore.  If not for Pat and Jeremy, and of course Bob, the brunch would not have been nearly as buttoned down as it was!  I guess we were way too busy hosting to get any photos.

I am so indebted to our old friends and my sister’s family for making such a long trek to be part of this event.  Being with them put the frosting on the cake and the cherry on top!

Now back at home I am relishing the all the memories and enjoying looking through all the candid photos taken by friends.  We’ll have the photographer’s images shortly.

I have turned my attentions back to the tapestry presentation I’ll be giving in early September to the weavers’ guild in Rhode Island, to working on what I’ve lovingly called the “Archie Project” for the past ….. years.  I refuse to admit how long this project is taking!

Bob and I took inventory of his stash of dowels in the workshop to determine what he might need to buy in order to make a backstrap for loom for me.  It looks like we have everything needed!  I might be weaving by early next week.

This morning LeaAnn sent me links to a wonderful illustrator and writer who lives in Wales — Jackie Morris.  My imagination took off while reading her blog.  On Saturday, while we were celebrating a wedding, she wrote this:

The summer is always busy. It’s hard to find the silence required for clear thought. George MacKay Brown talked of writing poetry as ‘the interrogation of silence.’ I know not everyone needs it to work, to think, but I do.
…I become more fascinated by silence as I grow older. But finding silence is different to being silent. When you choose to stop speaking you unnerve people. They fill the silence, the space you leave. They interpret your silence in their own way. 

At the end of her post she invited people to comment on how they achieve the silence they need to think and work, or to respond that they do not need to find this silence.

I agree whole heartedly with her description about needing inner silence and attempting to find it. There is no one place where I find mine. Sometimes it is easy to retreat to a wonderful silent place, and sometimes, no matter where I go I cannot get to it. I’m certain it has more to do with the state of my mind than the features or faults of any physical place. It all comes down to me. I just have to learn to be still and let it come.

As a weaver I often find that being at one of my looms is the best place for me to be silent and reap the benefits of where silence can lead. It doesn’t always work, but it is almost foolproof. On a floor loom or at a spinning wheel there is a rhythm of mechanical music that takes me deep into my inner self where there is a vast landscape of something like silence.

In tapestry I almost silently lift each warp thread by hand to create an image, and in that case it is my own deep thinking about the image that draws me away from the world, from any other noise but that deep music inside me. These are the reasons I return to weaving again and again.
After all the busy-ness of this summer–the SSCA extravaganza, visiting friends, the biennial weaving conference, and the wedding–it’s time to find that silence and get some good work done.
A New Direction…

It’s less than a week until my son’s wedding!  I have finished my projects, but I’m still deep in lists–  lists for everything we need to bring to the wedding– a list of  what I need for myself as well as what I’ve promsied to supply for the ceremony…..lists for meals before the wedding,  and a list for what I need to host the wedding brunch at my son’s new house the day after the wedding.
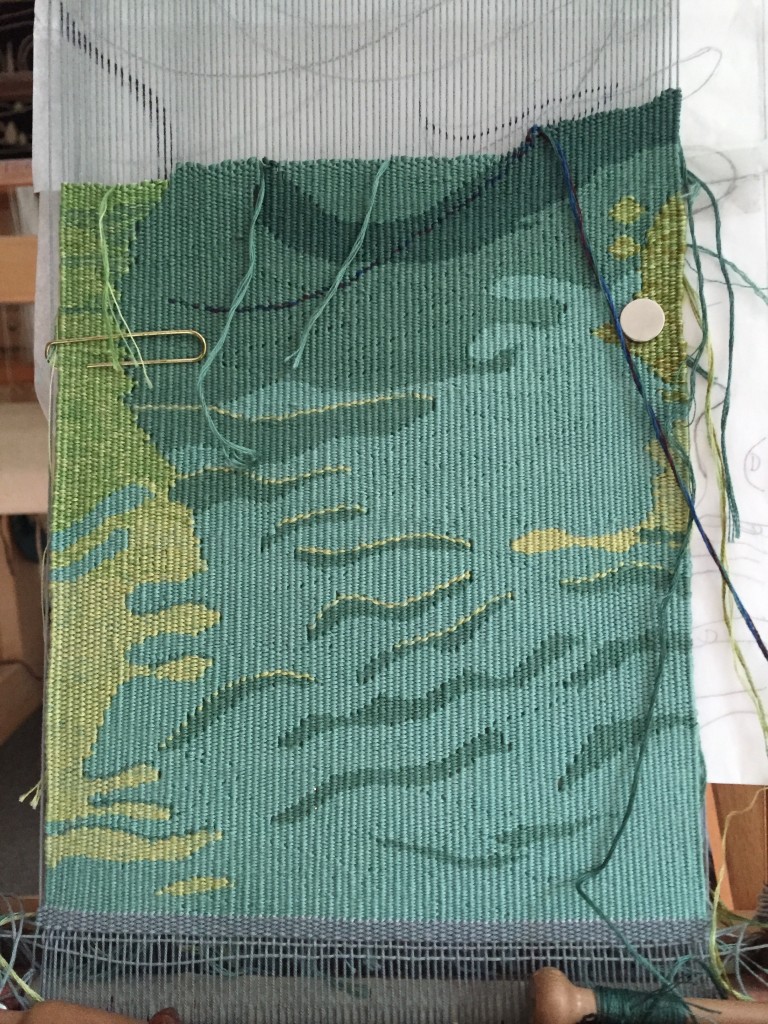
Meanwhile, I can’t help thinking about weaving projects.  I’ve gotten precious little weaving done on the small tapestry I started onboard late winter this year.  What I have done on it has been quite fun–lots of swirling water and the beginnings of the tentacles of a Portuguese Man of War. Very soon I will have my first attempt at pulling the warp around the loom so I can continue weaving up the warp.  I’m more than a little anxious about this, but once I’ve done it I hope it becomes something I can count on doing.  It will allow me to have smaller looms on board if I use this kind of warp.  Check out my new attempts at holding my cartoon in place–a small, very powerful magnet.  These little magnets will jump right out of your hands to fly together they are so strong.  And a very large paper clip.  Neither is a good solution, but I muddle on.

IMG_1249

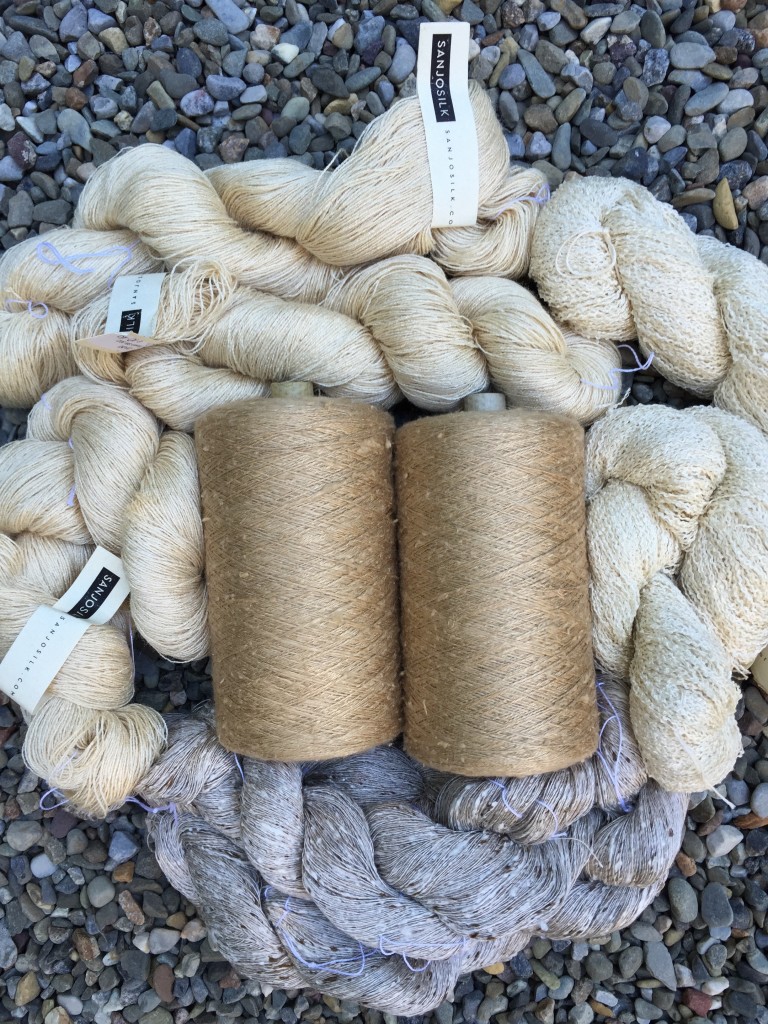
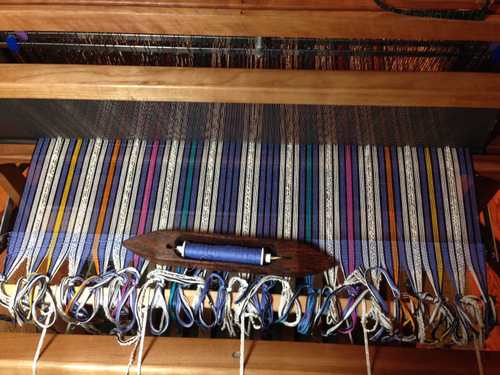
And I’ve been planning my next floor loom project.  It’s so hard to choose what to weave when I have so little time at home and so many ideas.  I think I will weave yardage in Plaited Huck (same structure as my recent linen tote bag).  This time I will make a warp of tussah silk in natural (sort of a pale oat color–not shown in the photo because the cone is the size of a small loom) with random stripes of several  silks from SanJo that are also cool natural colors, but matt–no sheen like the tussah.  One is smooth, another is boucle and the third has wonderful dark flecks in it.  The weft will be golden tussah, in the center of the photos.  It will become yardage for a top I hope to make…

IMG_1247

But here’s my NEW DIRECTION–all caps because I am very excited about this!  At this time of year for the past 3 years— the threshold of late summer–I have become rather anxious and a bit cranky (might be an understatement) that my weaving time at home is rapidly diminshing.  This year I have even less to show for myself than previous years…  sigh…

Yesterday morning I was looking at some messages on Ravelry and then clicking on various links to other things.  Isn’t that the recipe for suddenly losing half a day?  Following various links on Ravelry, a site for knitters, I stumbled on Laverne Waddington’s website about backstrap weaving.  Here is the first photo that caught my attention.

Are these not WONDERFUL???  A little voice is saying to me:  Are these not exactly what you’ve been wanting to weave???  Book covers and handbags. The little voice again: That’s why you’ve woven and sewn two tote bags in the past year.  That’s why you took a class on making paper forms for handmade books…..you can do this….YOU can do this on a boat! 

Look how Laverne personalized these book covers with the initials of the lucky friends who will receive them!

There are lots of small bags on Laverne’s site too, and lots of simply beautiful pick up designs.  Go take a look!

Oh, be still my heart!  I think backstrap weaving might be a wonderful new direction for me.  It will fit on the boat.  It will satisfy my need to weave somewhat complex cloth.  It will allow me to continue my new interest in making book covers and handbags.  It is taking all my willpower not to make a loom right now…  I must stay focused on the wedding for 8 more days, then I can come home and get started!

Funny how things come to you when you need them.  I’ve known of Laverne for a number of years now.  She and I are in a number of the same online groups.  I see her stuff on these groups now and then and marvel at her beautiful weaving.  It just never occurred to me until now that this type of weaving may be the perfect solution to weaving onboard.

It’s summer and I’m thinking about Linen…


There was a recent post on Facebook that linked to a May 16th  article in the New York Times about the two brothers from Pennsylvania who wrote The Big Book for Flax.  Most anyone who attended Maryland Sheep and Wool festival a few years ago saw them there, selling their beautiful coffee table book about linen when it was first published.

The article points out the hardships these two men have faced in trying to build a commune where members would work together to live off the land, including growing flax and spinning and weaving it to make their own clothing.  Their lifestyle is modeled off the colonial Moravian communities that settled in this part of Pennsylvania a couple of centuries ago.

I’ve never been certain how well flax grows in the US.  I know Sara von Tresckow has good success in Fond du Lac, Wisconsin.  Her website boasts a flaxcam, although I did not see live video of flax growing!–truly like watching grass grow!  Instead there is an interesting photo essay of the whole seed to harvest process. Sara spins and weaves with her homegrown flax.  I loved her solution to the volatile weather that the midwest gets each summer.  She cordons off her fields with baling twine to help keep the plants vertical during a blow or a thunderstorm. Now that’s an attention to detail and a labor of love!

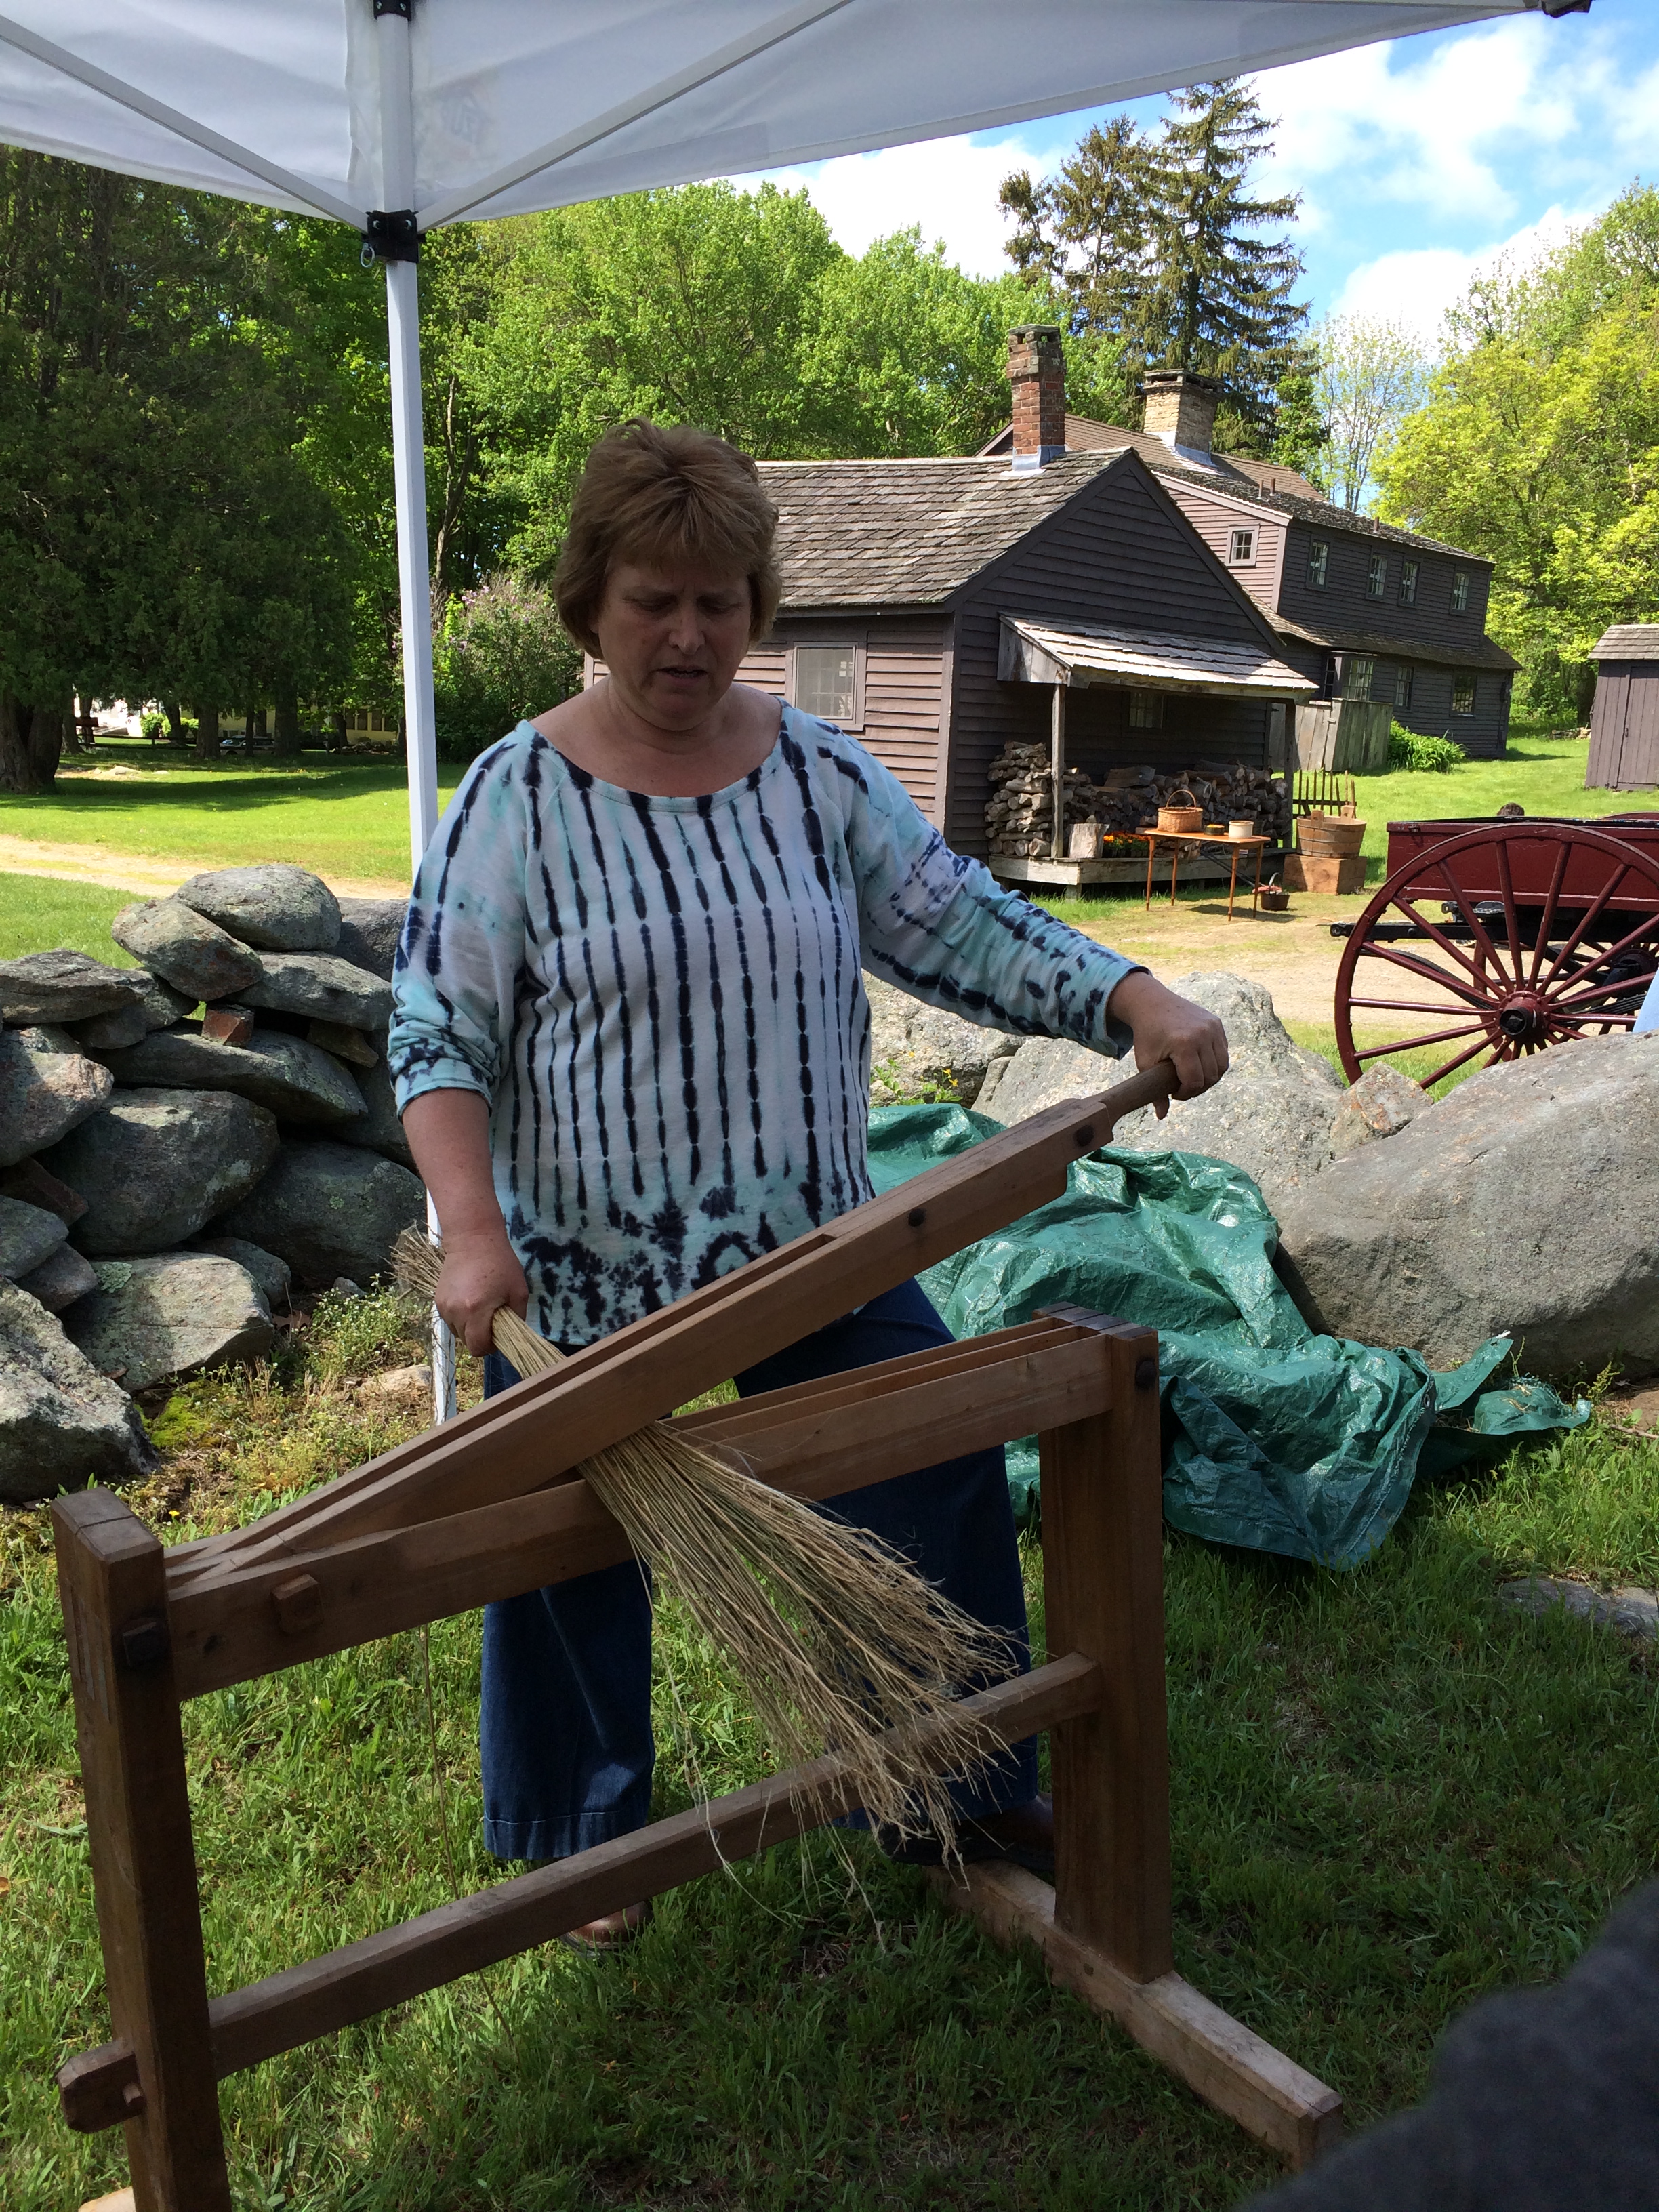
Last year I met a woman from New Hampshire who demonstrated flax preparation at the Bushnell Farm in Old Saybrook as part of an annual historic festival of ‘life on the farm’ in our area of the Connecticut River Valley. Gina Gerhard brought locally grown flax from New Hampshire along with all her tools for demonstrating  the whole process from harvest to stricks that are ready to spin.  I described the whole process last year in this blog post.

Still, I can’t help thinking that flax is easier to grow in northern Europe where the weather is more reliable, where the  light is gentler for softly bleaching the fibers to that perfect silver.

Linen is such beautiful fabric that I have always wanted to spin it.  I have made a few attempts in the past and have enjoyed it.  I have a few spools of wetspun linen waiting to be plied and then utilized in some way.  I have a lovely image of myself in a simple handwoven jacket–where I also am a perfect size 6.  It’s always fun to dream….

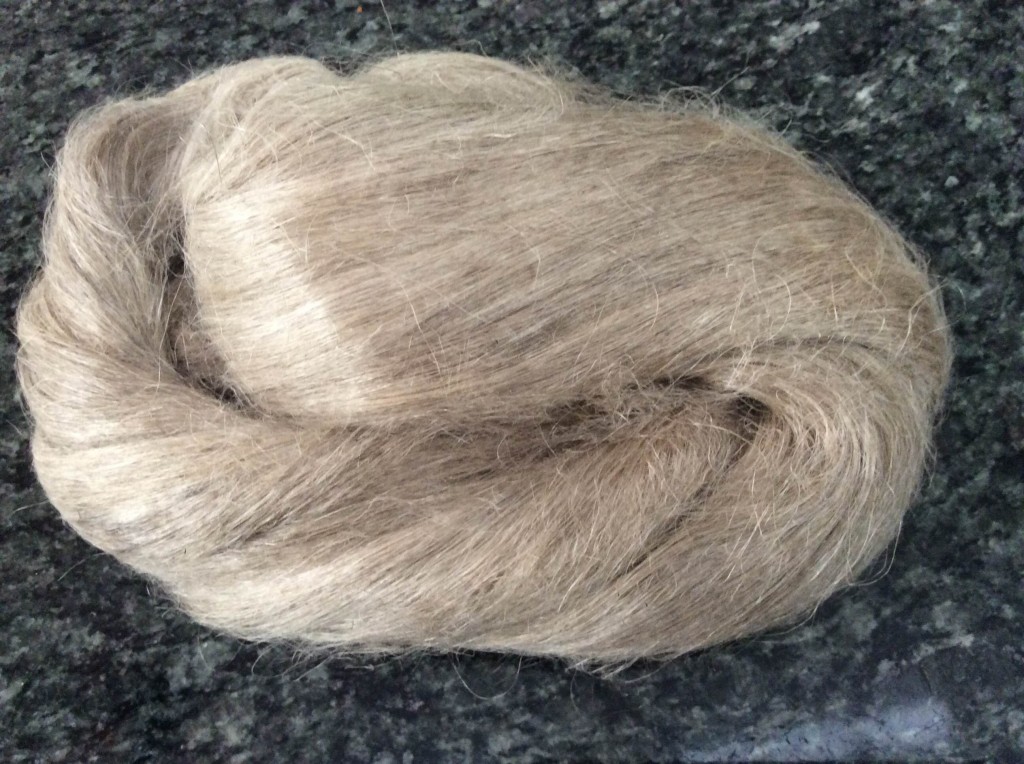
Last week at NEWS I saw some beautiful linen stricks at the VavStuga booth and couldn’t resist buying one. It has that beautiful color that I associate with flax from Belgium or Netherlands.   Now I wish I’d bought two–or three!  I can’t do much with 4 oz!

IMG_0295

 Then today I stumbled on a link to a beautifully done vimeo video on current European flax processing.  After seeing so many demonstrations and videos of traditional techniques for retting, breaking, scutching and combing flax it was very interesting to see the same processes done by machine.  It still appears to be a low impact way of using a natural product–far less environmentally challenging than most cotton.  Check it out.


And there is a sequel that includes some high tech applications for using linen in the automotive industry, for sports items such as bicycles and surf boards,  and even for fishing rods!  There is exciting information in this video about quite innovative uses for linen and flax fibers,  and yet the mechanics of processing flax are fairly basic compared to other high tech fibers. Fascinating!


There is about 25 minutes of video here, and all my words.  I think I’d better stop for now!

Confluence

Once again, it’s been a month since I’ve posted here, and usually when that happens I’ve been writing posts in my head for weeks and weeks before finally getting to a keyboard.  Not this time–I haven’t even thought about posting.  Old age? Beginning senility?  I’m dancing as fast as I can and the music is still accelerating!

The past month has been quite a confluence of all the facets of my life.  Don’t we all have competing interests and obligations that keep us juggling things to try and get just the right mix?  Too long without weaving and I become cranky; at the same time too much solitude in my studio and my hermitic tendencies start to drag me down.

The two big June events in my life were Bob’s 60th birthday, which he glided through like a swan.  He doesn’t look or act a day older, and he enjoyed getting together with some of his dearest friends to celebrate the landmark.  I still have more than 6 months to go, and I am feeling older and older each day.  Hmmm….

Last week Bob and another local sailor hosted a large sailing event for the Seven Seas Cruising Association.  George and Bob put on a three day conference with speakers and social time, a fancy dinner at a yacht club, and a dinghy raft up on the river.  It was a lot of work, but something both men really enjoy.  I sort of go along for the ride, although I did have a house full of overnight guests and made some breakfasts and one rather large dinner for 12!

Here we are with in our den with two couples who have helped us immensely in getting used to living aboard.  Both of these couples live aboard full time, unlike Bob and I who only live onboard during the winter months.  They are truly nomads.

And here is the young man who gives all the live aboards their daily weather information.  This is the man who kept us safe through hurricane Sandy two years ago, and has kept us safe through many other storms over the past 3 years!  He was our honored house guest for the weekend, and he even used Bob’s office to broadcast his daily weather information over SSB radio.  He had some way of connecting to his radio tower in Florida in order to do the broadcast. The amazing Chris Parker:

While both these events were fun, I have not had any time to work on tapestry or fabric weaving.  I have certainly had some important ‘thought time’ making plans for two projects that I will put on a couple of my floor looms.  Hopefully I can finish weaving at least one of these before we leave again at the holidays.  More on that in a bit….

After the guests left I turned my attention back to the linen fabric I took off the Baby Wolf about a month ago.   I spent some time over the weekend sewing a tote bag.  The linen is a medium weight fabric.  The warp was a mixture of several colors of a rather thick 2-ply wet spun linen.  In the photo below the 3 spools used in the warp are lined up together and the golden colored spool on top is what I used for the weft.

IMG_1053

And here is close up of warp threads; you see they are a bit coarse and hairy even though they still have the sheen of wet spun linen.

IMG_1049

This is the fabric off the loom in May, drying outside after machine washing.  You can see the cutting lines I wove in to help me in making the tote bag.  The fabric for the handles and top of the lining is at the top of the photo and is woven in plain weave.

FullSizeRender

And here is the finished bag.

IMG_1037

The draft for this fabric is a blend of plaited twill with huck blocks.  It makes plaited huck!  How cool is that?  I got this draft from Laurie Autio when she gave a talk called “Designing for Block Weaves Using Twills as Profiles” at our guild last fall.  This particular design is a 6-Block, 8-shaft structure using huck threading on a base of plaited twill.

IMG_1058

My warp was threaded at 12 epi and woven to square.  The fabric is close to burlap weight, but not nearly as open as burlap.  I am very happy with it.  If you weave this structure with a lot of color contrast between the warp and the weft you’ll get a good contrast between the plaited elements, those that go over and those that go under.  I am more a fan of subltety, but the downside is that you probably cannot see the plaited effect in my photos.  I also blurred the woven effect by using multiple colors in the warp.  This is just my preference.  It would be quite dramatic woven in two very contrasting colors.

I plan to write up the procedures for weaving this project very soon.  Stay tuned!

Shameless Landlubber

We have spent some wonderful days ashore between Fernandina, Savannah and Beaufort, SC.  I can’t walk 10 feet without taking a photo– of window boxes, planters, a beautiful front door or porch.  Clearly I miss land! –in spite of my little container gardens on Pandora.

Our last day in Savannah: camellias, cherry trees– even a few that have already begun leafing out!—azaleas, pansies.  It is full spring here.

IMG_0416

IMG_0413

And just a few more doors…..I can’t help myself! Note the gas lamp at this door.  There were many in Savannah.

IMG_0417

Elegance on elegance…..would love to get a peak inside both these places!

IMG_0420

IMG_0427

This gate with ivy is so pretty I can only imagine how lovely the garden must be on the other side!

IMG_0426

 Lunch was fun in a well known English style pub with good pub fare:  bangers and mash, shepherd’s pie, ploughman’s lunch.  I took this photo to show my dear friend Lesley, but I wish I’d taken a photo of my lunch so she could see I was having a Branston pickle!

IMG_0429

We visited the maritime museum that also happened to have a lovely garden surrounding it since the museum is housed in an historic house with beautiful grounds.

3-26-15a 014

The museum had quite an extensive collection of ship models, but what caught my eye were some of the very few other items, relics from various ships.  There was a wall of scrimshaw in one room, and I was intrigued with these lovely carved rolling pins. I don’t even have a rolling pin on Pandora since I only make a pie once or twice during our time onboard each year.  I use an empty wine bottle….we always have one on hand!

IMG_0401

And of course I had to take a photo of this lovely scene of children with a lamb.  Not your standard scrimshaw image!

3-26-15a 009

And just before leaving Savannah we had our photo taken by a couple of tourists after Bob offered to take theirs.

3-26-15a 018

From Savannah we moved on to Beaufort, where I looked forward to visiting one of the friendliest yarn shops, Coastal Knitting.  Just walking through the charming business section of town—so many beautifully tended shops and interesting restaurants—was delightful.  And the residential areas were beyond wonderful!  There were gardens in luscious bloom everywhere.  Here is just a sampling!

IMG_0443

IMG_0451

IMG_0452

IMG_0453

This morning, just one day after leaving Beaufort, I found a comment here from a woman who lives in Beaufort, and who just returned herself from a couple of months onboard her trawler, armed with both knitting projects and a tapestry project.  It is a thrill to know that there are other weavers out there!  It can get so lonely out here without other weavers to talk to!

Non-weavers often recommend that I get an inkle loom or a little rigid heddle.  I love these small tools and enjoy using them when I have a certain project in mind that suits them.  But they in no way replace that urge to weave the type of cloth that I love.  It’s just not the same, and an inkle loom is never going to satisfy my need to design and create fabric.  Anyway—it’s very nice to be in touch with another weaver.  Laura Burcin plans being onboard for a longer period next winter.  I look forward to connecting with her in person.  In the meantime, I feel I have gotten to know her a bit through her blog.

Should I talk about my “For Irene” sweater, which I have ripped back in order to make the lower body smaller?  I certainly don’t want to!  It has not gone as simply as I envisioned!  I knitted most of this sweater in Portugal on my rosewood, interchangeable Knit Picks needles—size 4.  At the airport in Lisbon, as I was headed back to the US, they were taken from me.  Now that I’m trying to match the stockinette on the body of sweater, I am finding that none of my other needles are able to match the gauge of those particular needles I lost!  UGH! I have started and ripped back five times now!  This is a crisis! I did try to replace those needles in Coastal Knitting in Beaufort.  They don’t carry the interchangeables, but they did have size 4 circulars from Knitter’s Pride which I have heard is the same manufacturer as Knit Picks.  Alas, no luck on getting the same gauge!

I wanted to wear this sweater to a wedding in a little over two weeks, and now I’m rather convinced it won’t happen.  Ah well, time to make peace with that.  When I get home I can order a replacement for the needles I lost….

Directions for a handwoven tote bag

8-SHAFT HUCK LACE TOTE BAG

IMG_1480

 This fabric is based on a well-known huck lace pattern that is available in a number of places.  It is included in the The Best of Weaver’s Huck Lace, edited by Madelyn van der Hoogt, on page 12 in the pattern section (by Ruth Morrison), and in the project section starting on page 51.  This pattern is also used as the end plate on the right-facing page at the beginning and end of the book.

 You can also consult Madelyn van der Hoogt’s informative digital workshop on lace weaves which you can preview here: http://www.interweavestore.com/weaving-lace-with-madelyn-van-der-hoogt.

Here is my version of this project:

Warp:  16/2 linen (Bockens Lingarn) in five colors:  1 spool each, 125 grams
# 522 black
# 485 purple
# 4060 dark green
# 40 bright turquoise
# 2030 lemon yellow

The tote fabric requires about a yard of fabric, and each napkin requires ½ yard of fabric, so plan your warp length accordingly.  I wove one yard for the tote and 2 ½ yards for five napkins.  I put on a 5 yard warp to allow some sampling and loom waste.

Weft:  16/2 linen in #522 black, 2 spools (in addition to the one used for warp)

Sett:  20 epi, width in the reed about 17.5” (finished width about 16.5”)

Threading:  There are 7 repeats of the huck pattern with 4 extra plain weave threads in black at each selvedge.  I also threaded two threads together for the first thread at each selvedge.  Total warp threads:  365 ends

Weaving:  to balance at 20 epi

The full pattern repeat is 50 threads.  Each color stripe is 45 threads with 5 black threads at the beginning of each pattern. I placed a stripe of five black threads at the beginning of each repeat to emphasize only one column of the flower motif, as in reality there are two columns of staggered flowers.  (Unfortunately, all huck looks geometric until it is wet finished.  So my flowers look like diamonds in the drawdown.  Consult the detail photo at the end for what happens after wet finishing.)  By having a small black stripe of 5 threads, I minimized the appearance of the staggered flowers so that one straight column of flowers would stand out.  I chose to do this in order to better coordinate with the mug I was using as inspiration for the tote.  At finer setts the staggered floral motif shows up well, but not at the sett I needed for fabric that would be sturdy enough for a tote bag.

Finishing: Off the loom, I machine washed the entire length of fabric in the washing machine on ‘normal’ setting, warm water.  After smoothing the fabric by hand, I let the fabric air dry and then steam pressed it before serging the edges between all the cuts.

Huck Lace Lunch tote final as woven (this link will bring up the pdf file)

Screenshot huck lace tote bag final as woven

In this drawdown I have also included 4 extra plain weave threads at each end of the warp. You might add even more. Huck lace gives a lovely scalloped edge to fabric when it is not bordered by plain weave; however, at such a loose sett of 20 epi I found that the scallops look rather clumsy.  They are lovely at finer setts, but for this project I wish I had used a plain weave border, so I’ve included that here.

The drawdown should be followed until the end of the yellow stripe, then worked in reverse color order back through the blue, green, and purple.

The mug that inspired the tote bag:

Weaving mug exchange

 SEWING THE TOTE BAG

 Materials Needed:

 Tote bag fabric:  15” x 27” plus extra for straps if using this fabric
Lining fabric:  15” x 27” plus more for pockets and possible straps
Pockets from lining:  2 pieces, 7” x 15”
Light Weight fusible interfacing:  14” x 22”
Fusible Fleece:  14” x 22”
Cotton webbing straps if you don’t wish to use handwoven or lining fabric for this

  1. Cut pieces to size.
  2. Fuse the light weight interfacing to the wrong side of your handwoven tote fabric, centering the interfacing so that there is ½” margin on each long end, and 2 ½” margins at the short ends.
  3. Fuse the fleece to the wrong side of your lining fabric, centering the fleece as you did with interfacing on the main fabric.
  4. Sew the pockets:  place right sides together and sew around pieces leaving one short edge open.  Turn right sides out and press, pressing under ½” seam allowance that did not get sewn.  Top stitch around all 4 sides, which will close and finish the edge that was left open for turning. Place the pocket on the right side of the lining fabric about 4” down from the raw edge of one of the short sides.  Sew along the outer edges and bottom of the pocket, attaching it to the lining.
  5. Then top stitch a pocket divider, either by sewing directly down the center of your pocket, or by sewing 1/3 in the distance on the long side.  I opted for the 2nd choice so that one pocket would be larger than the other.
  6. Fold the lining (with attached pocket) in half along the long edge, right sides together, and sew the side seams.
  7. Make a flat bottom for the lining as follows:  with the wrong side of lining facing out, position one side seam so that it is in the center of the fabric, and so that the end of the seam forms a triangle at the bottom of the tote:

tote bag square bottom Measure 2 ½” up from the point and draw a sewing line across the bag that should be 4” across.  Sew across this line.  Repeat this on the other side seam.

8.  Repeat this process of folding the long edges of the main fabric in half (right side together) and sewing the side seam.  Then repeat the process for making a flat bottom for the main fabric.

9.  Put the lining inside the bag, with the right side of the lining facing inward and the right side of the main fabric facing outward.  Turn the triangle flaps on both lining and main fabric so that they face into the bottom of the bag.

10. Fold down the top edges of the lining and main fabric toward the inside of the bag, and so that each fabric is now folded along the edge of either the interfacing or the fleece.  Match the edges and pin.

11. Make your handles.  If you are using the handwoven fabric your handles will only be about 16” long.  Take the hand fabric and press ½” in on the long sides.  Fold in half and top stitch along the pressed edge and then around the entire handle to finish.

12. Insert the handles into the pinned top edge of the tote bag so that each end of each handle is about 1/3 in from the end of the bag.  The finished bag is about 13” wide.  Divided in thirds (4 1/3”), you would place your handles to center on 4” and 8 ½” roughly.  Pin the handles in place with at least 1 ½” down in the seam.  Top stitch around the top of the bag.

FOR NAPKINS:

I wove 18” of huck lace pattern with 2” of plain weave at the end of each napkin.  I wove two picks of a contrasting color of weft in plain weave between each napkin. I turned under a hem at each end so that the plain weave was not showing on the face of the napkin, and hemmed the napkins by hand with black thread.

IMG_1477