It’s a fact that we all march on with our lives, lurching or gliding, and then something stops us in our tracks. As John Lennon said, “Life is what happens when you’re busy making other plans.” Oh boy. So true. (Actually, I just googled that phrase, and it seems that it is attributed to someone named Allen Saunders who wrote an article for Readers’ Digest in 1957, with that phrase in it. There you go….the marvels of the internet. Most of us know this phrase from a wonderful John Lennon song, “Beautiful Boy.” If you’re interested, see this.)
I did not mean to digress. Nothing can match that feeling of hurtling along through life and having all your plans stopped cold by an event, a moment after which nothing can ever be the same. During the morning of November 1, only 10 days ago, I learned that Archie Brennan had passed away during the afternoon of the previous day–Hallowe’en. At that moment all my whirling and spinning stopped. I know that thousands of others, across every continent, felt that same shock. Dear Archie…. he meant so much to everyone he encountered.
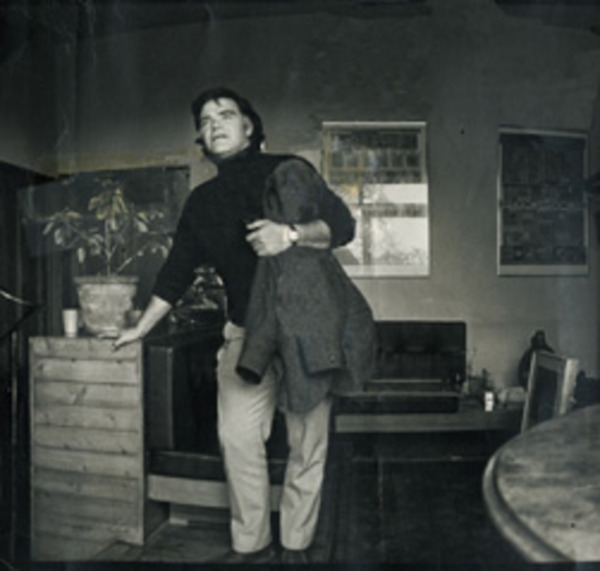
Archie at Edinburgh College of Art
I imagine his many students and friends are in much the same position I’ve been in lately: struggling through current projects, delving into uncharted, creative ground, making progress and facing setbacks. The bounty of our work: I have too many projects going on at once, and I imagine you do too. Inspired chaos….well, hopefully inspired.
So what do we do with our grief? With our wonderful memories of classes and workshops with him? Meals shared–pizza and Chinese take out? With the memories of his humor, his gentle critiques of our tapestry work? Most of us who studied with him are not spring chickens ourselves at this point. What’s the best use of our own time left? There’s no one answer to any of these ponderings . But there are lots of possibilities for each of us to consider about our own creative output, whether in tapestry or some other art form, or in the way we interact with others. Everyone who encountered Archie certainly got a glimpse of how creatively Archie looked at the world. There was humor and a gentle social commentary in every piece that Archie chose to spend his time creating. He was endlessly fascinated with getting know the people who crossed his path, and he was generous, so generous with his knowledge. Those of us who weave are much indebted to what he taught us.
Someone once asked Archie what was the most difficult piece he had ever woven; he answered: the one on the loom right now. …and there it is, the very nature of everything we do. Each of our hurdles advances us some tiny bit forward for the next hurdle. Archie was part of our advancement, either in tapestry weaving or in looking at the world in a more creative and socially conscious way. The best we can do is take our hard-won knowledge and use it, over and over, and remember him often along our journey.
I am not a religious person, but it was poignant that Archie left this world during the hallowed evening, on the precipice of all saints. His patience and his humor always made me think he was a bit of a saint…. Farewell, dear teacher.
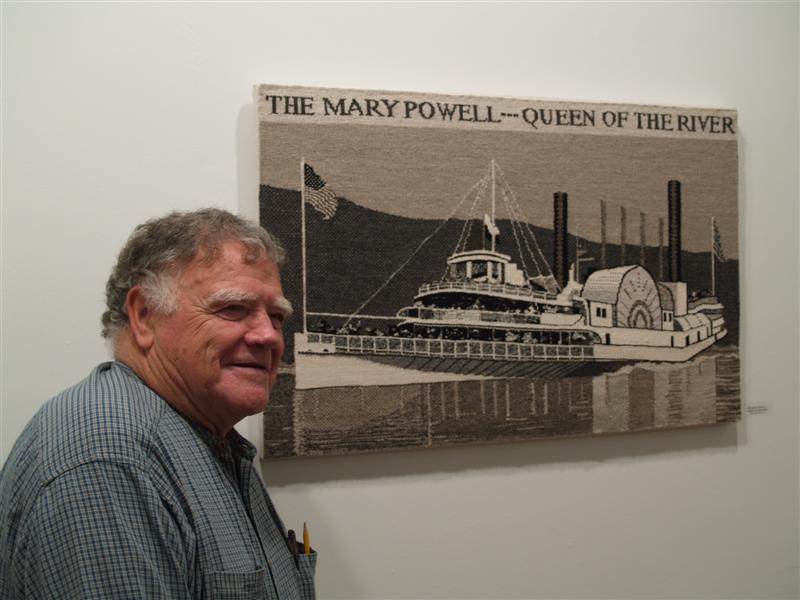
Archie and his tapestry “The Mary Powell,” at the opening of the Wednesday Group’s celebration of the quadricentennial of Henry Hudson’s exploration of the river that bears his name . Autumn, 2009
It has been a month since Bob and I returned from France. We are hurtling through time, getting ready for our winter living onboard, and I am attempting to do something textile-y with every day I have left on land! So, in some ways it feels like our trip to France happened about 6 months ago! In other ways I feel like I’ve just returned.
A friend of mine alerted me to the fact that Paris has wonderful shops for notions and fabrics. I had experienced a bit of that two years ago, when I found a fabric shop in Fort de France, Martinique. I couldn’t wait to see what a shop full of buttons, ribbons, and trims might offer–in Paris!
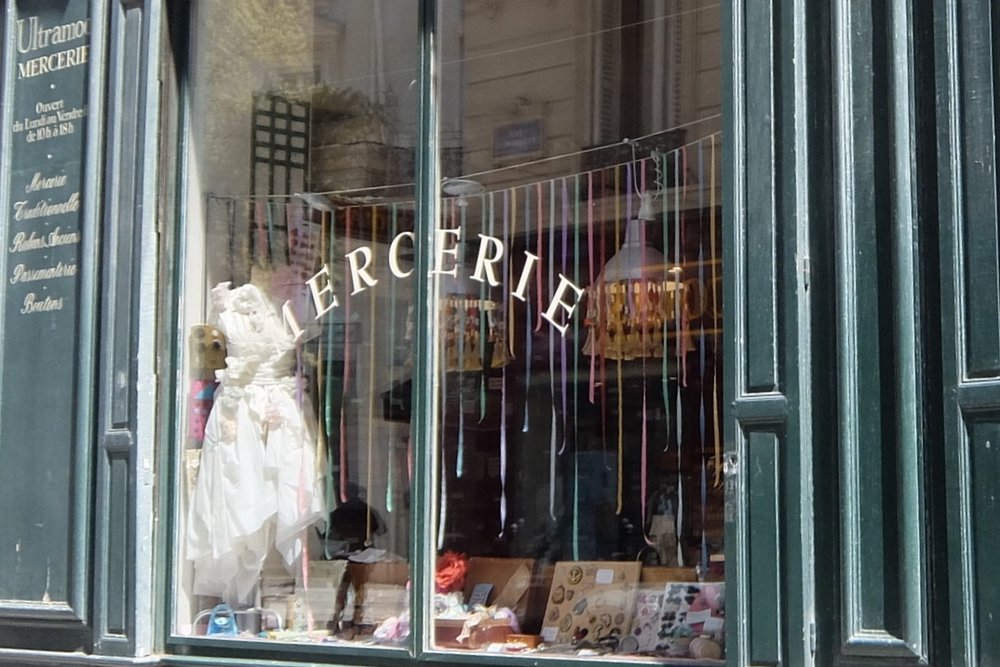
My friend had mentioned Ulta Mod, which has two shops on opposite sides of the street on Rue de Choiseul. It might be the oldest haberdashery in Paris since it opened in 1832.
Rebecca Devaney has some wonderful descriptions of the history of Ulta Mod as well as its current offerings in the newer store–and great photos! You really should take a look at all the great interior shots of the store on Devaney’s website. I think it vies with French boulangeries as a compelling reason to visit Paris! While I was there, a woman had her tweed coat spread out on a counter and was choosing new buttons. I thought the buttons that were already on the coat were quite nice! I don’t think I would have considered changing them, but then I am not French, let alone Parisienne. This woman, and the saleswoman waiting on her, clearly understood that the coat could be so much better with new buttons! How they got through the wall of buttons to make a choice was mind boggling.
I got lost in the section of trims. I was thinking of braiding as I looked through bins and bins of offerings. There had to be about a 100 color choices of just one type of cording that caught my eye. As often happens to me when there is too much choice, I couldn’t pick anything! My loss….
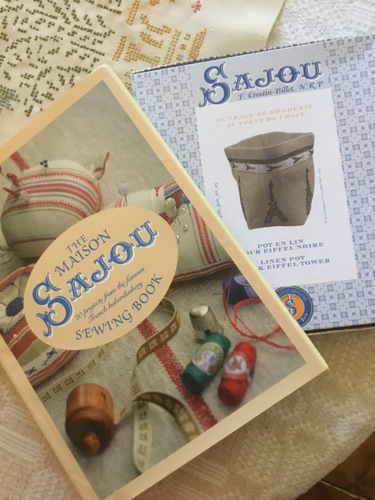
I had done a bit of internet searching ahead of time and wanted to visit Maison Sajou. Oh my! This is an embroidery shop where every project, every spool of thread, package of needles, and every fabric on display made my heart race. I don’t even do embroidery anymore, but I wanted everything in this shop! Actually, I wanted to live here.
Now I plan to give embroidery another whirl. It’s certainly an easy thing to take onboard for the winter. After much deliberation, and after putting various spools of linen embroidery thread and some cute packages of embroidery needles in my cart, I added this project kit. Tres adorable!
I bought the book online before I ever even got to France! The cross stitch in the background was done by one of Bob’s great aunts as a gift to us back in the 70s.
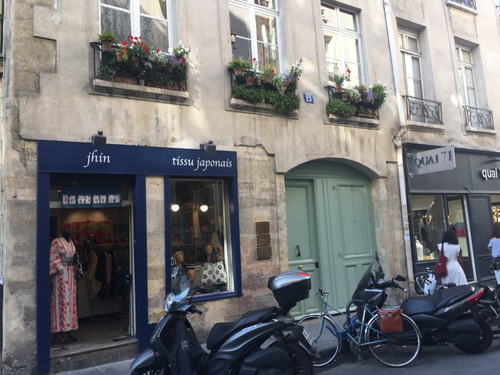
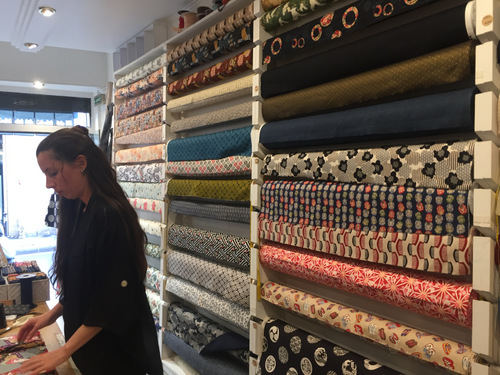
I think I missed a great opportunity to see some fabric shops in Paris. We were leaving the Cathedrale Montmartre, walking down a street of fabric shops, all closing for the day. I have no idea if this is the hotbed of French fabric shops since I didn’t get to check them. On another day, I went searching for a fabric shop I’d found online in the area where we were staying, the 11th arrondissement. I found a Japanese fabric shop called Jhin.
Of course I envisioned returning home with French fabric, perhaps outdoing the beautiful linen print I found in Martinique. But fate took me to Jhin and I came home with two beautiful Japanese prints for me, and another two for a friend. Serendipity can be so much fun!
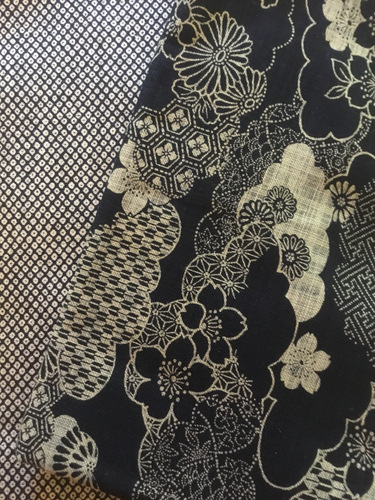
Japanese fabric from my trip to France.
I’ve begun embroidering the cute little tote from Sajou. It’s a restful way to spend time–perfect for days in tropical harbors in the Caribbean. I’ll be there soon.
The most famous tapestry in the Western world is not, in fact a tapestry, but that does not diminish its incredible workmanship or its place in history. I’m referring to the Bayeux tapestry. A visit to Bayeux to see this work was high on my list of things must-dos while in France last month. (It was 2nd only to seeing the Lady and the Unicorn.) It remains in excellent condition after almost 1,000 years. I don’t think it’s ever been stored away in an old barn as many woven tapestries have been, so it is in remarkable condition. At the museum in Bayeux, where it is housed, you can walk along the length of this epic embroidered tale, and marvel. I marveled that the background was entirely handspun and handwoven. I marveled that all the embroidery threads were handspun and hand dyed. I thought about those nuns who sat together and wielded their needles one thousand years ago. In some fundamental ways we are so similar to those women. Nihil novi sub sol.
The museum in Bayeux has done such a clever job of displaying the tapestry that I never even missed the fact that I could not take photos. The “tapestry” is displayed in a dimly lit glass case that flows in a large circle in the center of a darkened gallery. Everyone is given headphones to listen to an audio description of the work and the story of the Norman Conquest of England in 1066. Like everyone else, I was compelled to keep up with the narrator so that I could see the bits of the story illustrated in the embroidered piece, as well as taking some time to enjoy the lovely colors of the dyed threads and examine the stitches.
The piece is 224 feet long. It tells the story of the Conquest, from King Edward’s death, through the envoy that went to France to alert William of Normandy that he was the chosen successor to Edward, to cousin (or some kind of relative) Harold usurping the English throne for himself, through William’s amassing troops and building ships to sail to England and claim his place. It’s intriguing to ‘read’ this story in the imagery of the embroidery. It’s hard to pick any part of the piece that stands out above the rest. The building of ships caught my eye, with all the details of cutting down trees and the depiction of the tools used for shaping the stem and the planks for the boats. I think this was part of the work that captured Bob’s attention.
The scenes of the ships sailing across the channel made me realize how much I’d enjoy weaving the various men onboard and the colorful sails. A few years ago, one of the Wednesday Groupers decided to weave a small section of the Bayeux tapestry as woven tapestry. I totally understand. I’m feeling pulled to weave those ships under sail. I hope the nuns enjoyed their creative interpretations as they stitched.
The battle scenes were equally well executed, and I found the depiction of horses in battle quite moving.
Standing in the presence of something so well preserved and so beautifully made is quite emotional. It’s impossible not to think of the women who made this piece, the men who commissioned it, the men who lived the story being told. It’s impossible to ignore the long projection of time that brought us to the 21st century, how our native tongue is now a mix of Norman French and Saxon and Old Norse, how our way governing spread through the world through England’s vast expansion of colonies. Here is one story, told at the beginning of this long history of evolution and progress of the English language and English justice, worked in embroidery by women.
A Short Tour of the Normandy Coast
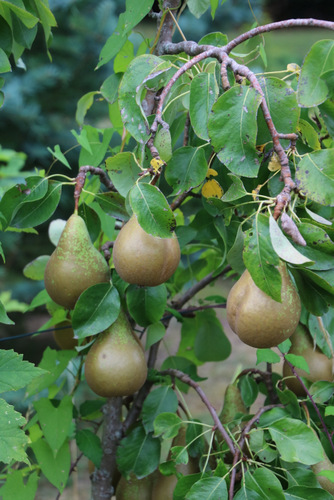
Normandy is a beautiful area of France, known for cheese, for apples and pears and Calvados, for damp foggy days along the shore.
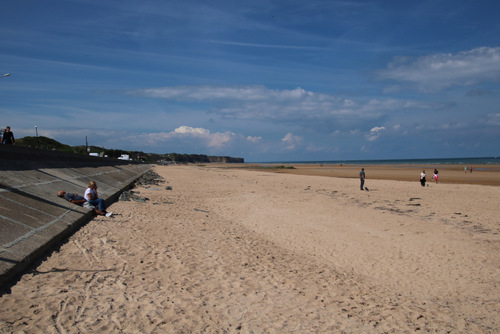
We were quite lucky to have clear, dry days while we were there. The beaches were stunning, but it was easy to imagine how difficult that D-day landing was over 75 years ago, on a far less beautiful day. That was another memorable part of our trip that lies outside the subject of my post. Still, after seeing the amount of work in the Bayeux tapestry, telling a 1,000 year old story, I couldn’t help but notice the similarities in the various battles fought along the same coastline, during the past 10 centuries.
Omaha Beach on a sunny September day
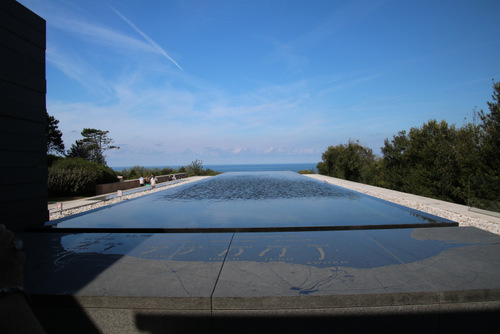
The infinity pool at Omaha Beach
The American Cemetery
We ate cheese each day, and each day we sampled some apple cider and a few times some Calvados. My compulsion to make lists of must-sees/must-dos included having sole Normandie. I couldn’t wait to have the same meal that Julia Child had on her arrival in France so many years ago. I was shocked that I could not find it on any menu in Bayeux, Honfleur, or Etretat! That was another little disappointment, but the cheeses surely made up for not it…and the bread!
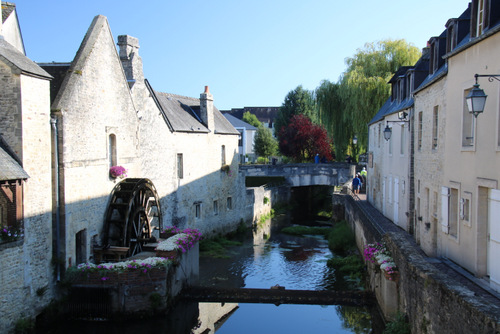
In spite of the fact that the coastal towns along the Normandy shore are famously scenic, I found Bayeux to be my favorite. It may have been the light. We were blessed with dry, clear days.
A stunning day in Bayeux
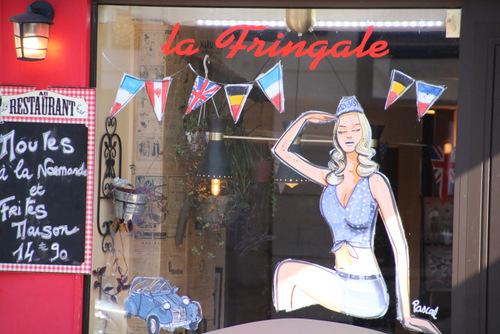
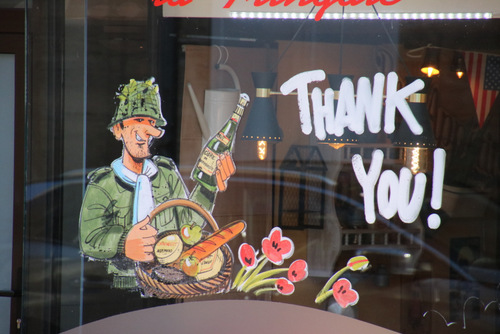
The streets of Bayeux are festooned with colorful balloon type decorations, and many shop windows have been painted with images and slogans of gratitude for saving French culture during WWII. There are French, British, Canadian and US flags everywhere, and even a few German flags.
Bayeux
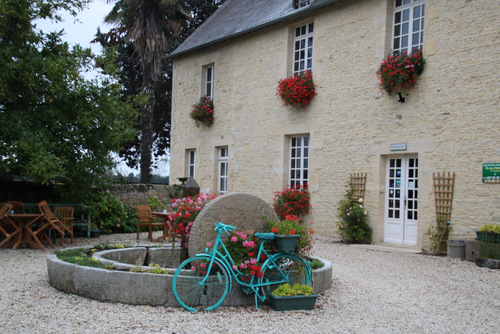
We stayed just outside Bayeux in a farmstay, and it was an excellent choice. This place is as charming as a fairy tale, and we walked along a country road at the edge of several farms and into a tiny nearby village.
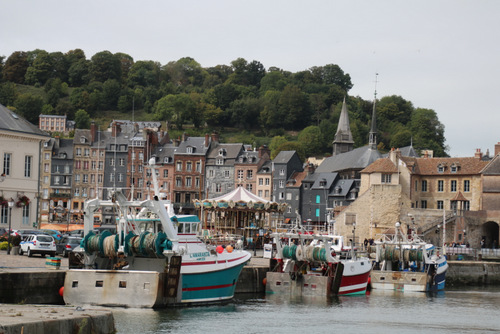
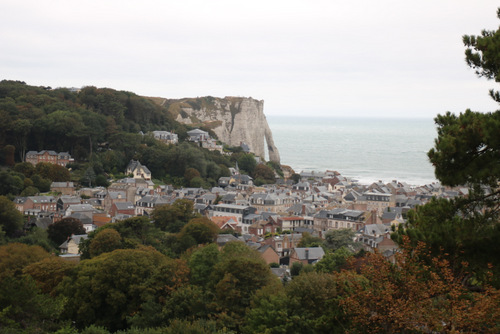
From Bayeux, we traveled north to Honfleur and Etretat. Honfleur is incredibly scenic as touristy, and Bob enjoyed a day of looking at boats. I think he took about 1,000 photos. For lunch we sat under one of those umbrellas to the left of this photo.
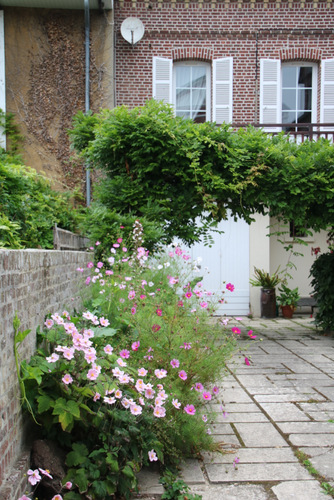
If I were to start writing about the gardens….well, it would be a deep rabbit hole. Gardens, window boxes, and florists were so lush everywhere we traveled. The roses I saw everywhere were as perfect as roses in June in New England. Can I limit myself to one photo? Maybe….just for this post.
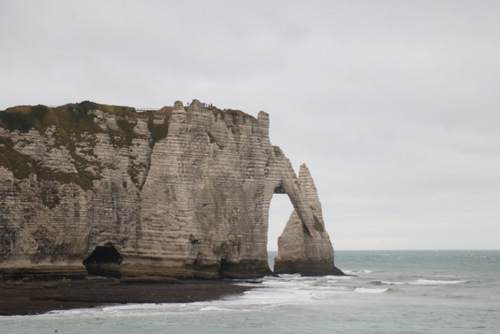
I hope I never forget the view of the shoreline in Etretat, seeing the very view that Monet painted on several occasions. It made me realize how fluid time is, that I could stand in the same spot that someone immortalized in art a century (or 10 centuries) before I stood in that very place.
Etretat
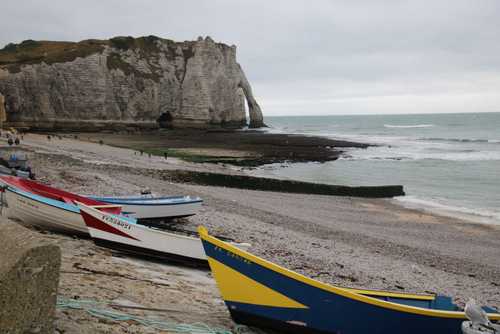
We could even see this memorable landmark from the tiny balcony of our room at one of the highest points in town.
We celebrated Melody’s birthday in Etretat and then began our journey back to Paris, stopping in Rouen and Giverny.
Happy Birthday, Melody!
I think I need a post about the bounty of French markets’ fresh vegetables and fruit, perhaps touching briefly on gardens which of course includes Giverny, and all the lace I saw throughout Normandy. Next time…
This has been an olympically busy week, and all of it was unexpected. We had an unplanned visit from Bob’s brother at the beginning of the week, which made my mother in law’s 90th birthday truly special. Boating friends have arrived via sailboat midweek, and we want to spend time with them. Bob is up to his chin provisioning our boat Pandora for his departure next week for points south, leading down to Antigua in the Caribbean. This is a giant hurdle for us each year, because all our clothing, all my textile projects, and all our food staples have to get onboard before Bob sets sail. We will not be able to ship any of these items, or take that much stuff on a plane!
And to top off a week of fun but unexpected pleasures (read hectic), I got an email about a presentation at Yale Art Gallery that I simply had to attend, no matter how much schedule rearranging it necessitated!
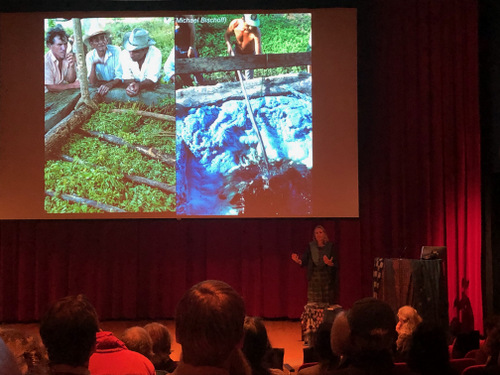
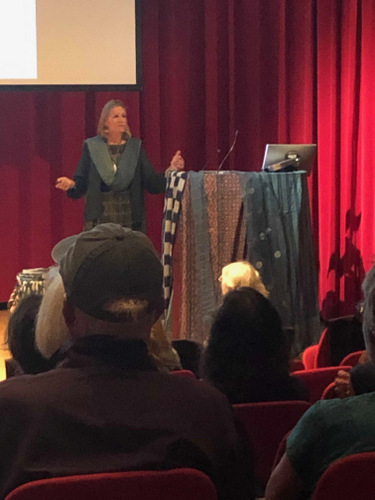
I expected to spend the next two blog posts sharing some textile-y experiences I enjoyed in France, but I need to interrupt that program to talk about last night’s presentation at Yale. The speaker was Jenny Balfour-Paul! I certainly was not going to miss a chance to meet this fascinating woman who has done so much research into the world cultures that have a long history of dyeing with indigo. Two years ago, my local weaving group read her most recent book Deeper than Indigoand then spent our September meeting discussing the book. Indigo is such a fascinating subject! How did anyone ever figure out how to extract that wonderful blue from the plant? It seems like alchemy, especially since the dye itself is not blue, and when you pull your yarn or fabric from the dye vat, it does not turn blue for several seconds. It starts yellow and goes deep green before finally turning blue. It’s quite a magical experience, and I can imagine how ancient cultures who had no knowledge of the chemistry involved, must have marveled at this mysterious process. The Indians and Japanese always prayed to their indigo god before beginning a dye session, and they always gave thanks to that god at the end.
Jenny Balfour Paul has been researching indigo for over 40 years. If I wrote about all I learned about her last night, this post would be far more than a little digression. She is a living treasure on the history of indigo, and she has traveled all the parts of the world where indigo dyeing was done in ancient times, and the parts of the world where indigo dyeing was big business during the colonial expansion era of the Western world. Recently, she’s been involved in projects for creating textiles with less impact on our fragile ecological system. She will be talking about that on Monday, next week, at the Explorers’ Club in Manhattan. You can read about the project here. Her first exploration, 40 years ago, was to the Middle East, where traditional dyeing techniques were fading into obscurity. She wanted to record those techniques in order to preserve them. Considering the language barrier between her and these remote tribes, she mostly gained knowledge of their dyeing process by watching them. This included seeing the plants grown in the fields, harvesting, and the complex process of turning plant into dye. After the Middle East and North Africa, her research has taken her to the Far East, to remote parts of China, to remote parts of both Africa and India, to the South America and the tropical islands where Western ventures into mass production of shippable dye stuffs took place during the colonial period. One of the most fascinating projects she’s working on is using indigo cakes that were recovered from a shipwreck in the Marquesa islands in the late 17th c. She let us all hold one of the indigo cakes, and it looked brand new, even after being submerged for centuries.
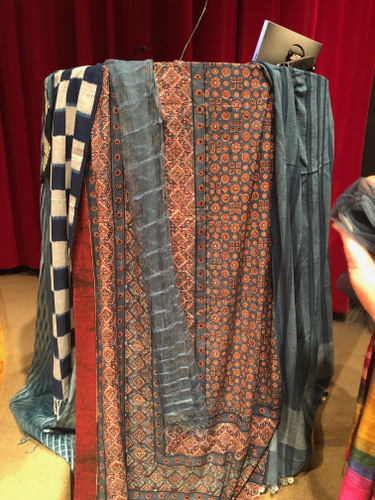
For her presentation last night, Jenny draped the podium in beautiful indigo fabrics
She wore a stunning outfit of indigo dyed fabrics. Her beautiful dress was dyed by her first teacher who set her on the path of researching the dyeing traditions of other cultures. The colors in my photo are quite ‘off’ due to the stage lighting. Her silk scarf is really a deep blue touched with subtle shades of green. Her beautifully printed dress fabric is what her teacher dyed. It has a lot of green in it, and also tan from where it was tied to create rows of resist. It is also patterned with tiny dots where her teacher used a wooden block with nails, dipped in wax, to add resist to the fabric (like batik) before dyeing.
I was thoroughly enchanted with Jenny Balfour Paul, both as a dedicated researcher and as someone who was refreshingly passionate about her subject. Her enthusiasm is contagious! When I spoke to her after the presentation I admitted my lack of confidence in dyeing, especially with indigo. I’ve had some successes, but only using someone else’s dyebath. I’ve been fortunate during my time in Connecticut to have other guild members share their indigo vats me. Last night Jenny gave me a bit more confidence to try again to make my own vat. She recommended the indigo kit from Maiwa. I’m on it!
And so goes a short digression. Like many things, this is going to send me down a deep rabbit hole. But I’m looking forward to gaining some confidence in dyeing with indigo. I wonder what Bob would think of that as a project onboard this winter. Hmmmm….
The tapestry class I’m teaching started earlier this week, and since we are studying traditional Gobelins style techniques, I can’t get the “Lady and the Unicorn” off my mind. I started reading the book I bought at the museum, which also brings up bits of info that are filed deeply in my brain from my college years–a long, long time ago at this point. I enjoyed studying the MIddle Ages in college, in between the classes I needed for my majors.
During the Middle Ages a popular literary form was the bestiary, in which stories about real and imaginary animals were told in order to convey moral concepts. The unicorn featured often in these tales, where it represented two opposing sides of the same idea: ideas of purity, virginity, and Christian virtues, as well as less pure concepts of sexual desire and attractions, giving into one’s senses. At this time in history the senses were considered to be base, in need of control by the higher call of duty and control of one’s desires. There are descriptions of a 6th sense, the heart or the soul, an inner compass that could give guidance to the lower senses of touch, taste, sight, smell and hearing. So, naturally, many scholars have weighed in on what that might mean to the purpose of the story in the six tapestries of the ‘Lady and the Unicorn.’ After 500 years, there are still so many disagreements–and unknowns.
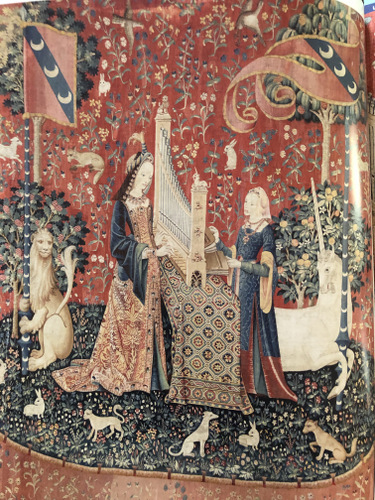
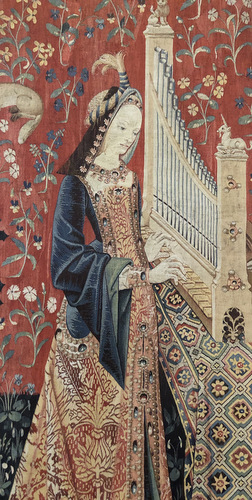
“Hearing,” from “The Lady and the Unicorn”
I was intrigued to learn that the tapestries were repaired in the late 19th c., after being acquired by the Cluny Museum, and that the woven areas near the bottom of certain pieces have faded dramatically from the rich red to a greyish pink. The upper areas that are still original have surely faded some, but are still a deep madder red. What was used on the repaired areas? Could it have been the recently developed aniline dyes? Can I get an answer on this? Do you see the badly faded area at the bottom of “Hearing?”
I find the photos is in the book I bought so inspiring! The facial expressions on the woman and her lady in waiting, their wonderful hairstyles, their jewelry, their clothing!–I can look and look and still find more that amazes me. The animals and flowers are endlessly entertaining, aren’t they? A few years ago, when I still lived near the Cloisters, I took a tour with a docent who focused on the gardens there and what the plants were used for edibly and medicinally, and in folkore . She told us stories about what strengths various plants were believed to lend to the body if eaten, or applied in some way. At the end of the tour, the docent took us to the gallery with the “Hunt for the Unicorn” to show us many of the same plants depicted in the millefleur: foxglove, carnations, roses, lilies, and plenty of others. How amazing that these plants were so well portrayed 500 years ago. Just writing about this memory makes me want to weave!
At the moment it’s the organ and the woven rug in “Hearing” that make me think this is the best tapestry I’ve ever seen. How many weavers sat side by side to work on this? Did more than one weaver work on the organ pipes which are spot-on brilliant? That rug is a show stopper too, not to mention the Lady and her maid. Whatever these weavers made in wages, it was not enough!
“Hearing,” detail from “The Lady and the Unicorn”
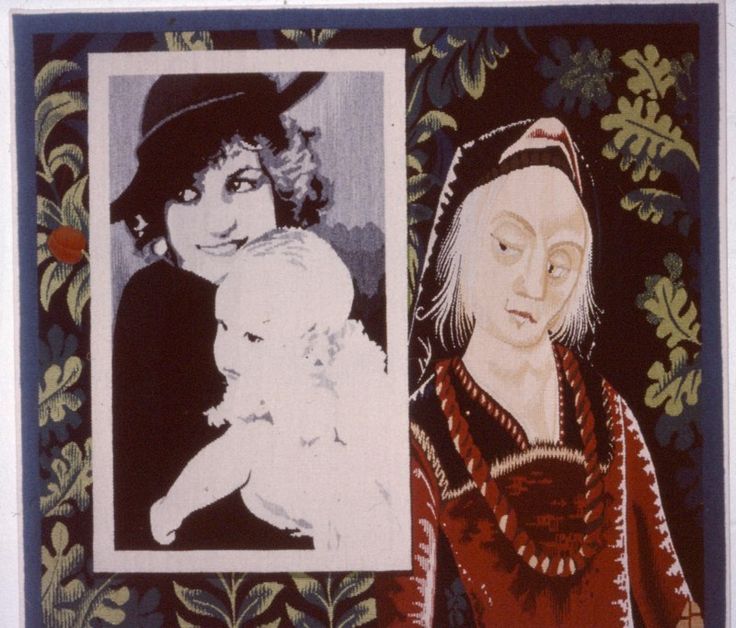
So now I’ll skip ahead to a couple of 20th c. tapestries that evoke these medieval masterpieces with a modern sensibility. We weavers still do not make reasonable wages. Some things never change.
A Medieval Maiden Meets Princess Diana. Archie Brennan.
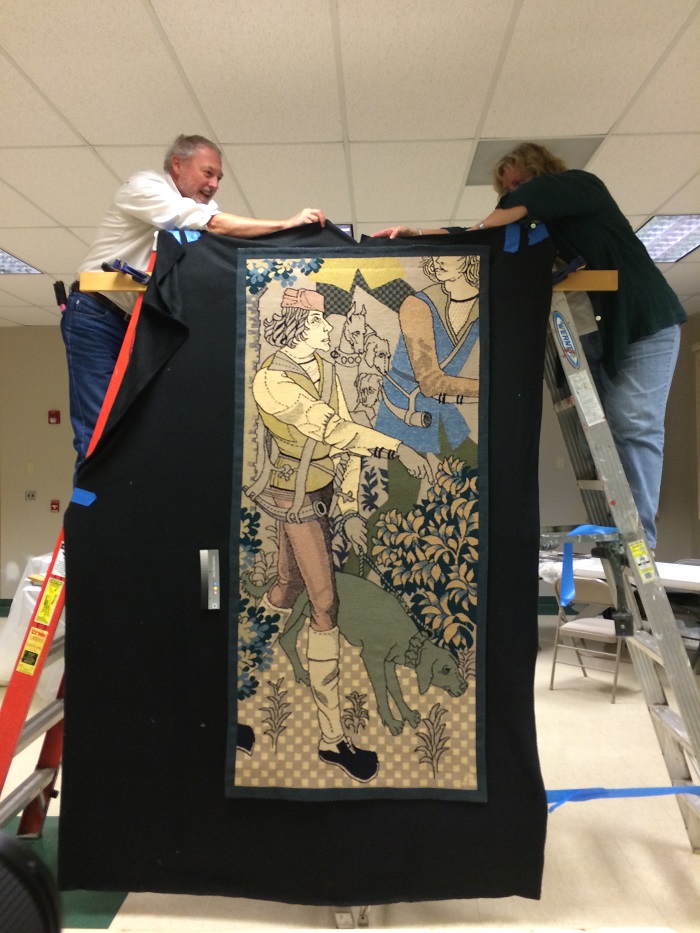
A friend helping me get ready for Bob to photograph Archie Brennan’s “The Lymerer,” which is Archie Brennena’s reconstruction from “The Hunt for the Unicorn.”
Archie Brennan was my teacher for about a dozen years, and actually he still is. There will always be something to learn from him as long as there are images of his work available and memories of his terrific advice. Like medieval tapestries, the more you look the more there is to see.
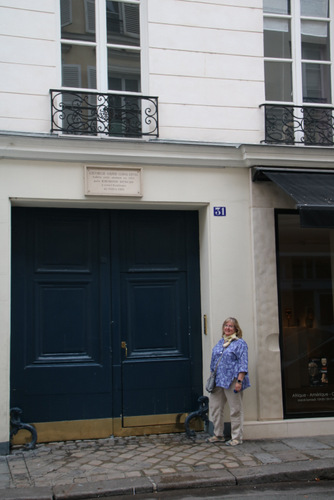
While in Paris, Bob and I visited the address, 31 Rue de Seine, near and dear to my heart. It’s been a well known address over the decades of the past century and a half. First, it’s known as the residence of George Sands (1804-1876), who happened to write about the “Lady and the Unicorn,” as well as set her novel Jeanne in the Boussac castle, where the tapestries lived during that time period. Fast forward a few years, and Raymond Duncan (brother to Isadora) lived at this address where he ran a sort of commune for art students. Archie found himself there in the early 1950s, weaving tapestries for Raymond. I have no idea where Archie’s work there may have gone.
31 Rue de Seine, Paris, where Archie lived briefly in the early 1950s and worked for Raymond Duncan as a tapestry weaver.
You can’t imagine how it made my day to visit this spot! We went into the art gallery next door (to the right in the photo, Hourde Charles-Wesley) to ask about the current owners of #31. The gallery assistant said the gallery has a key that opens those big blue doors to the courtyard. Archie has written about that courtyard, where Duncan made large sculptures. I’ve often felt that I could picture it based on Archie’s descriptions (and one tiny photo I found online years ago). And voila! I saw it for real.
The gallery assistant told us that recently the owners found some artwork in the basement. She didn’t say what–Raymond Duncan’s sculptures? Archie’s tapestries? I doubt it, but something may have been left from that time period, and, if so, likely it would be work of some of the students. Archie felt that Duncan’s work would not stand the test of time. Most of the residents of the commune were students, mostly wealthy American and Japanese women who found it trendy to live in a Bohemian setting and study under Duncan. Archie was one of a few artists who were paid to work there. Interesting times.
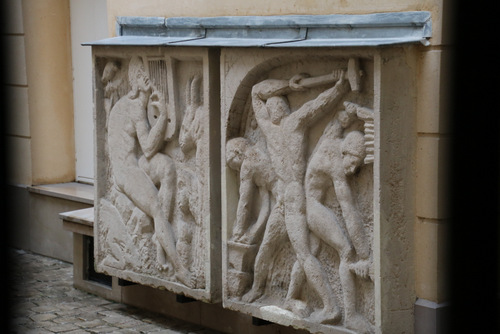
This piece happened to be in the courtyard. I have no idea if it’s one of the pieces found in the basement. I have a lot of questions, and luckily I now have a contact in the gallery next door!
Recounting these days in Paris: the disappointment at not seeing “The Lady and the Unicorn,” the excitement of getting past those big blue doors at 31 Rue de Seine, piecing things together from my (almost) 20 years of working in tapestry, revisiting medieval history; well, it’s been memorable for me. Tapestries, Paris, 500 years apart. It was a moment.
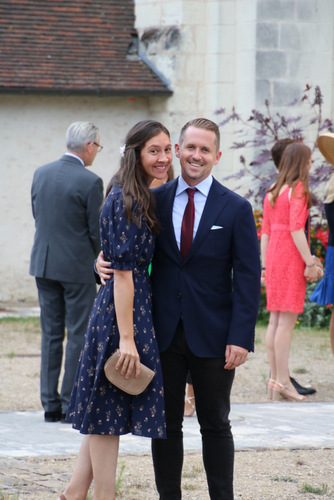
Yesterday Bob and I returned from two weeks in France. The idea for the trip started with an invitation from our son’s partner, Melody, to meet them in Paris before joining them on a jaunt to the wedding of one of Melody’s friends from college, who was getting married at her family chateau in a small village in the Loire region. No kidding!– a family chateau…first built in the 12th c. and renovated and expanded in the 15th and 17th centuries. Even the local church where the ceremony took place was from the 12thc. It was the stuff of fairy tales! It was also an opportunity to spend time together in magical places, like Paris, the Loire region, and Normandy.
Melody and Chris at the wedding of a friend in Lencoitre, France
Of course, I had an agenda. At the top of my list was seeing the Lady and the Unicorn tapestries at the Cluny Museum in Paris. In my heightened state of excitement about the trip, and clearly in my growing ‘feathery’ state of mind, I called this set the Unicorn in Captivity several times before I realized my mistake. Duh…. what can I say? I’ve known that this is the name of the final tapestry in the Hunt for the Unicorn series, so I have no excuse or even possible reason for my confusion. These moments do give me pause to wonder where I’m headed (mentally).
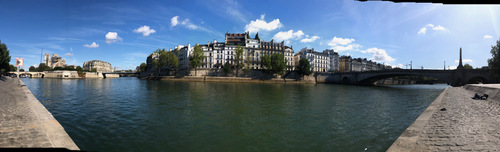
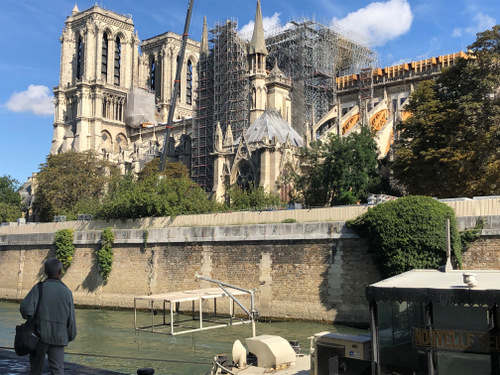
I thought I might spend most of a day at the Cluny , so I planned to do this before the kids arrived, in order not to bore them to tears. That was the first and biggest hurdle of a trip that had a few more hurdles. I have always had the experience that museums are closed on Mondays, so since Bob and I did not get to our Paris hotel until mid afternoon on the first Monday in September, I put off making the Cluny the very first thing we did. Instead, we took the afternoon and evening to travel on the Seine and enjoy floating by such famous monuments–Notre Dame, looking decidedly memorable after the terrible fire; the Louvre; the D’Orsay; the Grand Palais, the Eiffel Tower. It was amazing that we could sit in a boat and see so many beautiful examples of architecture from so many centuries pass by in the space of only a few hours.
Approaching Ile St. Louis by ferry,with Ile de la Cite and Notre Dame in the background on the left.
Notre Dame with all the repair work underway.
First thing on Day 2, Tuesday, I was off to the Cluny, which is when I learned that many museums in Paris are closed on Tuesdays. They had all been open on Monday when I passed on going. Ugh. We learned the hard way–meaning a long walk and metro ride– that the L’Orangerie was also closed on Tuesdays. This a good lesson to check the guide books before making plans, but I may be too old a dog to have this lesson stick. There is more to come on that!
First thing on Day 3, after another trek to the Cluny, I learned the truly terrible news that the tapestries were not on view at the moment. That was the reason that entry to museum was free that day. Their gallery was having some minor work done. Can you imagine what a bitter blow this was? This was the #1 one attraction to me in all of Paris, and I missed it. To add insult to injury, I learned that the gallery with the tapestries would open again this morning–while I am now sitting in my kitchen, drinking bitter coffee. When I learned this, my first thought was to change my itinerary and pay whatever penalty was necessary to stay an extra day at the end of our trip to see these tapestries. A fine plan, but sadly, I will be starting to teach a course on tapestry this week, and I could not spare even one extra day. Somehow I managed not to burst into tears in public over this. It does seem outrageously absurd that in all the years I have hoped to see these works, I managed to finally get there during a brief time frame when they were not on view. And I’m trying not to beat myself up too much since I found no notice online of this short closing of the exhibit. It was just a phenomenal moment of bad luck.
So I bought a book on the tapestries, and some paper bookmarks to hand out to my students during the first class this week. What a pathetic consolation prize. Still, the book is a good resource, not just a book of pretty photos, so I’ve already begun to enjoy reading it. There were two tapestries from a later time period on view in one of the open galleries. Later that day, I did get into the L’Orangerie to see Monet’s large water lily series. A couple of years ago I read the book Mad Enchantment, which is about Monet’s last years, when he painted these large scale works as his contribution to the war effort. He wanted to leave behind something truly French since everyone believed that France would soon be lost to Germany. He was suffering from progressive cataract problems, he was aging, and he had bouts of extreme mood swings. Reading this book added to my knowledge of what went into the display of these huge works.
The Lady and the Unicorn tapestries (the six that are extant) were woven around 1500, the height of the Middle Ages. They were woven in a workshop in Flanders (now Belgium), where being a tapestry weaver was a well known occupation. The Hunt for the Unicorn series was woven about the same time. Scholars know that both sets were designed in Paris, but I have not found a reference for where the “Hunt” series is thought to have been woven. In fact, no one is certain that the seven tapestries now displayed together at the Cloisters (part of the Metropolitan Museum of Art in New York) are from the same set. No one can determine who commissioned the works. Both the “Hunt” series and the “Lady” series were rediscovered in the mid 19th c. The “Hunt” series had been looted from its Paris home during the French Revolution (first recorded hanging in the Rochefoucauld family residence in 1680), then rediscovered in 1850s, in a barn. The “Lady” series was discovered in 1841, also in disrepair, in a 12th c. castle in Boussac, in what is now the Nouvelle Aquitaine region.
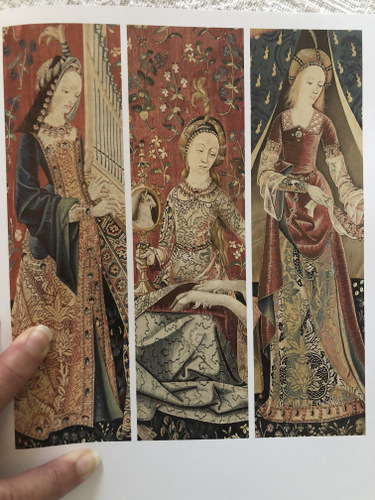
Here are the six ladies in the Lady and Unicorn series. Each one represents one of the five senses, plus one extra that is a bit of mystery. These first three, which I photographed from the book I bought (I certainly didn’t want to imply that I’d actually seen these beauties, so you can see my finger holding open the book) represent, from left to right, hearing, sight, and the mysterious one which is called ‘Mon Suel Desir.’ That roughly means heart’s desire.
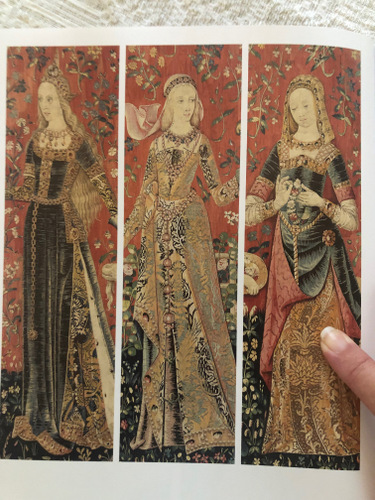
Here are the next three: touch, smell, taste. These are the most beautiful women in tapestry. Their clothing is exquisitely portrayed, although the Devonshire Hunt tapestries might be more exciting for examining how to weave garments. This is certainly the resource I’d turn to for examining faces. They are stunning!
There were two tapestries on display in the gallery of medieval art at the museum. One is called “The Bath,” from the 16th c. and shows a medieval lady in the bath with her ladies in waiting. I read on the nearby placard that bath scenes were a popular subject at this time. I certainly know that has been true for other periods of art, but this particular case is earlier than I expected. It seems to me that tapestries in the Middle Ages and the Renaissance were used for telling great stories, either from mythology or the Bible, or stories about the importance of the person who commissioned the work. The unicorn and his many layered representations of maidenhood and Christology was also a popular subject during the Middle Ages. The thought that so much work went into depicting a bath scene is pretty amazing to me!
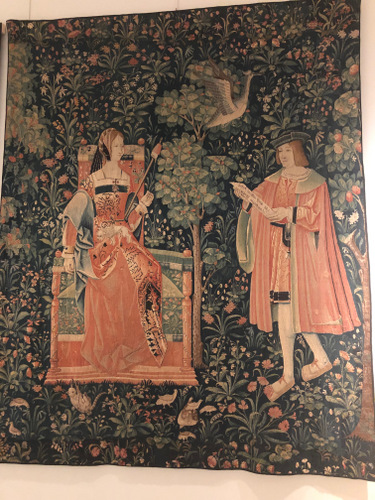
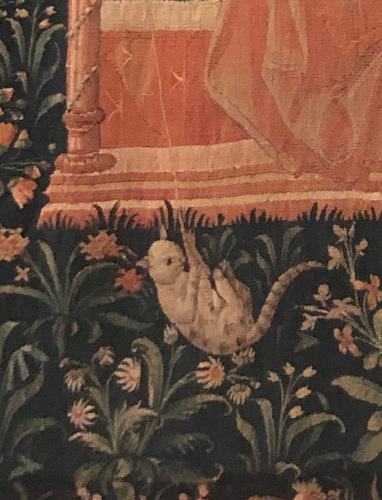
It was the second tapestry that really caught my attention. It is about a letter, but I was struck by the wonderful depiction of a woman spinning. There is a cat playing with the spindle and a dog in the woman’s lap who appears to contemplating the cat. It so wonderfully captures everyday life. Who knows about that letter the man is reading to her?….. is he reading it because she cannot read for herself? ….because nothing can distract her from her spinning?…..even a cat batting at her spindle cannot pull her away from her spinning. I love the possibilities!
Look at her dress and the fabric on the chair. And of course, there is all the millefleur going on as a background. Have you ever wondered about that style, and why the weavers created such elaborate, busy backgrounds during this period? I can give you a short answer: when you are weaving a detailed image on a plain background, you are likely to run into a lot of tension problems between the many small shapes and the large background. Trust me on that one….but don’t take my word for it; ask any tapestry weaver. Also, imagine a group of weavers sitting at a loom together weaving an image. Would you want to be the one who is weaving a solid background while your companions are enjoying all the details involved in the woman’s face, her gown, the dog, the cat? Simple answer, but likely true. I can’t take credit for this. I learned it from Archie Brennan, who also believes that prior to the Renaissance the cartoonist was likely to have been an experienced weaver. I believe that too. I wonder if it will ever be proved.
And I can’t resist adding one more thing. The text in tapestries from the Middle Ages and the Renaissance was always quite elaborate. It happens to be easier and more effective to use angles and curves for letters than to weave block letters. Angles and curves allow you to create text that does not have as many slits that will not need sewing afterward. It looks more complicated but was actually more pleasant to weave, with less finishing work afterward.
I can’t close without a glimpse of our adventurous companion, Melody. She has a motorcycle license and enjoys touring her vacation destinations on a bike. I spent Rob’s entire adolescence trying to keep him from getting a motorcycle. He got his license about a nano-second after he graduated from college. Now I have two motorcyclists to worry about.
I had to hold my breath (and say prayers) when she drove in busy Paris traffic. It’s not a great shot, but I couldn’t give the photo my full attention since I was busy praying (and not breathing).
In spite of missing my most significant reason to be in Paris, it was still an excellent adventure. There is more to come, not only from our time in Paris, but also in the Loire region and Normandy. I had some excellent adventures in lace and other handwork along the way.
For some, summer ends this weekend. I’m an equinox/solstice season follower, so it will be summer until September 21.
This summer has held some wonderful distractions. I’ve missed my weaving guild meetings during our summer hiatus, and I missed our regional conference too….but other things have called my attention and been incredible opportunities.
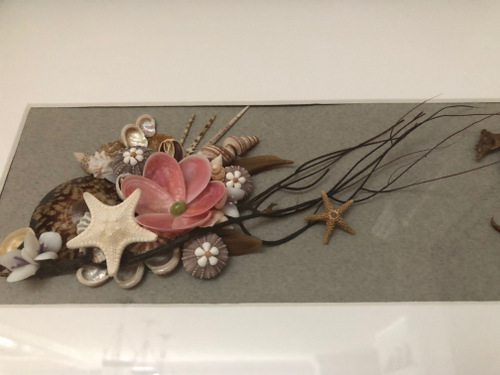
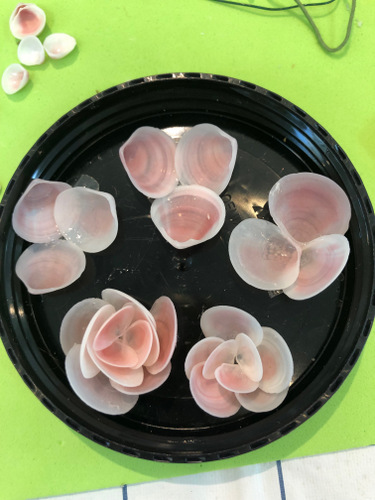
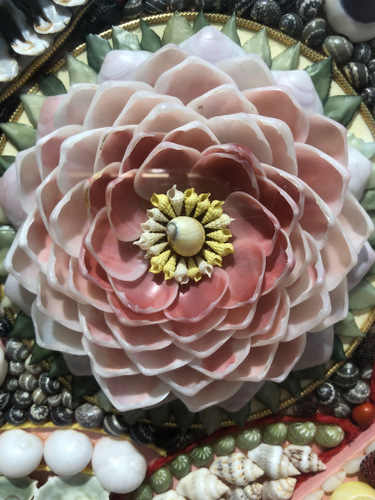
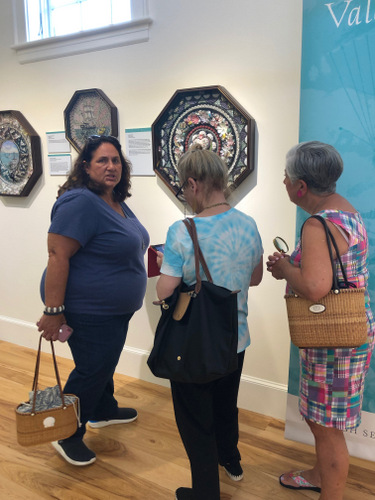
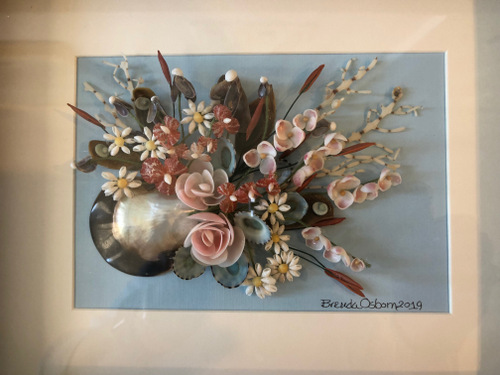
The biggest event of my summer happened just earlier this month. A friend of mine who now lives full time on the Cape (in what was previously her summer home), invited two of us rather old friends to spend a week with her studying with a well known Sailors’ Valentine designer. Full disclosure here: I am not a huge fan of sailors’ valentines. They are overly fussy to me, and it’s hard for me to take in so much visual busy-ness. But there are also shell compositions that evoke garden scenes, or flowers in a vase. Those really get my attention. This small arrangement really pulled me toward wanting to try my hand at some shell designs.
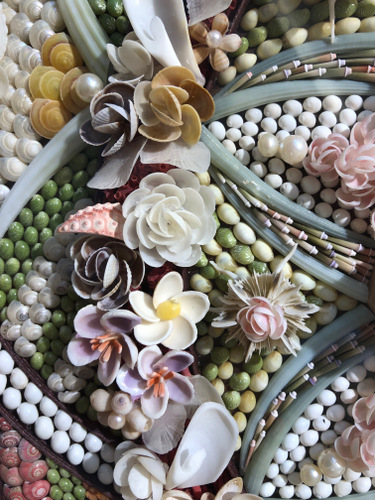
One of Kayrn’s shell designs
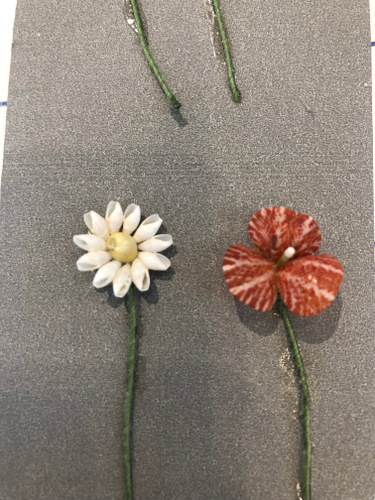
We spent 4 days learning to make a few flowers under the tutelage of Sandi Blanda, in order to create our own floral designs. Here are a few of the flower techniques. We were using E5200 glue, applied with a toothpick or bamboo skewer.
Daisies and something I can’t quite identify.
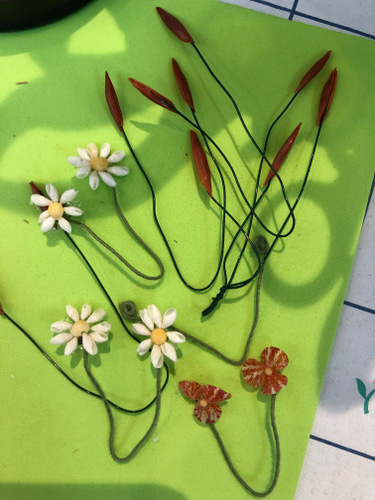
A few of my favorites! Daisies, a type of flower that is quite familiar but I can’t name(!), and some reedy looking things, like cattails you find along the shoreline.
A little tray of ‘rose cups’ in the process of becoming roses.
You have to make a lot of flowers to create a design! You need more than you’ll actually use just so you have some possibilities for arranging. At this point I felt mine design was ready to frame under glass in a shadow box. I did not want the look of a vase of flowers; I was trying to achieve an underwater garden of things growing out of a shell and bending in the current.
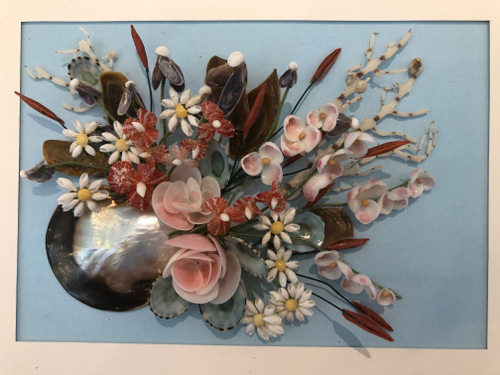
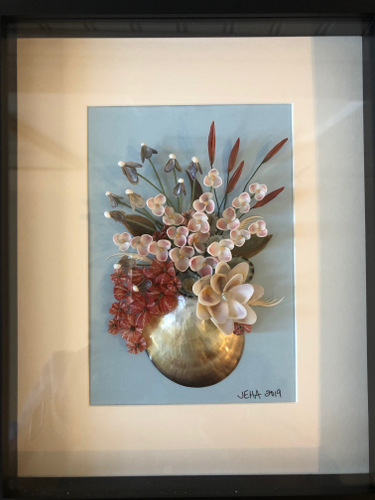
My more experienced friends made beautiful flower arrangements in shell vases.
Karyn’s finished piece
Janet’s piece.
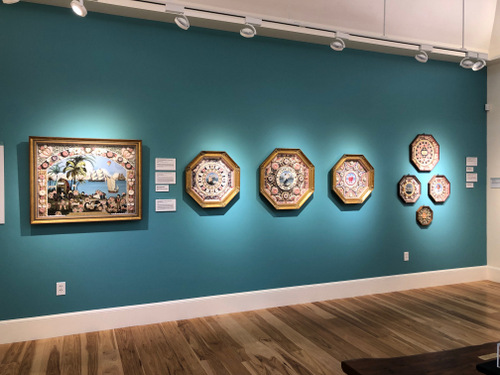
One of the afternoons we took a break to visit the Sailors’ Valentine exhibit at the nearby Cahoon Museum. This is shell extravaganza!
Now you’ll get a good sense of how many tiny shells it takes to make just one flower in these elaborate valentines! Egads!
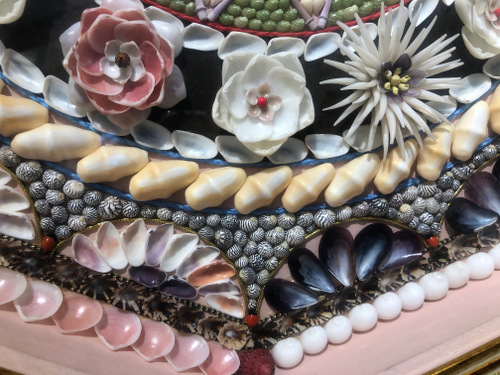
I love the spikey flower on the right!
This is just a small section of a large valentine. It just boggles my mind that someone could make something so intricate!
For many years, people thought sailors made these valentines for their sweethearts during their time onboard, much like the ivory work and Nantucket baskets made during this same time period. In recent years it has come to light that many of the shells used in these designs came from Barbados, and often the valentines were wrapped in newspapers from that island. It now seems more accurate that islanders made these elaborate shell arrangements, and sailors bought them for their loved ones.
The exhibit at the Cahoon, which ends tomorrow (Sept. 1), features traditional valentines as well as the work of some talented current shell artists. Our teacher was featured in the exhibit, and she has a solo exhibit in one of the upstairs galleries.
Sandi Blanda is in the center of this photo, showing us something on her ipad while we admired one of her pieces in the main gallery. My friends are experienced basket makers too. Take a look at their wonderful Nantucket tote bags!
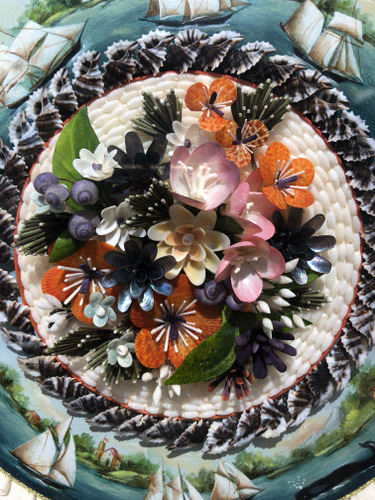
This type of shell work is incredibly fiddly–as you might imagine! It was tremendous fun while we were together. The thought of tackling another, especially on my own, is a bit daunting. I don’t know if I’ll do it again. Meanwhile, here it is, framed under glass.
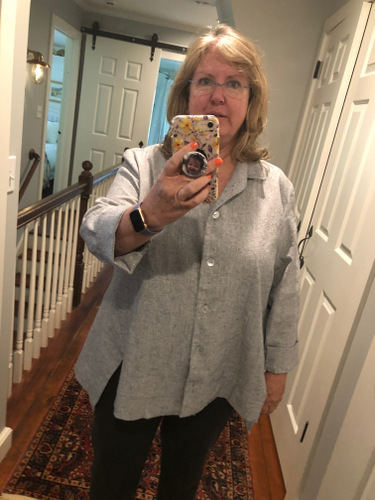
During the rest of this month I’ve been sewing. Yes, sewing. I’m not terribly proficient at it in spite of learning when I was about 12, and in spite of having two grandmothers who were quite excellent at it. I’m ever hopeful. I have some wonderful handwoven fabrics, and someday I hope I’ll be wearing them as garments.
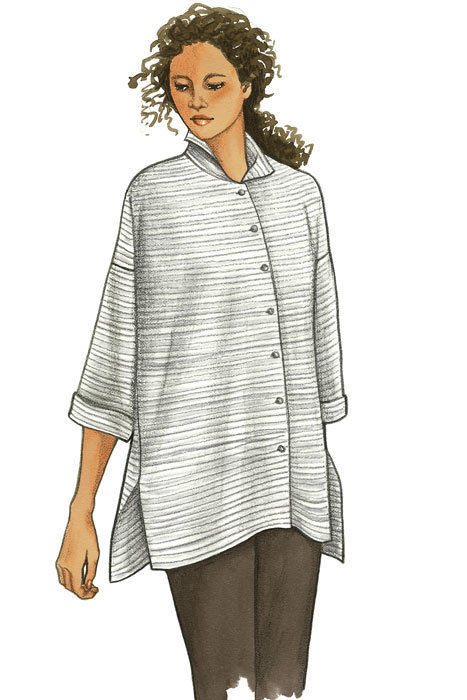
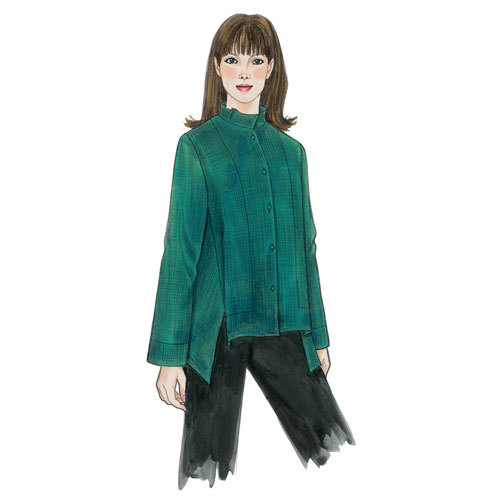
My local sewing shop has been offering some classes in fun techniques and a couple of cute shirts patterns. Both shirt patterns are from The Sewing Workshop.
The London Shirt is one that I’ve now made four times. I love it! In my favorite version I used a French fabric–a lightweight linen print that I bought in Martinique.
And the other is the Liberty Shirt that I just finished last week. It has a bit more fiddly construction.
Someday I’d like to make a little something out of any one of my handwoven fabrics, but I’ll need a lot more practice sewing first…
WAIT!!! How could I forget that there is one more BIG thrill to my summer! Tomorrow I’m leaving for two weeks in France! At the top of my must-see list is the “Unicorn in Captivity” series at the Cluny Museum*, followed by the Bayeux tapestry on our excursion to Normandy. I will also see lace in Bayeux and in Alencon, and a couple of special haberdashery shops in Paris (what I would call notions shops). I can’t believe the time has finally come to have this adventure! I’ll be taking my Liberty shirt and three of my London shirts. In fact, I’m calling the one made with French fabric my “French London.” I can’t wait to have an end of summer fling in France!
*Oh boy, was that a senior moment! Not my first either. The “Unicorn in Captivity” is the title given to the last tapestry in the set at the Cloisters, which is known as the “Hunt for the Unicorn” in its entirety. I’ve known this forever …..so why did I have that little brain malfunction? The set at the Cluny is called the “Lady and the Unicorn.”
Isn’t it grand? There have been summer classes to take, regional conferences to attend, as well as some down time for sitting in a chaise lounge in the shade, doing some knitting and reading a few of the latest weaving periodicals. I’ve done a bit of all these things.
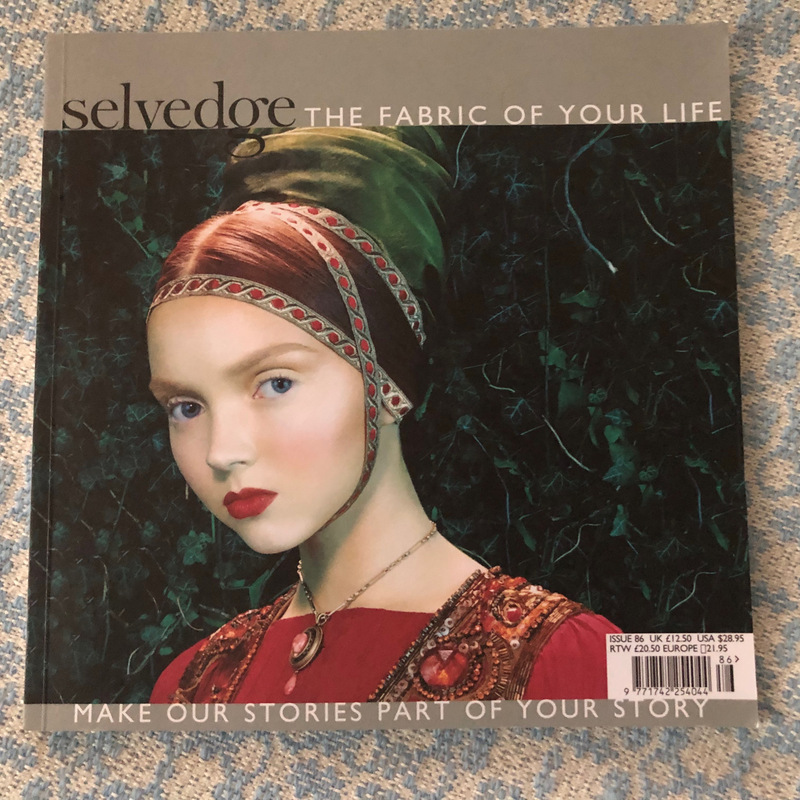
Bob and I made quick trip to Camden, Maine about a week ago, so on the way home I got to make a stop at Halcyon. I bought the Sept/Oct issue of Handwoven as well as an issue of Selvedge. With a price tag of almost $30, I don’t buy Selvedge too often. But I ask you, how could I resist the Renaissance issue??
The Renaissance issue 2019
With articles about the global textile industry, costumes for Anthony and Cleopatra for the National Theatre, a renovation of the Whitchurch silk mill, two articles on lace– and the clencher for me–an an article on “text-iles.” Oh boy!
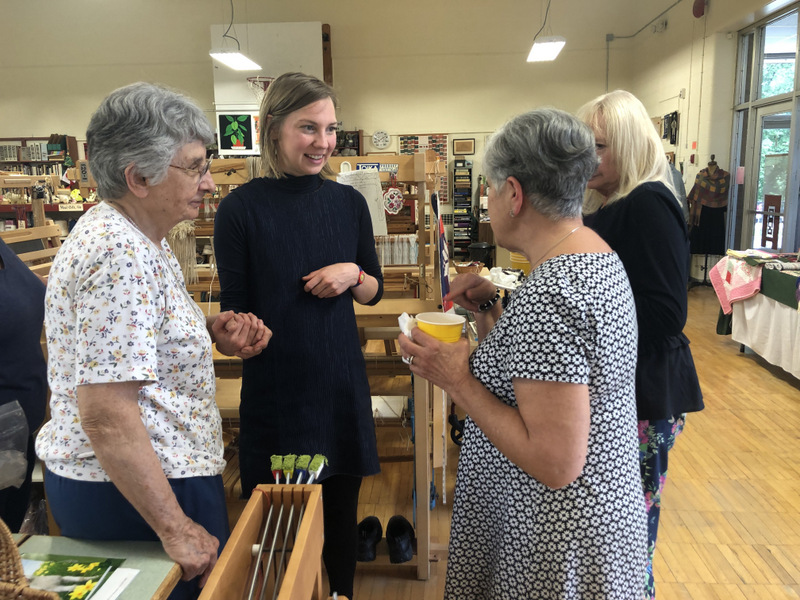
My summer got off to a great start at the last meeting of the year of my close-knit weaving group that goes by a couple of names–Wacky Weavers, The Flockettes, or simply the Marymount Weaving Women. The group has been going for 40 years, led by Sr. Bianca from the order of the Religious of the Sacred Heart of Mary. Although I’m not Catholic, I’ve been in the group for more than 25 years now. In May, I arranged for Mae Colburn to speak to us. She is currently involved in a number of remarkable textile projects, and she is likely to be an important voice in contemporary weaving.
Mae is the daughter of a weaver with Swedish heritage and expertise in Scandinavian weaving traditions. Mae’s mother teaches traditional wadmal weaving and has developed a fulling mill that will soon be available in the US. Here’s a link to some of Carol Colburn’s interesting projects.
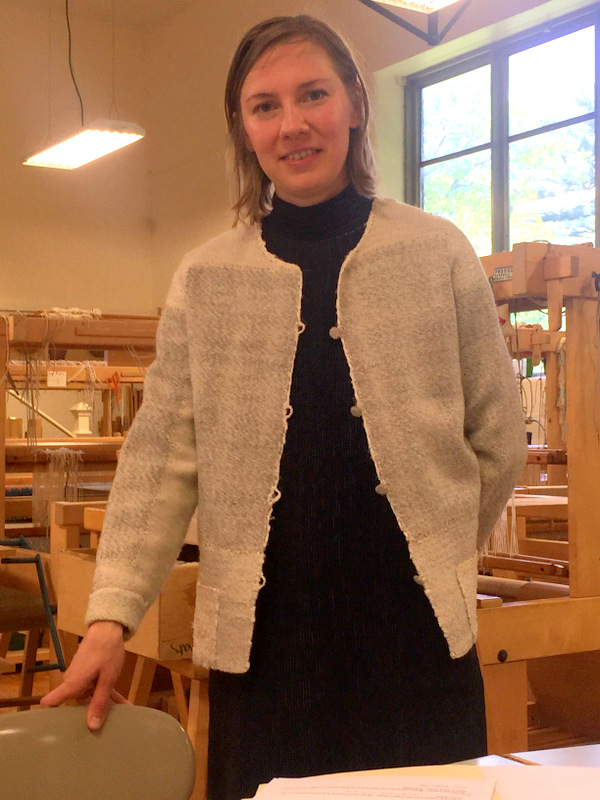
Mae is currently Helena Hernmarck’s assistant. She is taking to tapestry as well as she took to weaving cloth for clothing. Mae is also part of a group of weavers producing one of a kind garments for well to do clients. You can read about that here. Mae’s presentation to us was about finding one’s way in a fast paced environment with high technology, by choosing to make things entirely by hand without any modern technology (beyond the use of administrative technologies). Her company, called Friends of Light, uses only locally sourced fibers that are then spun and dyed and woven to shape (no cutting!) by members of the group. The group intends to pay themselves a fair wage for their labors. I hope they can make this work! They already have a handful of commissions, and they’ve already realized that they did not account for a number of administrative costs. One of Mae’s interesting points in her presentation was that although we now live in an age where ‘time is money,’ there may be a desire for things made entirely by hand and for the benefit of one client only. I hope she and her Friends of Light collaborators are successful. That would be a boon for weavers everywhere–not to mention a boon other crafts as well.
Here is Mae wearing one of the made to order jackets. There is not cutting–each piece of the garment is woven to shape for it’s intended recipient. Yeah….
At the end of the day, I happened to get this photo of Mae and Sr. Bianca together. For me it’s a touching image of the generation of weavers who taught me to weave, holding hands with the future generation of textile artists who are now coming of age. Sr. Bianca is 91 now, and Mae is….well, she is a beautiful young woman! It was a memorable meeting.
Along the way to this moment in high summer there were regional conferences everywhere. I did not make it to NEWS this year, and I was pleasantly surprised to get a survey asking me why I did not attend. I guess the powers that be in New England want to know what they can do to entice some of us to attend. I wish I had gone for a day, to see the exhibits and to visit the vendors, and, most of all, to hear Mary Zicafoose give the key-note address. She is a great speaker and I’m still smarting a bit from missing it. A few friends let me know I really missed a good presentation (but I already knew that!)!
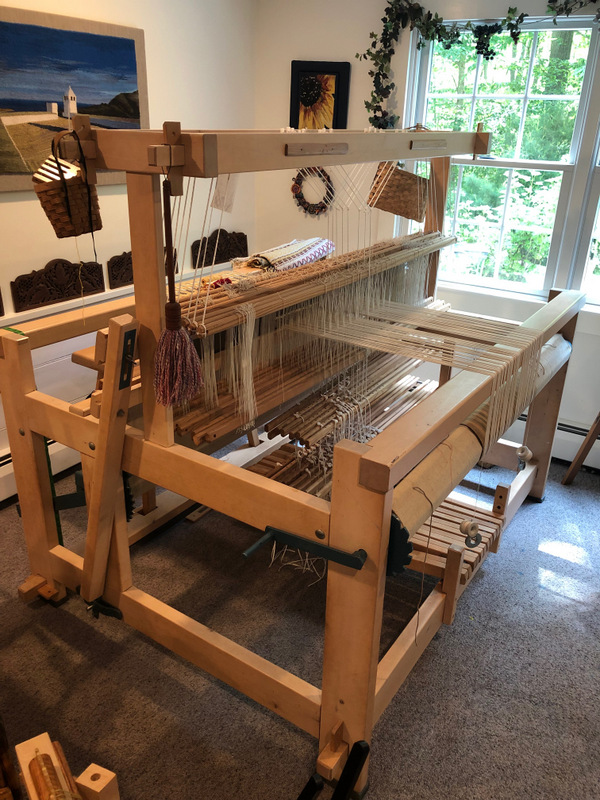
There are big changes afloat in my weaving life. I have decided to make a total re-do of my studio space. Over the few years I’ve lived here in what is our ‘retirement house,’ I have managed to to fill my generous space so that I can barely move. I have made the decision to sell my two biggest floor looms and replace them with only one loom. That will make a noticeable difference in my space. My big Toika (60″ weaving width) is already gone! It’s seems miraculous that it sold so quickly, and I give all credit for that to the Weaving Center at Marymount Convent. The weavers there are not afraid to dream big, and they all love Toikas, since that is what Sr. Bianca has in the studio. That loom was sentimental to me. It came from my dear friend June, who was part of the small group I mentioned earlier–the Wacky Weavers– and who was responsible for my joining the group. Now her loom lives with someone else who weaves at that center. Perfect.
Soon I will put my 40″ AVL (16S mechanical dobby) up for sale. I have already scoped out the loom I want!– a 60″ AVL computerized dobby with 16S. I have the very loom in mind and have agreed to get it as soon as my AVL leaves the premises. Want a mechanical dobby? Get in touch! It’s got lots of great features, and if you live in an area that loses power due to storms or severe winter weather, you can still weave on a mechanical dobby.
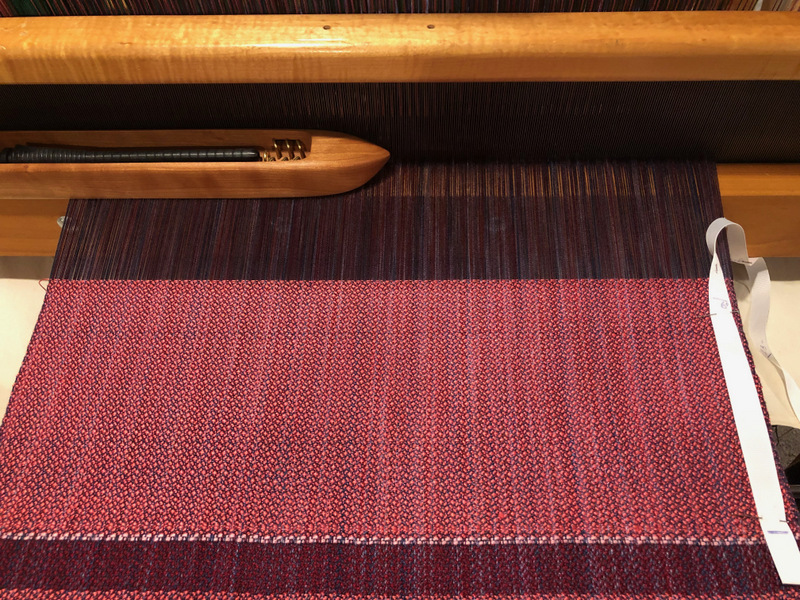
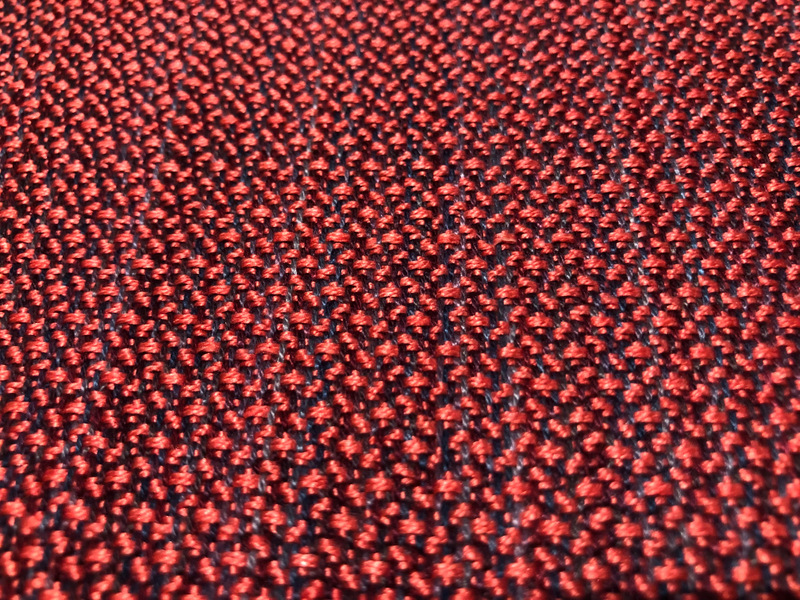
This is the latest fabric I cut from the AVL. It’s a JOY (Just Our Yarn) warp with a Treenway silk weft. I wanted to make a jacket with the fabric, but I’ll be lucky to get a vest out of it. Somehow my 5 yard warp turned into only 2 3/4 yards when woven. Clearly, my warp was not 5 yards!
It’s an interesting weave structure–sort of a broken twill on 10 shafts that creates little pebble shapes. It has great drape.
When all these changes fall into place, I’ll have my big Shannock vertical loom for tapestry, a big dobby for fabric weaving, a taka dai, and a sewing machine and serger in the main room, with plenty of wiggle room to actually get to these things. In the adjacent room I have two walls of bookshelves that hold my textile library, and in the middle of that room is my small 8S Baby Wolf. I’m so excited to get to this next phase of organization.
It’s high summer, and I have great hopes for getting more space with better organization by the time fall rolls around. Here’s hoping!
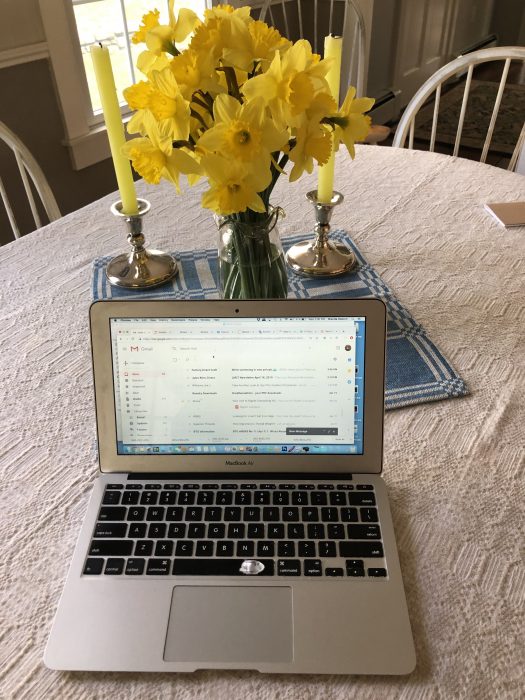
Do you get a lot of promotional emails from places where you’ve placed orders, or looked at websites? These days my inbox is mostly full of promotional emails. It’s such a drag to delete all these unwanted messages. In spite of UNsubscribing from many of them, and making a filter that sends many of them to the trash automatically, I still have to wade through so many unwanted messages. Ugh.
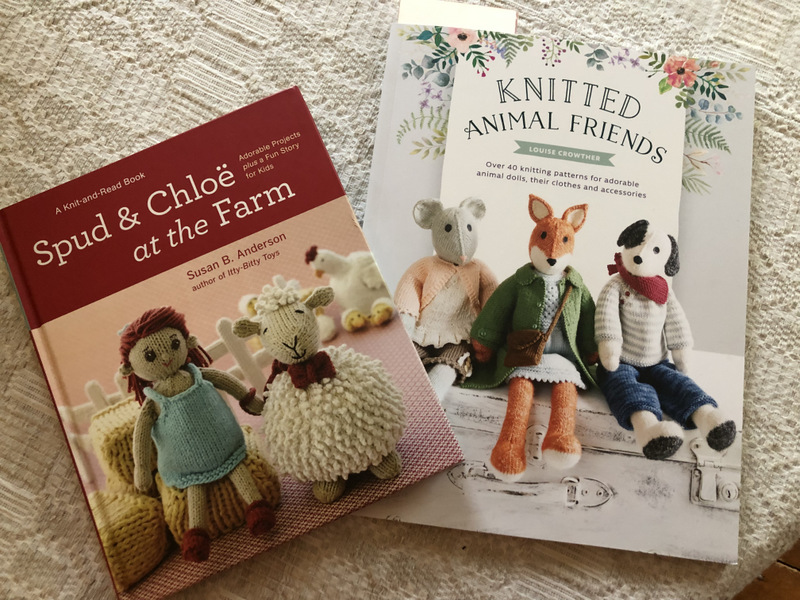
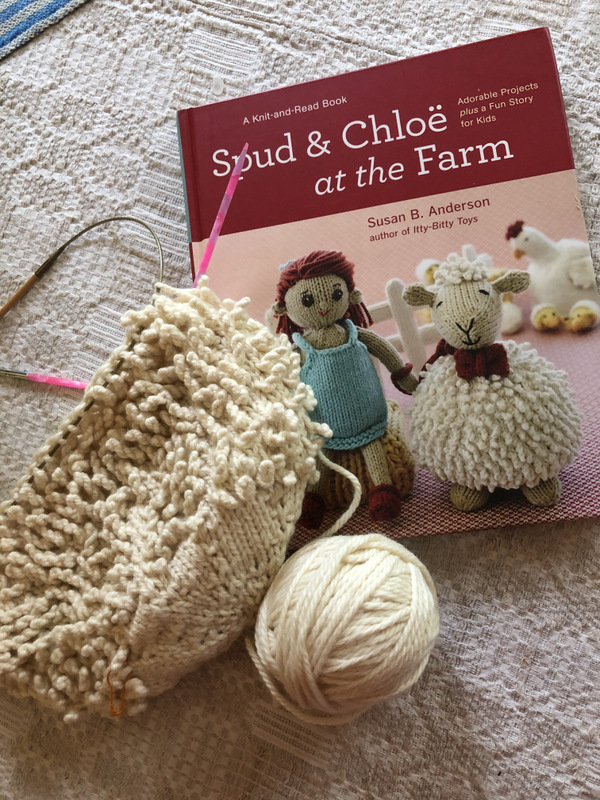
Sometimes there are nice surprises in all that junk. Earlier this week, I got an email from Knitting Daily about a new book of adorable knitted animals. I haven’t seen a book this cute since Spud and Chloe!
Sorry to show you a promotional video after just complaining about my inbox clogged with emails. It’s cute though, isn’t it? I have a partially finished Spud that will go to my granddaughter Tori eventually. I put it away when it came time to add plastic pellets and stuffing to Spud’s body. I didn’t have either, and I never ordered them. Well, today I’m back on it and expect to have those materials tomorrow.
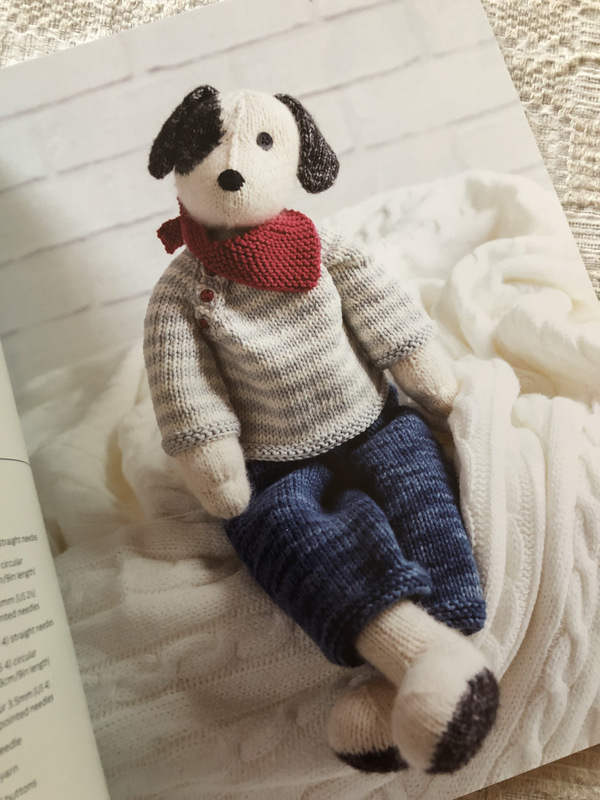
BECAUSE….. I need to make a few of the adorable animals from Knitted Animal Friends next! It would impossible to choose which animal to knit first, so I feel a bit lucky that the dog (George) called out to me as an almost-Bobi-look-alike. Bobi was my son’s dog for about a decade, and when Tori was born she quickly loved Bobi almost as much as she loves her Mom and Dad. Bobi died in January, and Tori still talks about him. When she colors dogs she always makes them “brown like Bobi.” This knitted dog, done in Bobi colors of white and brown, will look very much like him. The dog in the book even has a red neckerchief very much like Bobi used to wear.
Here’s an iconic moment in the Osborn family of Rob and Bobi.
Both books are full of fun things to knit….if I didn’t have grandchildren I would definitely knit some these for myself. And at some point I will knit a Tori-type Chloe to go with the animals.
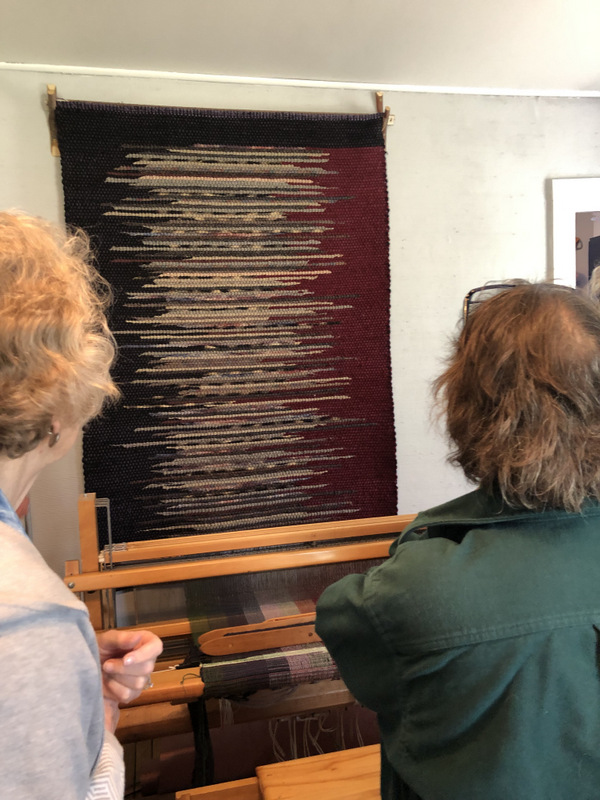
Yesterday my small group weaving guild met at Jan Doyle’s weaving school, in the Octagon House in Carolina, Rhode Island. It’s a fun place to visit, and a I know it’s a fun place to weave. I think spending time with other weavers, or other people in whatever activity you love to do, always enhances your own work.
Two friends admiring a rug woven in double weave with inlay.
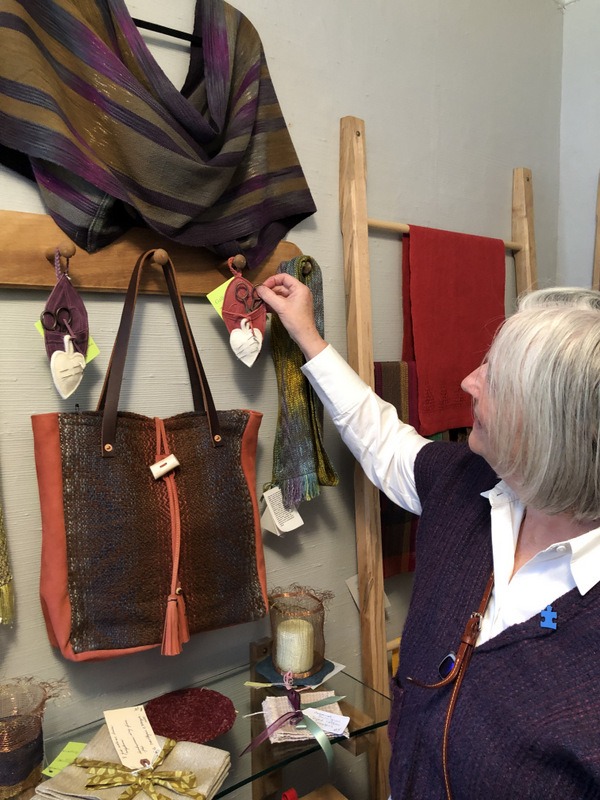
There is a shop in the center where weavers can sell their work. Pretty tempting stuff. I managed to get out of there with a wonderful indigo ikat woven pin cushion. I dearly wanted a wool tweed overnight bag. Maybe it will still be available next time I visit.
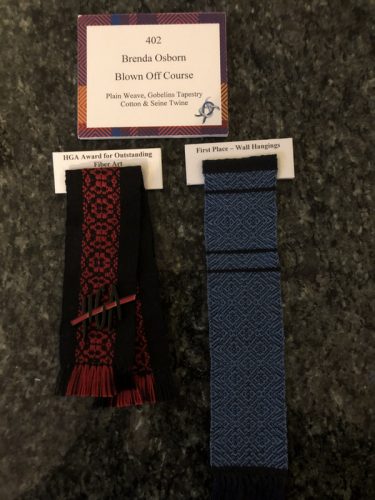
In other news, my little Portuguese Man of War tapestry got returned to me yesterday. I’m quite thrilled with these beautiful ribbons, and I plan to frame them together. I love the HGA pin most of all.
This is short because I have a date with my Baby Wolf Combby. Linda from the service department at Schacht spent some time on the phone with Bob earlier this week. In fact she ‘facetimed’ Bob in order to take a look inside our combby to see what might be malfunctioning. She instructed Bob on straightening all the wires that connect the shafts to the solenoids, and now the loom weaves like a charm. At least it did for 20 minutes with no misfires. I’m going to weave for an hour or two now. I am SO hopeful that I can begin to trust this loom. That’s a big hurdle!
It’s a damp, bedraggled Monday after Easter, but spring is definitely here. Bob saved a nice bouquet of daffs before the deluge began. We’ve had our share of April showers now.
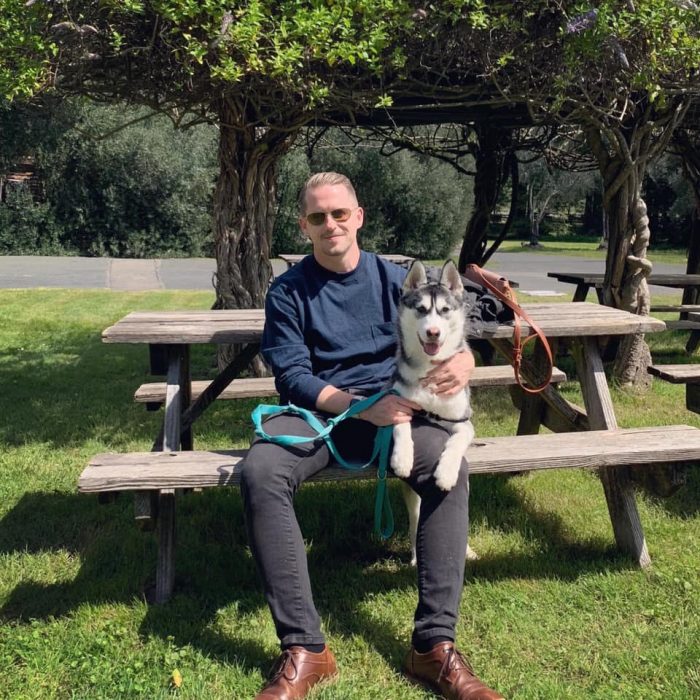
This was our first Easter without any family. It was odd for sure, and I don’t plan to do it again, but I had a wonderful afternoon on Saturday with my sister, sitting in a coffee shop and catching up on a couple of months of news together. Before that, Bob and I spent 10 days in California with Chris and Melody! Those wonderful days should keep me smiling for a long time.
Northern California is a wonderful place, even without the added treat of being of with family, and being there in April when the hills are so alive with poppies and Indian paintbrush and myriad other wildflowers was just the thing. It was a perfect time away. To top things off, Melody and Chris made sure I got to visit some places that have been on my ‘wish list’ for many years.
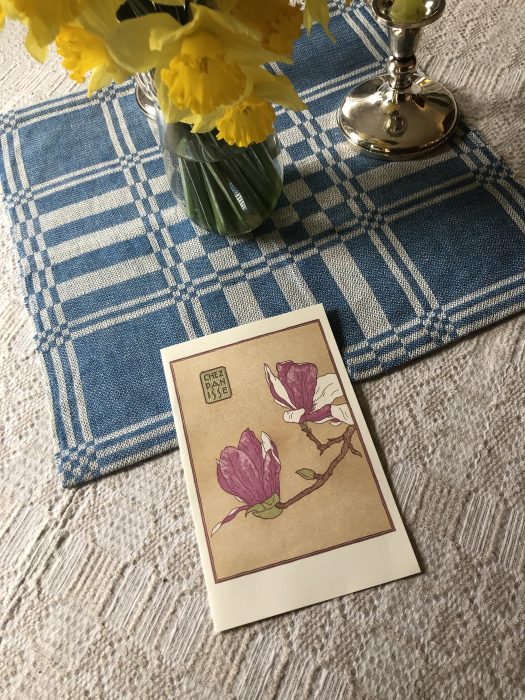
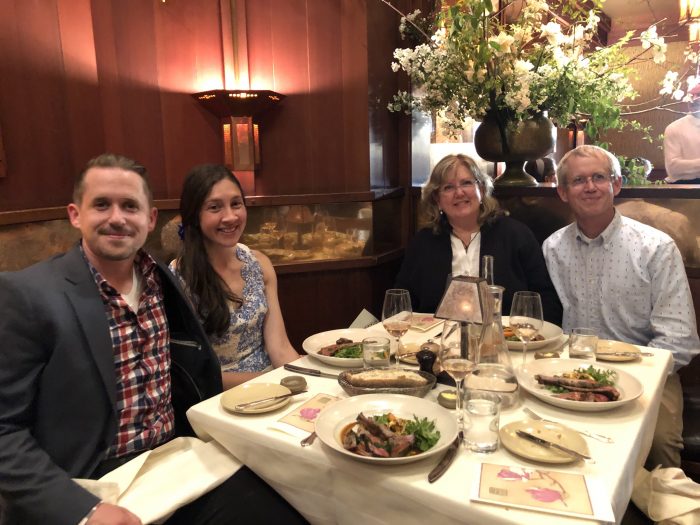
How about dinner at Chez Panisse? I actually never thought I’d do this because it is on the other side of the country, in a town I’ve never visited, even when I was visiting the West Coast. But fast forward to now, when our younger son works in Berkeley and lives just a few minutes south! I’ve been intrigued with Alice Waters since she started this restaurant, when I was a teenager on the verge of falling in love with cooking. Remember the 70s?–the back-to-nature movement to whole grains and locally sourced, sustainable veggies? Molly Katzen and the Moosewood Restaurant? And how about The Vegetarian Epicure? For me, Alice Waters is all tied up with my initiation into cooking. Her restaurant conjures up all kinds of magic for me, and the reality of it was every bit as magical as all my years of imagining! We got keepsake menus for the night…. Amy Dencler was our chef that night, which was a thrill to me since I’d read about her joining Chez Panisse. And to top off a stellar evening, Alice herself showed up for a while during during the prep of our meal.
Dinner is served.
My favorite course may have been the soup, which was a pureed asparagus. I decided to make it for our Easter dinner yesterday. I looked online for a recipe by Amy Dencler, or even Alice. No luck, so I fell back on Julia’s recipe from the first volume of Mastering the Art…. which I already knew from years of making it that it would be delicious!
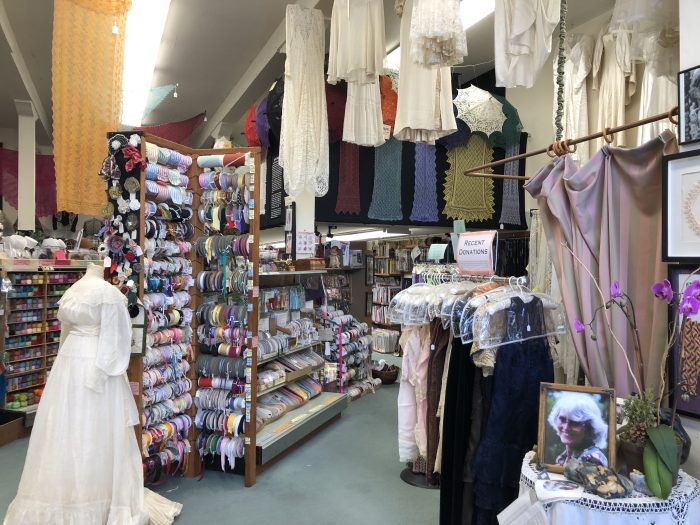
The Lacis Museum has also been on my wish list for eons. It is also in Berkeley. All these years, Berkeley has just been a place name to me. We’ve been to San Francisco and along the northern coast of California numerous times, but I’ve never included a stop in Berkeley. I never even bothered to look up where the Lacis Museum is located. So I’m not sure you can imagine how excited I was to learn that Chris works only a few blocks from there!
Inside is an unbelievable opportunity to buy lace supplies for lace knitting, tatting, bobbin lace, embroidery–I think that’s just the tip of the iceberg! I got some supplies that I’ve been putting off searching for online.
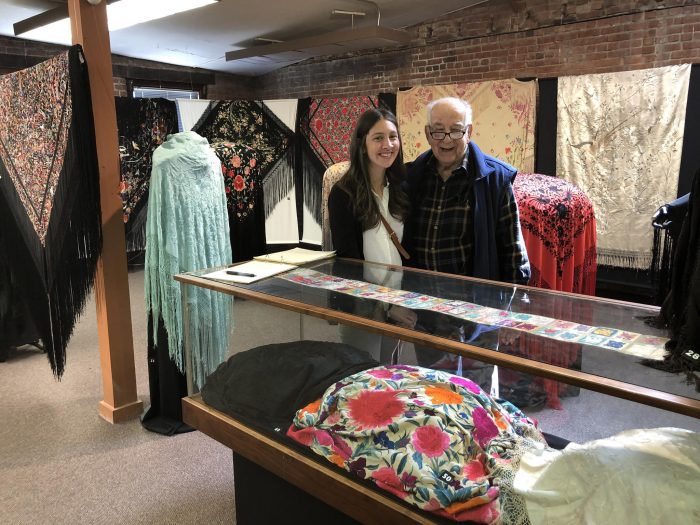
Upstairs from the shop is where the lace exhibits and classrooms are. At the moment there is an exhibit on embroidered shawls from the late 19th and early 20th centuries. Jules Kliot arrived to take us up to see the exhibit. I have been getting the email newsletters from him for at least a couple of decades. Now I’ve met him!
There are so many shawls in this exhibit, and all beautiful. The early ones are all hand embroidered with hand tied fringes; Jules said they took 10 years to make. Later shawls were machine embroidered with machine tied fringes. I took a lot of photos which I’ll enjoy looking at in detail for years–some in natural shades and some in such brilliant colors.
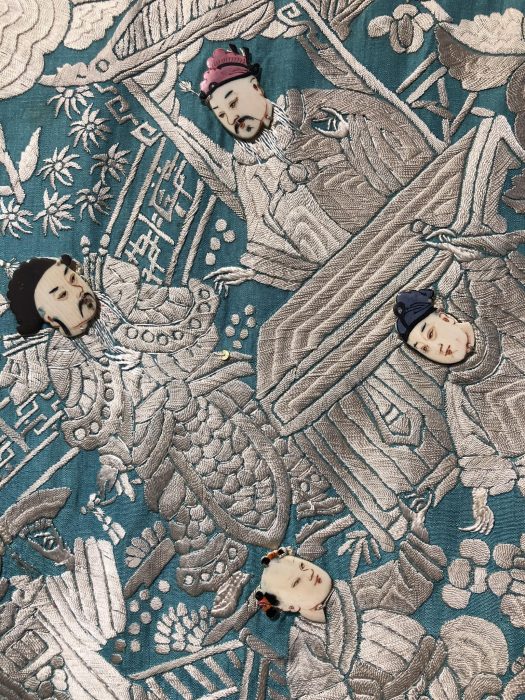
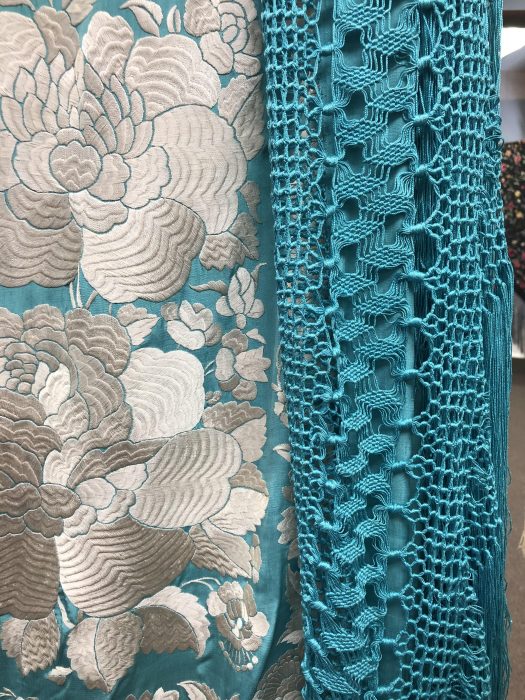
I want to include all the photos I took, but how about just this one shawl? It is hand embroidered with attached faces done in painted porcelain. The embroidery was all done in shades of cream, natural, ecru. One or two of the faces were missing, and underneath the missing porcelain faces there were still embroidered faces.
The hand-tied fringe is pretty elaborate too.
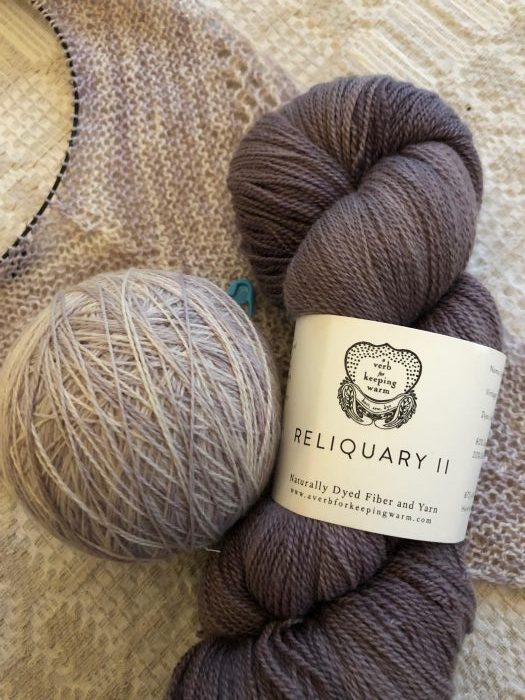
Next on my wish list was a shop called A Verb for Keeping Warm, or AVFKW….kind of a mouthful! It has only been on my list for a couple of years, since I keep reading about it in the Making and Madder magazines. I didn’t even know it was in Berkeley until I just happened to be looking at one of my knitting patterns while out there.
What a fun shop. They dye all of the their own line of yarns with natural dyes. Their own yarns range from worsted weight to lace weight, in wonderful wools and blends that include silk and alpaca. As you can see the shop is full of luscious yarns and wonderful knitted items to entice anyone. Look at all that dried indigo hanging along the wall. They grow about 250 pounds of indigo every year.
I fell for a knitted shawl on display designed by Andrea Mowry of Drea Renee Knits called “Find Your Fade.” You can make it in as many as seven different colors, or just one. I took a look at the naturally dyed, laceweight merino/silk blend yarns and chose two skeins that were dyed with logwood. My version of the shawl will use these two skeins. I also bought a packet of ground madder.
There were so many highlights to this trip–a visit to the UC Berkeley campus where we could see all the way to the Bay from Sather Tower. We visited Pegasus bookstore which has been an online resource for me for years. Now I’ve been to the brick and mortar shop, where all three of us–Melody and Bob and I–found books we had to buy.
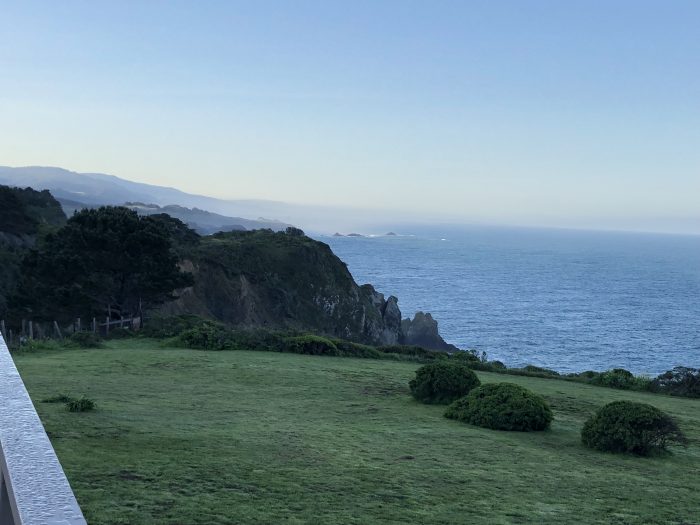
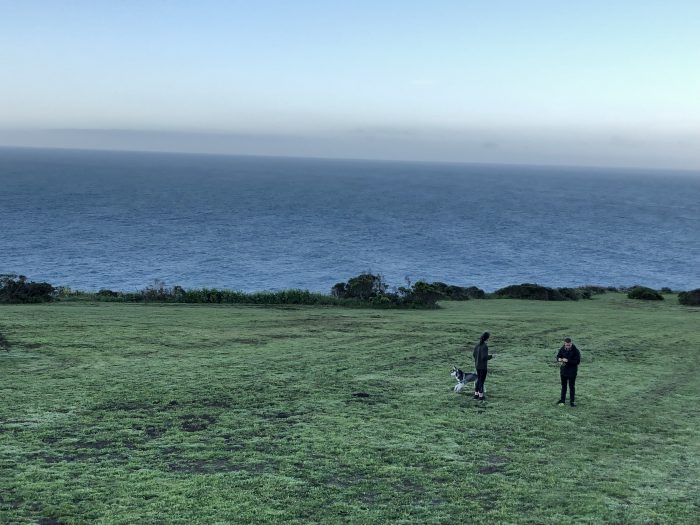
And then there was a long weekend spent up in Mendocino County, a place Bob and I have returned to since our children were young. Chris also loves this part of California, so he arranged for all of us to spend some time together there. We knew the years have flown by when our son, who once stayed home with grandma on our first trip to this area, now drove us around while we relaxed in the back seat! Bob and I loved it!
Chris found a house right on the coast for us to stay. See the bit of deck railing in the lower left? What a view we had from this house!
Melody and Chris playing with new family member, Mila.
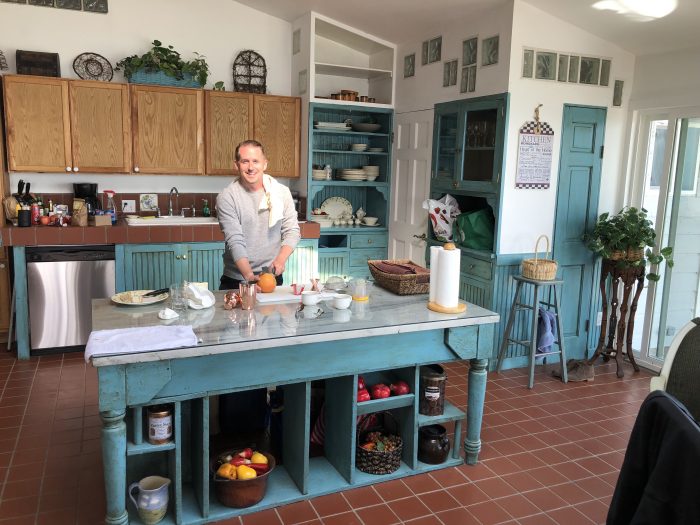
Chris brought his barware, including glass coupes, for several kinds of cocktails. He is becoming quite an accomplished mixologist. We loved this comfortable house!
We visited wineries, took walks along the coast, and ate some amazing meals, both that we made ourselves at our rented house and in restaurants in Mendocino. You can get some creative meals at various wineries too–like Pennyroyal, where the daughter of one of our long time favorite wine makers has started her own business.
I can’t resist sharing this photo of Chris and Mila at our favorite vineyard in the Anderson Valley, Husch.
We spent our last day in San Francisco. It was a wonderful time of year to be on the coast of California and to be with Chris on his birthday. We got to know Melody better and see Mila for the first time.
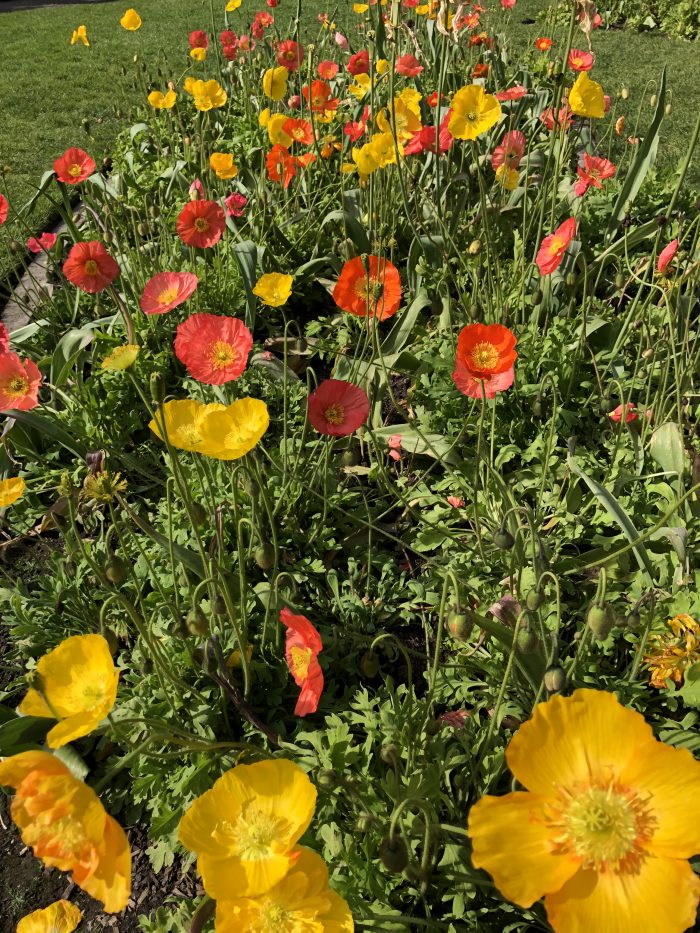
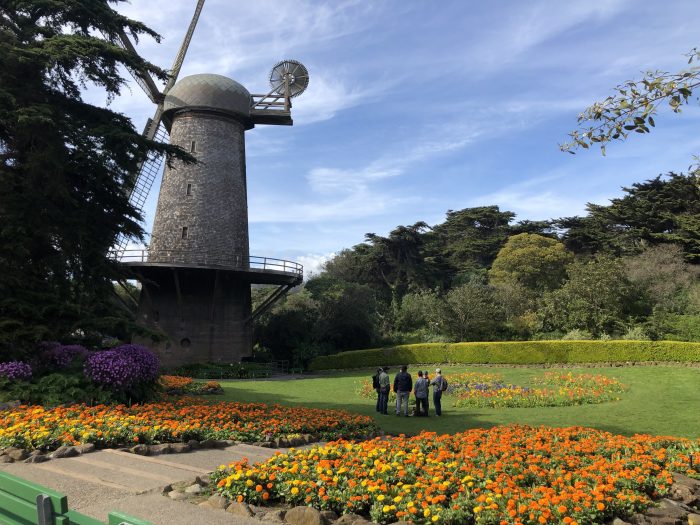
I was thinking of the poppy seeds I scattered in my garden at home as I visited this wonderful garden in Golden Gate Park. It’s one of Chris’s favorite destinations and now one of ours as well. He used to live only a short walk from this park and wouldn’t mind moving back here someday.
And back at home, I have about a million little poppy seedlings coming up. I know that they will not fare as well as they do in California, but I’ll think of this garden if/when my own poppies bloom. I’m knitting the shawl from A Verb for Keeping Warm now and then in the evenings and reading one of the books I bought at Pegasus. Best of all, I’m feeling quite re-energized and ready for spring in New England.
Gallery Exhibit at NEWS Conference, July 20-23, 2023. First place “Miscellaneous” for a Nantucket style basket, with 2 special awards for “Best use of Historical Inspiration and Best Use of Off-Loom Weaving.
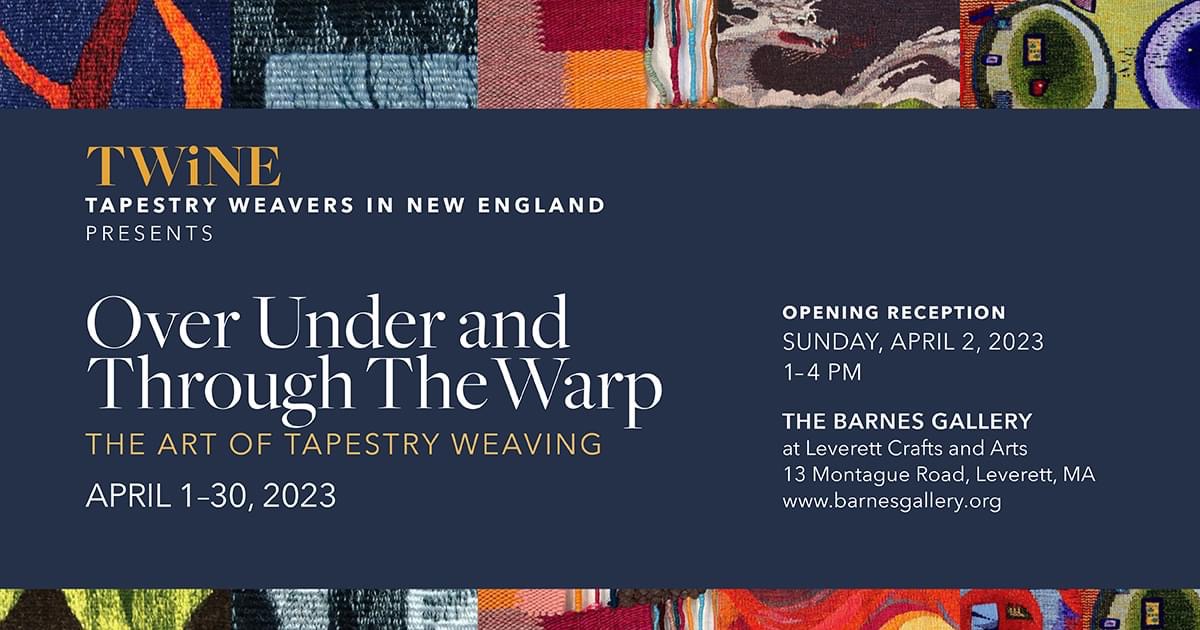
OVER, UNDER, AND THROUGH THE WARP: The Art of Tapestry Weaving, April 1-30, 2023, The Barnes Gallery, Leverett, MA. www.barnesgallery.org. An exhibition of works by Tapestry Weavers in New England (TWiNE). My works “Entangled 1,” “Untitled 1,” and “Mind the Risks” are in this exhibition.
TINY BUT MIGHTY Unjuried, small format tapestry exhibit, hosted by American Tapestry Alliance at HGA Convergence, July, 2022 Knoxville, TN
INTERLACEMENTS: Artistic Expressions in Weaving. Juried Biennial Exhibit of the Handweavers’ Guild of CT. River Street Gallery, 72 Blatchley Ave., New Haven, CT.
March 30 – May 5, 2019. Awards: 1st Place Wall Hangings, HGA Award for Outstanding Fiber Art.
CROSS SECTIONS: Works in Fiber by the members of North Adams Fiber Artists. Sept. 7 – Oct. 8, 2018.
Opening reception, Friday, Sept. 7, 5pm – 8pm. Gallery hours: Fridays, Saturdays, Sundays, 12pm – 5pm.
A CELEBRATION OF FIBER ARTS: Arts Center East, Vernon, Ct, October 11th — November 7th. Opening reception Oct. 11th from 2-4pm. Gallery is open Thurs–Sunday from 1-5pm. “Sunset on Wilson Cove” and “Hudson River Idyll” are both there for this exhibition.
AWARDS FROM NEW ENGLAND WEAVERS’ SEMINAR: for “Sunset on Wilson Cove”: 1st Place Tapestry and Transparency, Judges’ Choice, People’s Choice, Textile Arts Center “Best in Tapestry,” Rebecca Dea Award for First Time Entrant. NEWS 2015.
NEW ENGLAND WEAVERS’ SEMINAR: gallery exhibition, Smith College, Northampton, MA. July 9 – 12, 2015.
“THE WEDNESDAY GROUP” at Garnerville Arts Center, Garnerville, NY. May 30 – June 4,2015.
“CONTEMPORARY HANDWOVEN TREASURES,” 2015 Biennial Exhibiton of Conneticut Guild of Handweavers, Lyman Allen Museum of Art, New London, Ct; April 4 – 26.
www.lymanallyn.org
“POSTCARDS FROM HOME,” Invitational Gallery Exhibition of small tapestries by artists in Scotland, Ireland, Denmark, Australia, and New England. Northlight Gallery, Stromness, Orkney Island, Scotland. March 25 – April 25.
August 2015, Torshavn School, Faroe Island, Scotland.
“A LIVELY EXPERIMENT,” Gallery Exhibition of the Handweavers Guild of America (juried), Rhode Island Convention Center, Providence, RI. July 16 – 19, 2014.
“SMALL FORMAT TAPESTRY: Untitled/Unjuried,” sponsored by American Tapestry Alliance at HGA, Convergence, University of Rhode Island Feinstein Campus Gallery, Providence, RI. July 16 – 19, 2014.