ArgoKnot

tapestry

New Place, New View

We are approaching the last weekend in January, which means I’ve now been a live aboard for a whole month. In some ways it seems longer than that, in other ways less than a month. We have been in the small village of Deshaies (pronounced Day’ay) on Guadeloupe for several days. It is a charming place, if a bit run down. The shabbiness lends itself to chic-ness here. Very French Mediterranean here, in an ‘every man’ sort of way. Although, there is one big yacht that anchored behind us last night. They played some very loud music for less than 5 minutes (thank heaven!), and then turned on these amazing blue lights just as the moon was setting in the West. Those blue lights cast a huge aura around us.

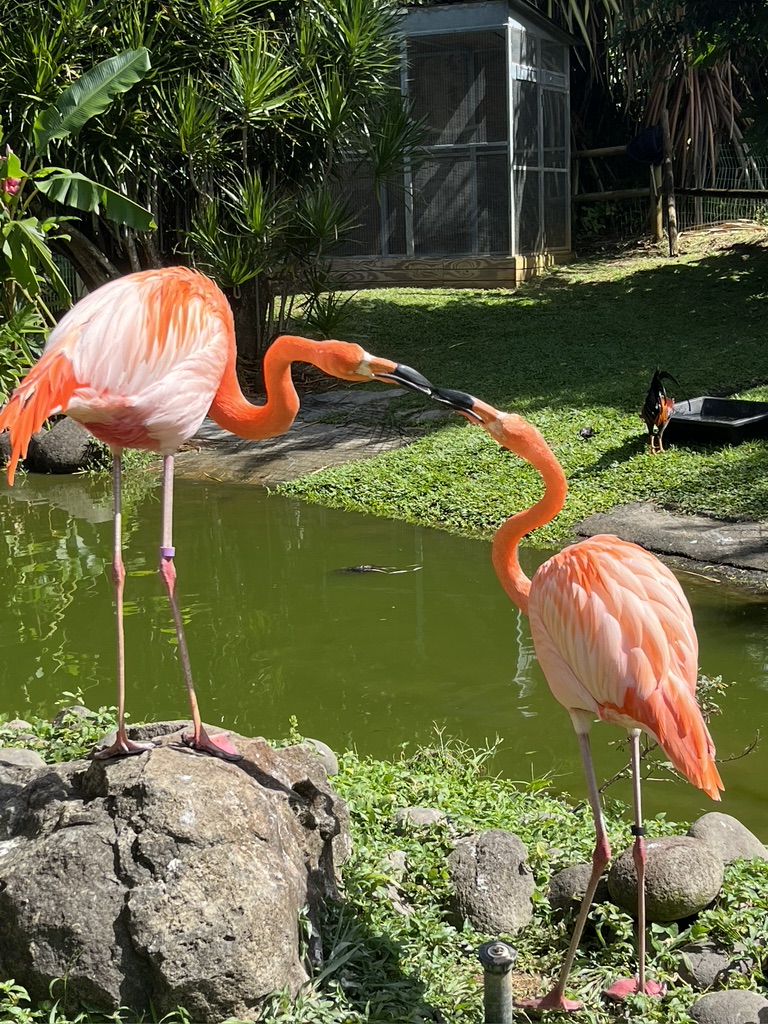
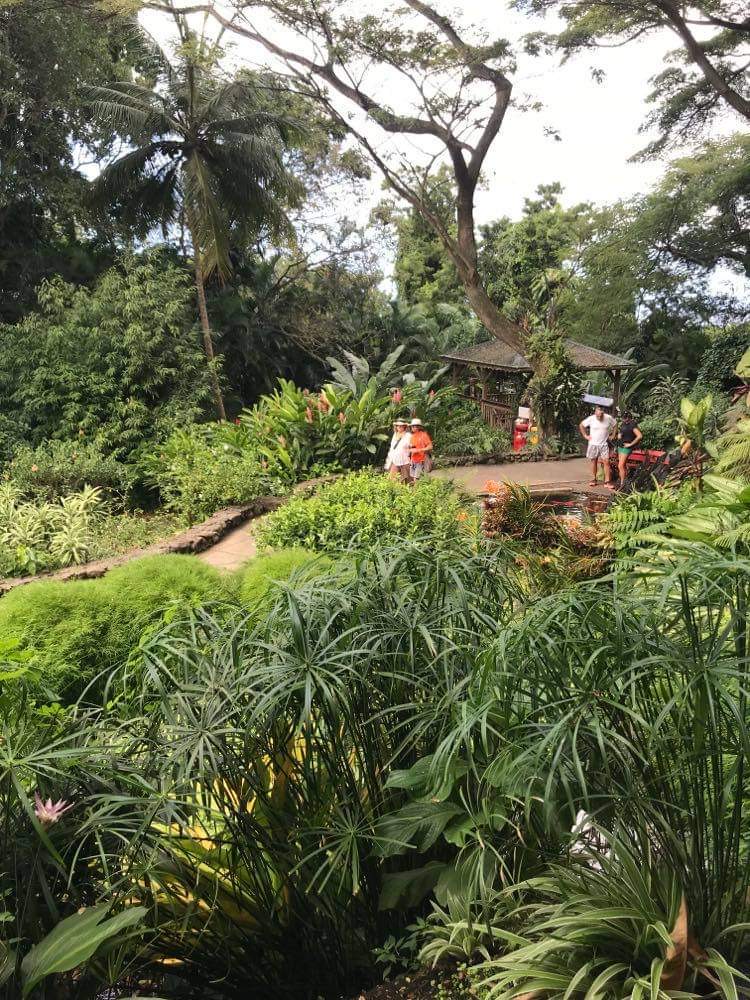
One of the highlights of a visit to Deshaies is the botanical garden that is just outside the village, up a steep hill. Every year at the garden is slightly different. This year the heavier rains have made the place look close to perfect. Even the flamingos have benefitted. Last year we worried that they might not live another year.

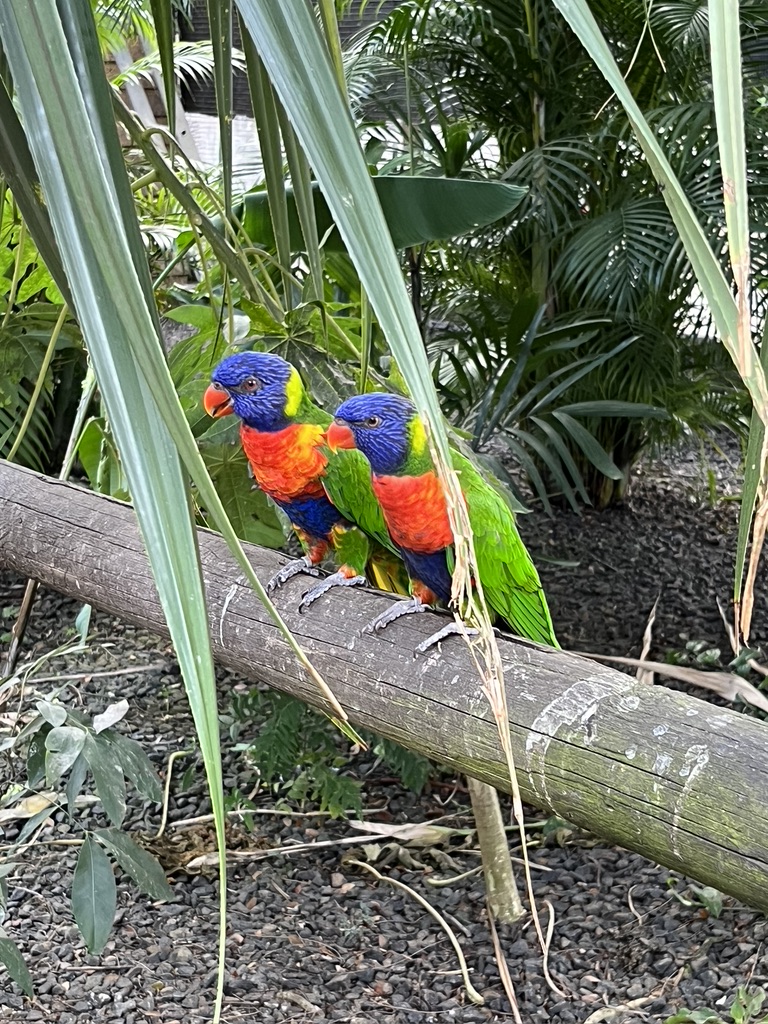
There is also an aviary full of parrots.

After walking the gardens, where Bob took a lot of wonderful close-up shots, we had lunch with friends, Lynn and Mark, at the scenic restaurant.

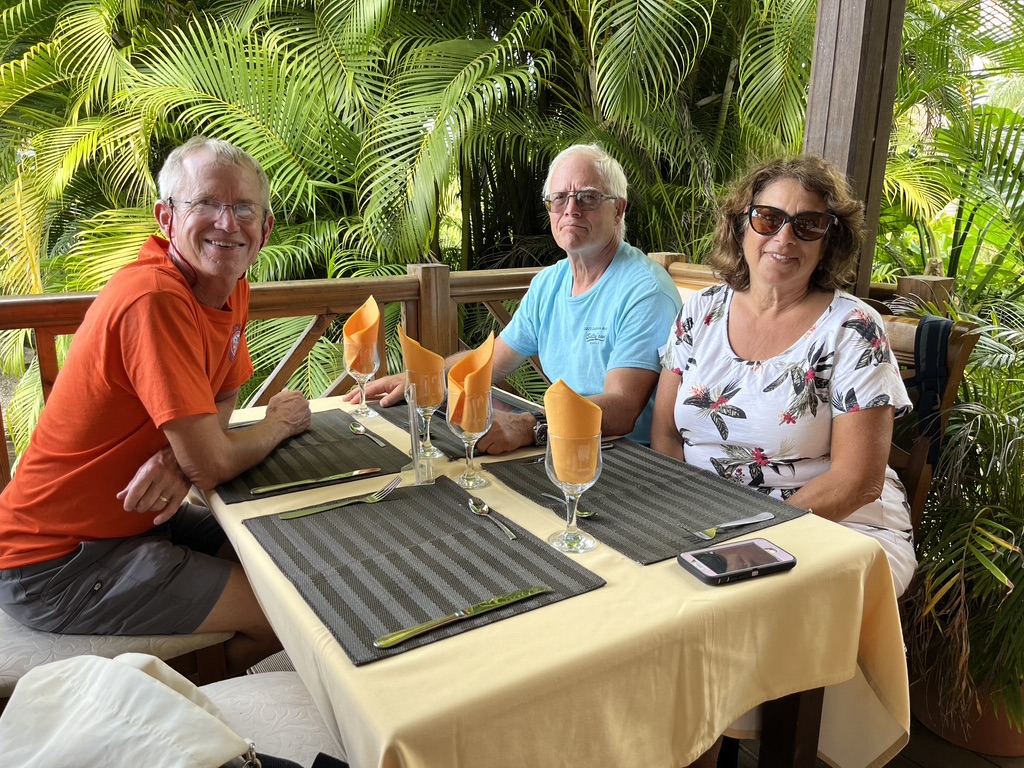
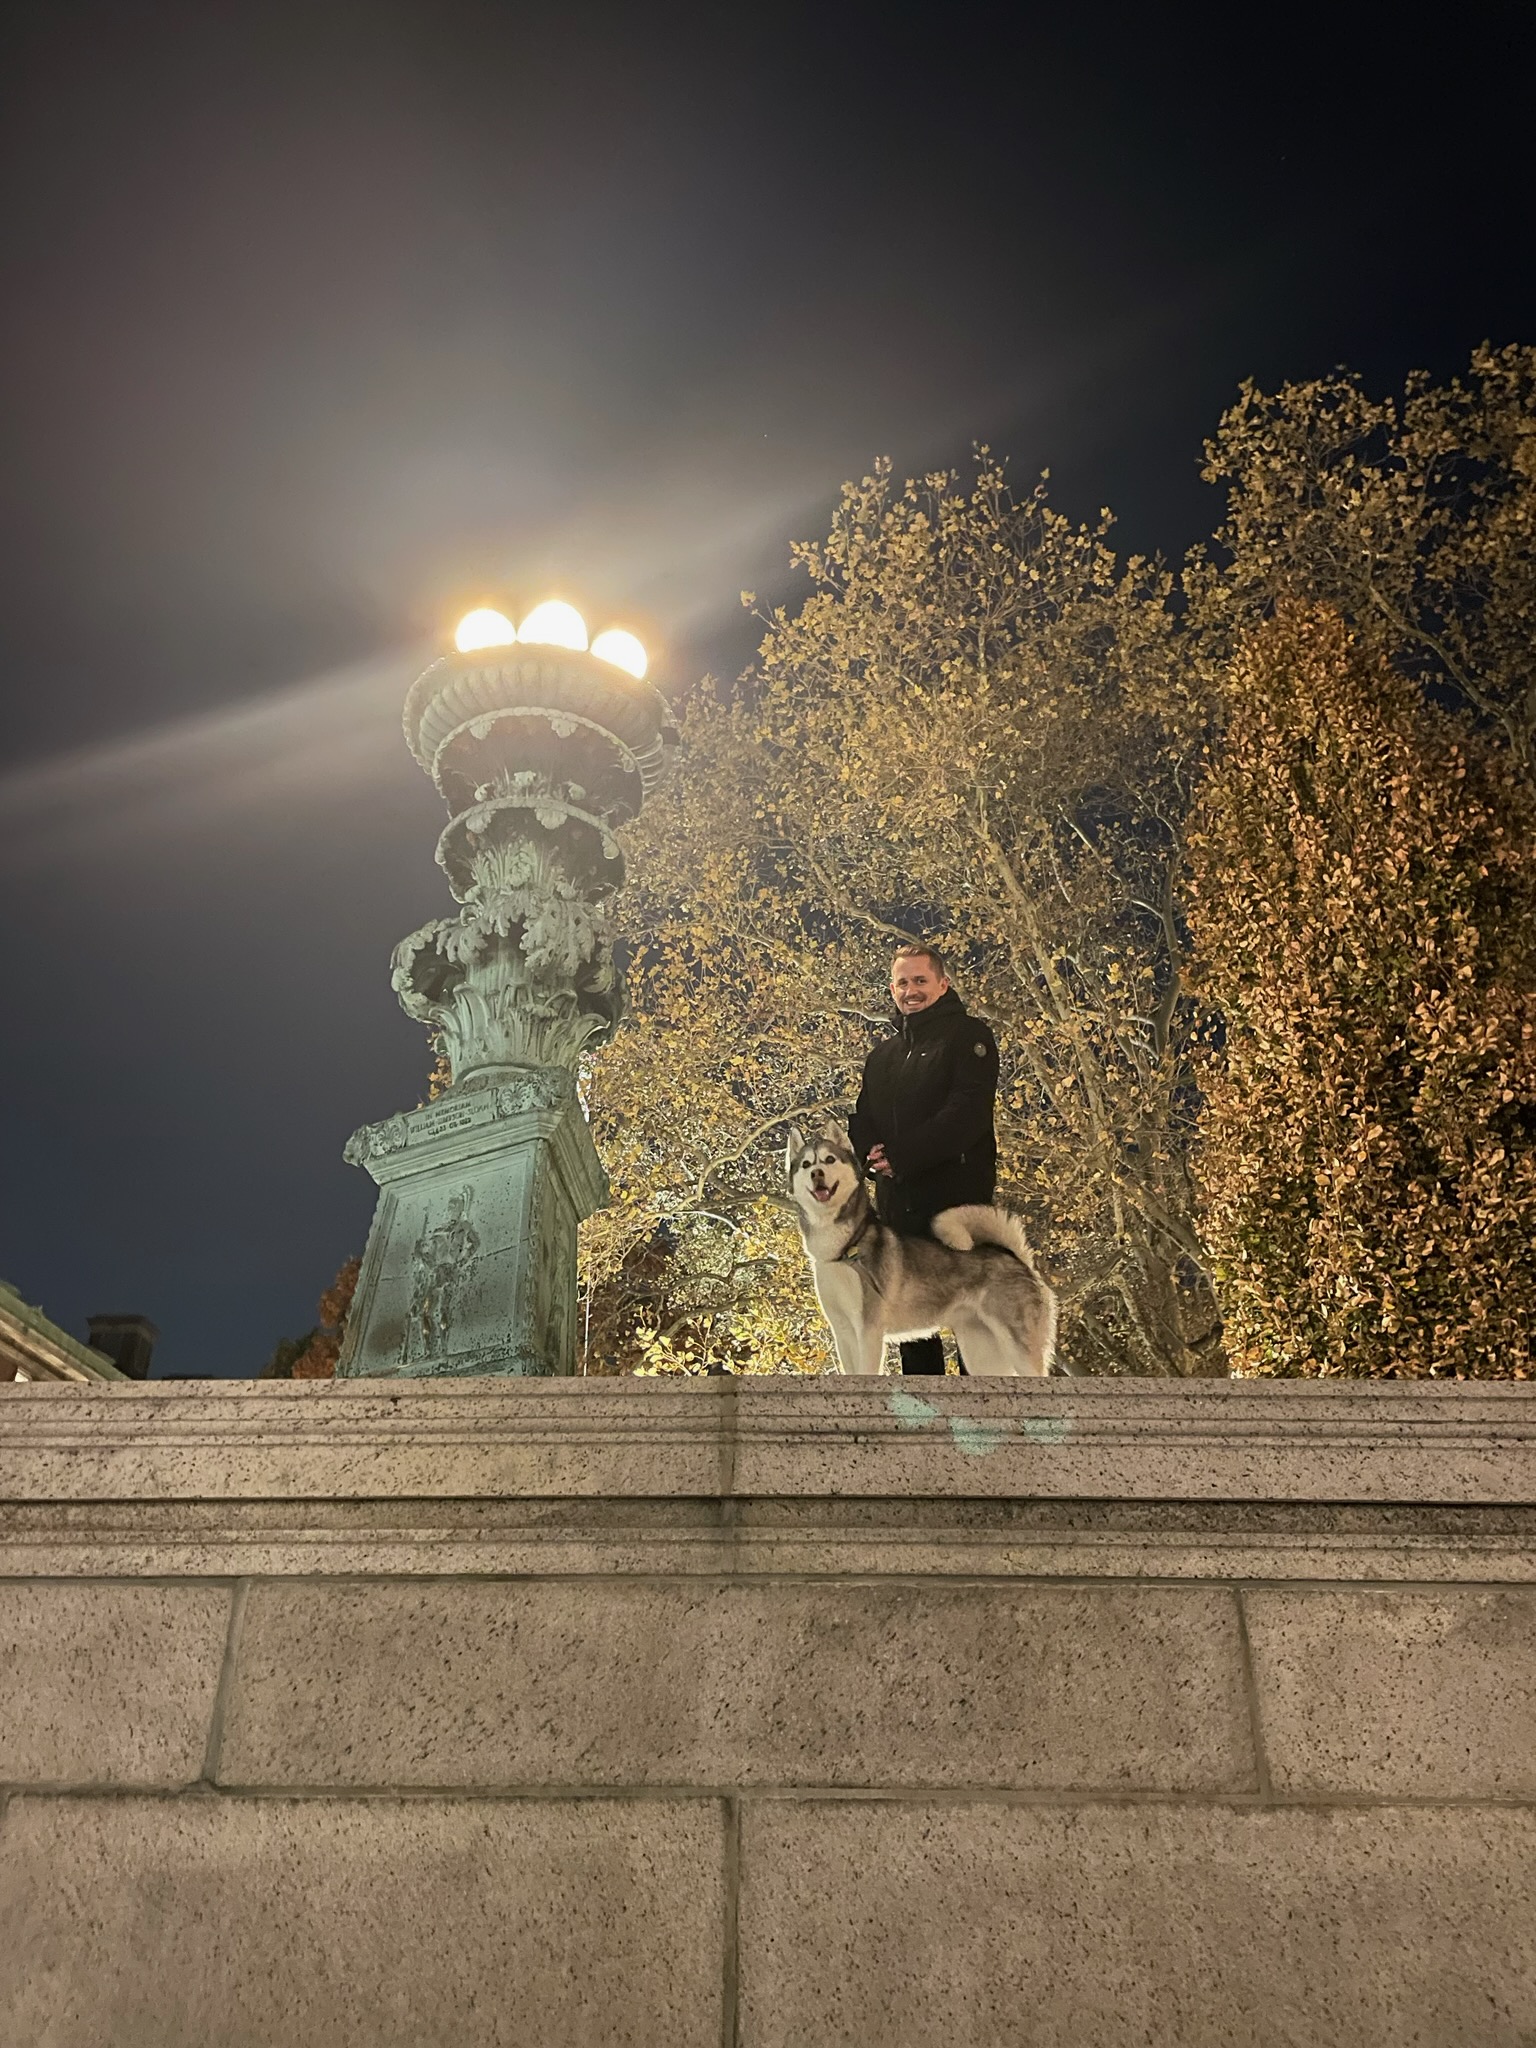
Along the way, Lynn took some photos of us.

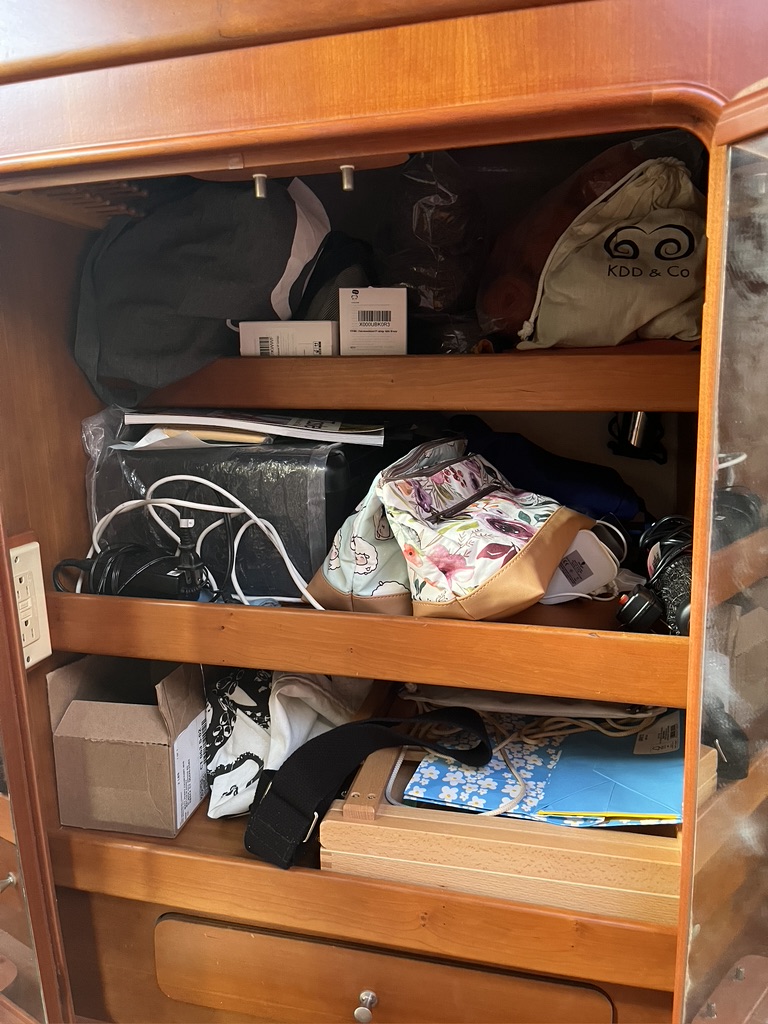
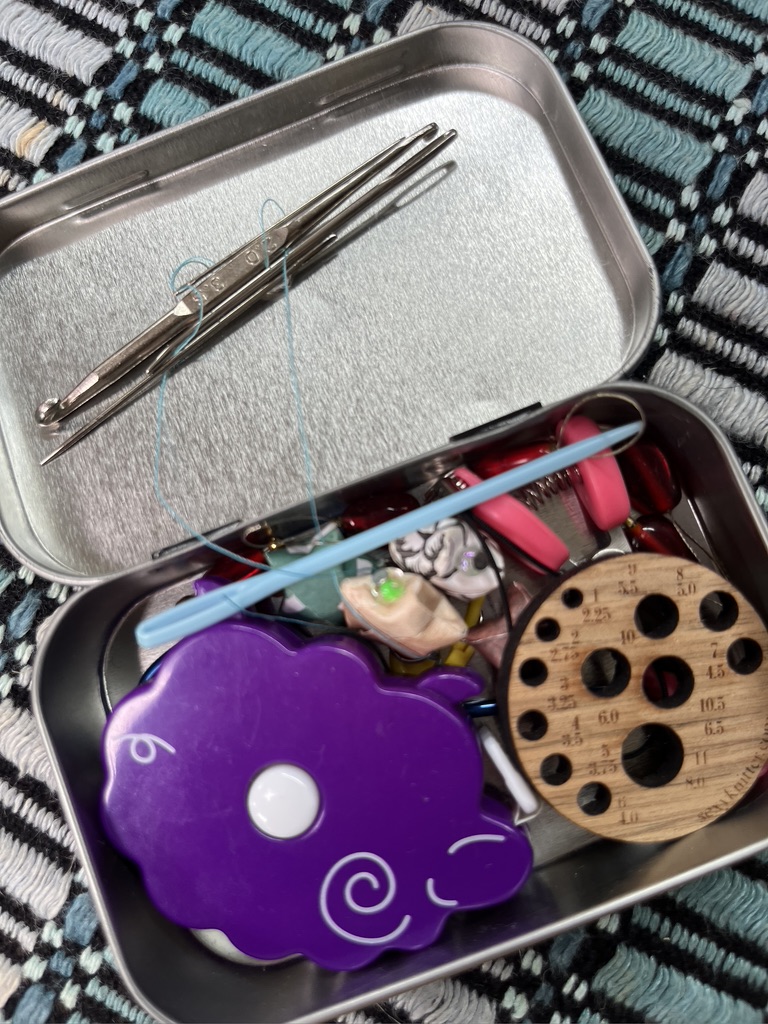
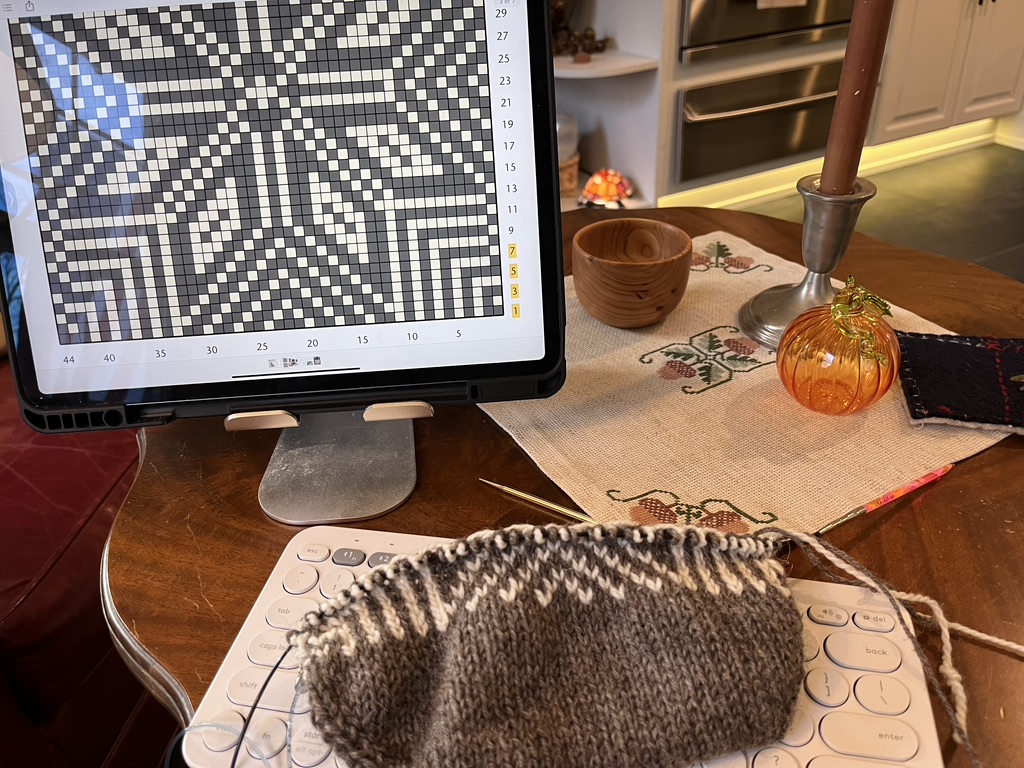
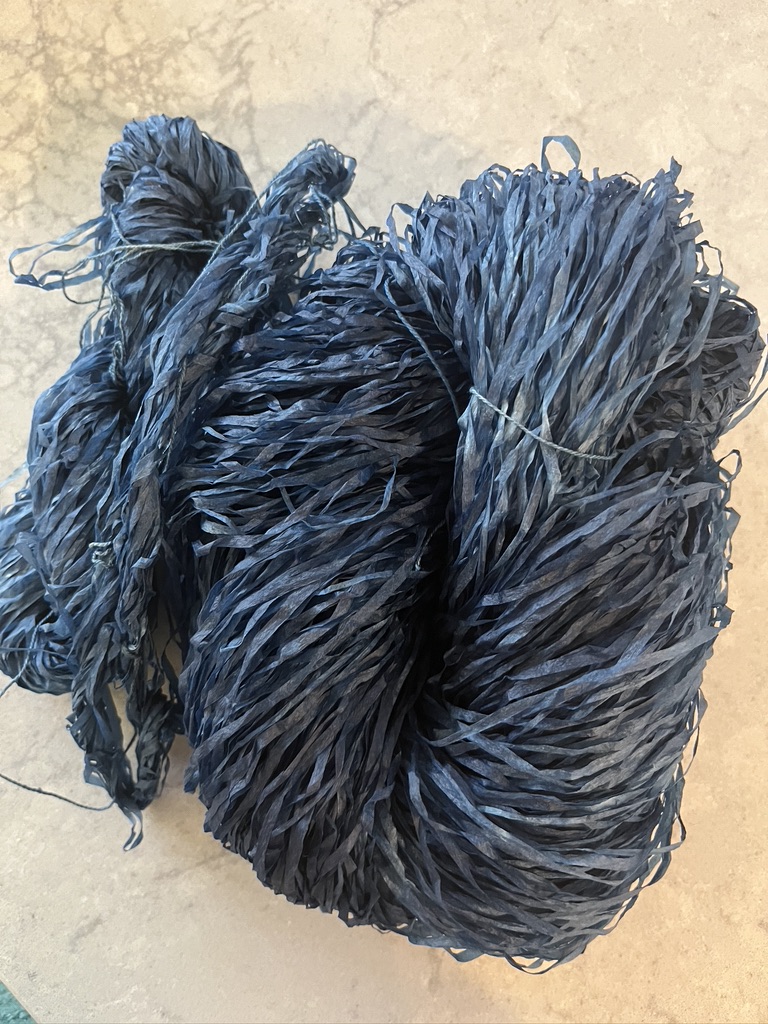
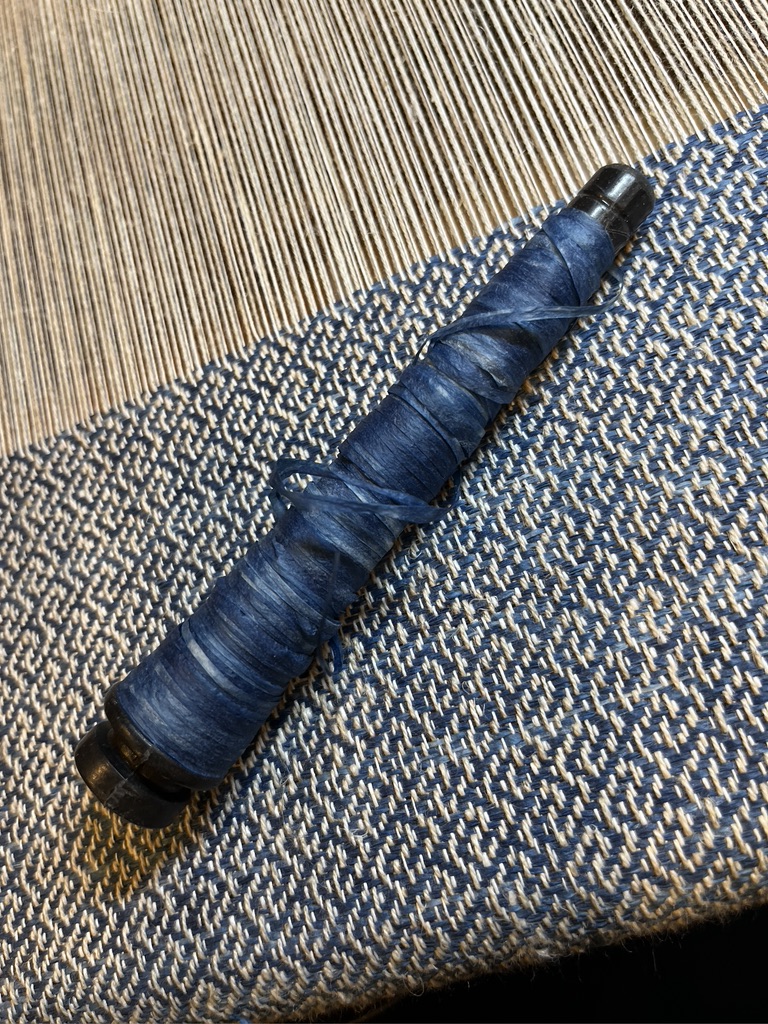
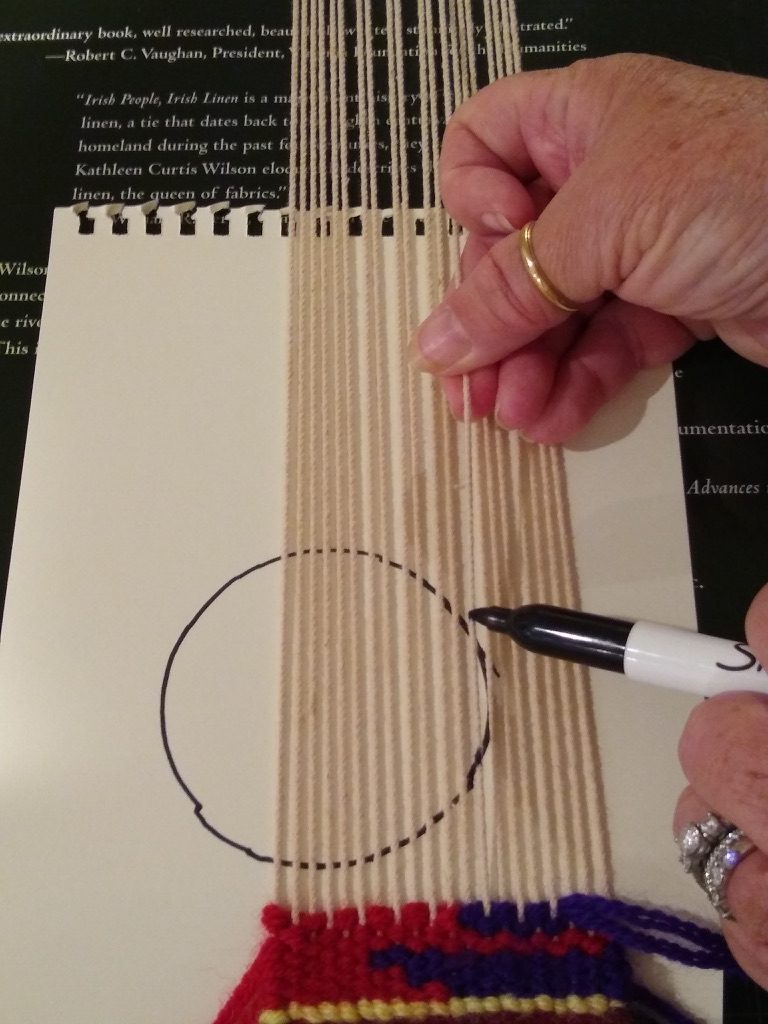
On our last morning in Falmouth, Bob walked to the hardware store to by a length of PVC pipe so he could make me a niddy noddy that would allow me to wind a skein of the yarn I had spun and plied on my little Nano 2 e-spinner. The niddy noddy will not come apart, so I thought I’d better pad one leg of it with a napkin to help me get the yarn off when I finished winding.

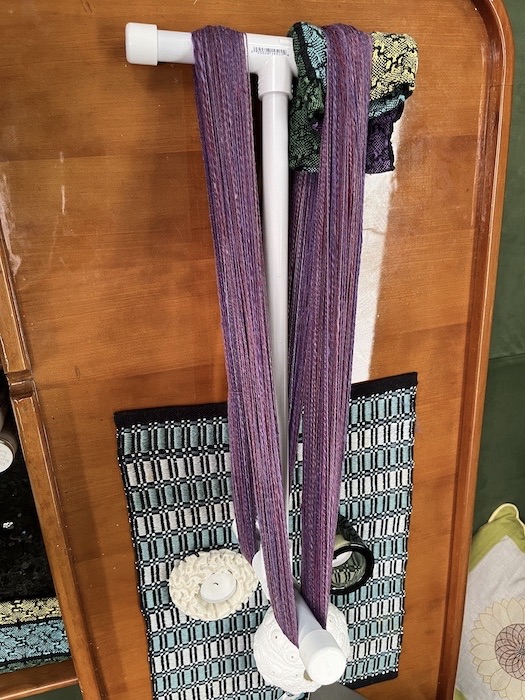
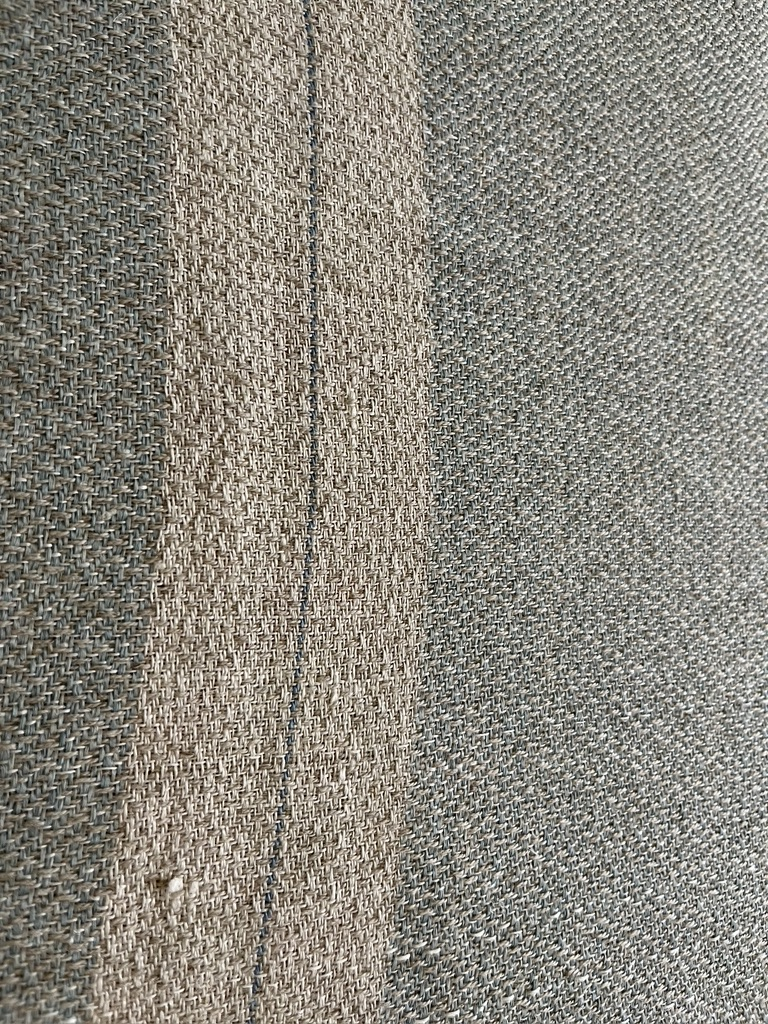
It worked well! I now have 840 yards of 2-ply lace weight merino/silk blend. I love it!

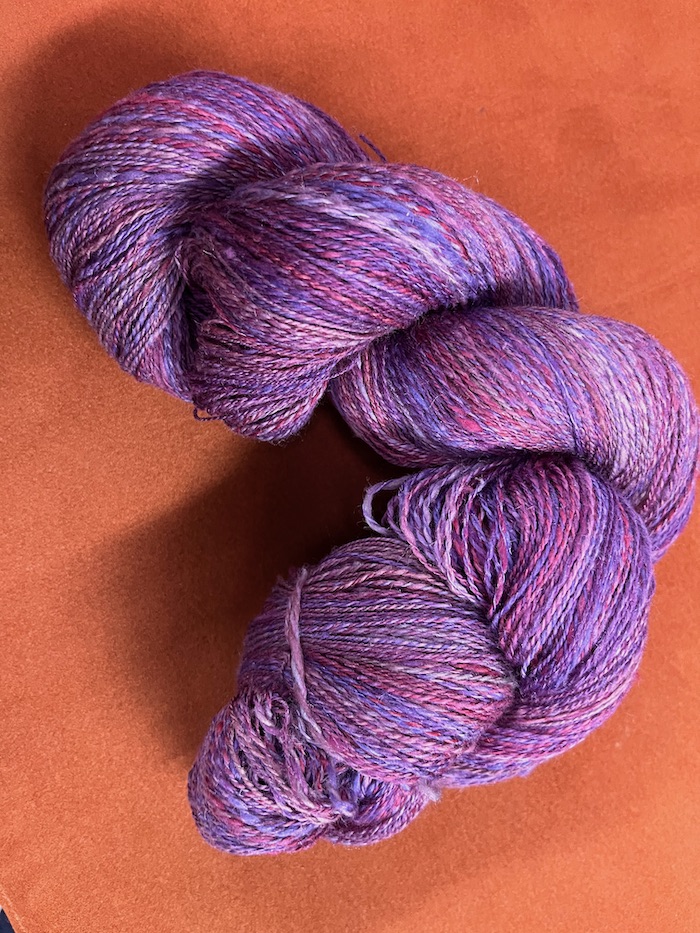
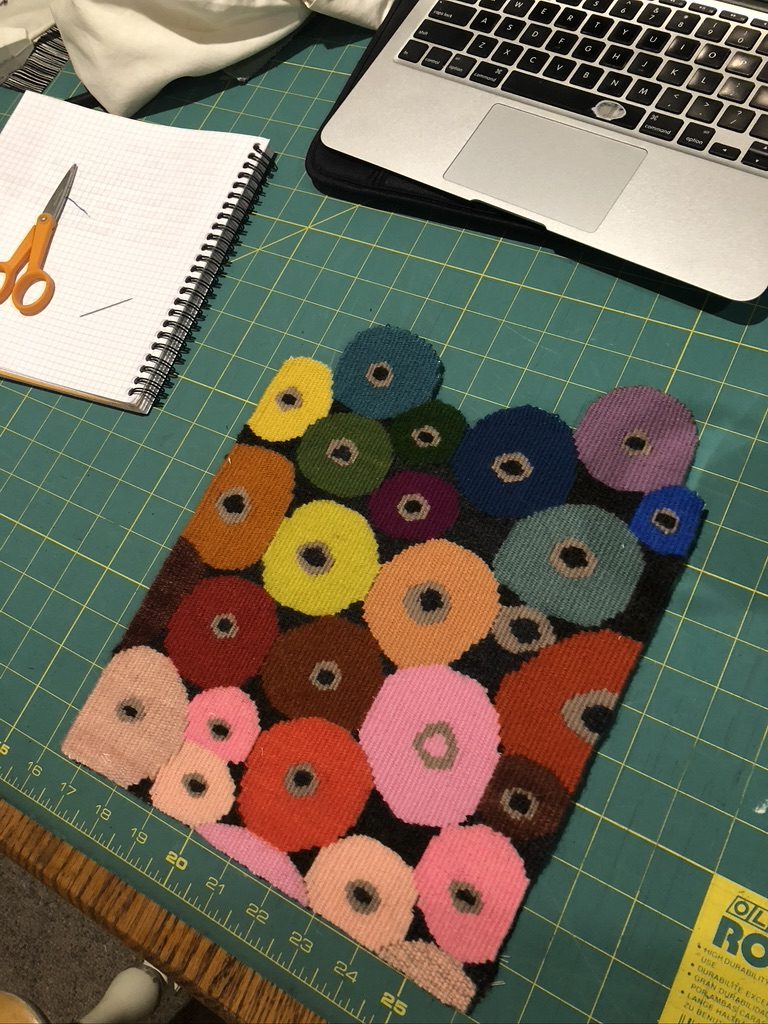
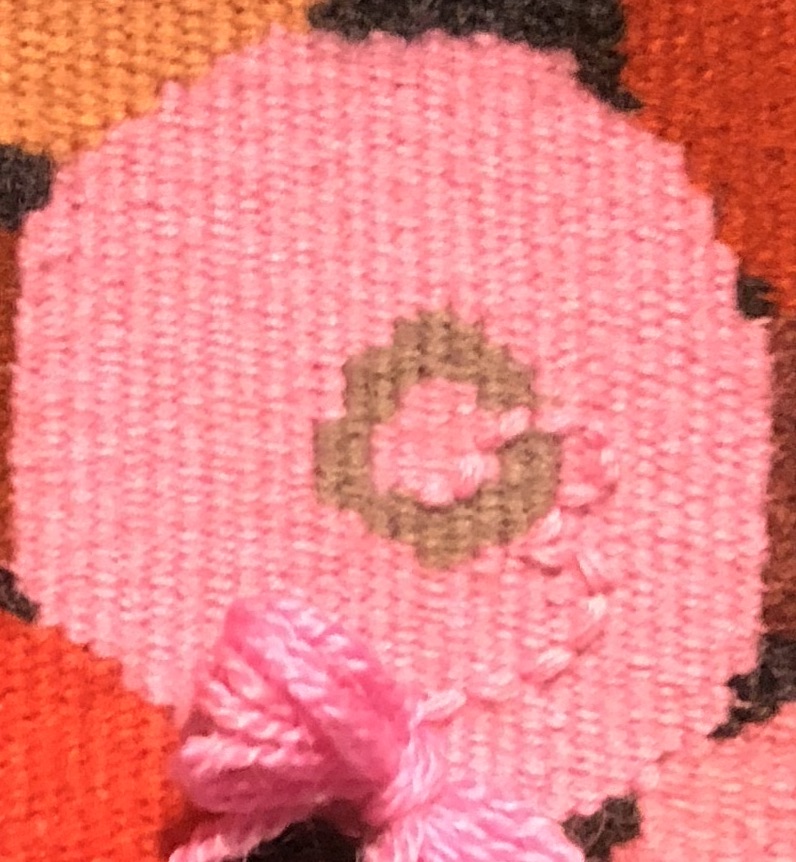
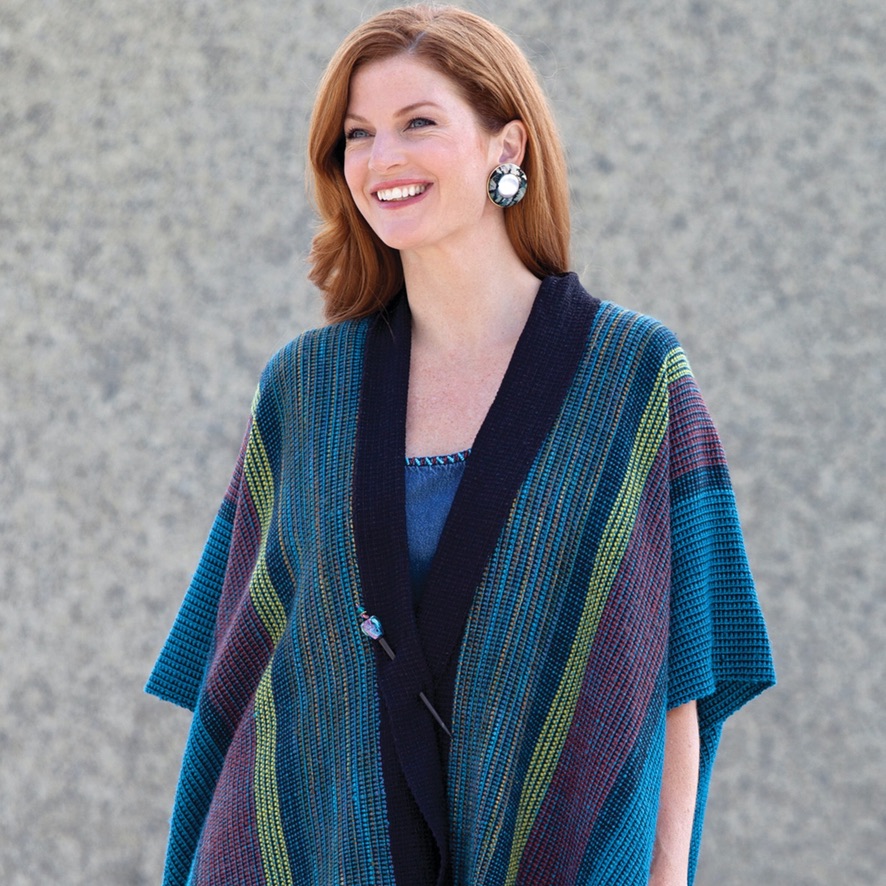
I’ve been looking for ideas for a short ruana to utilitze this yarn. This will be a lightweight fabric, using stash of my handspun waiting at home, added to this skein, and perhaps some merino/silk zephyr in dark blue. I may weave with zephyr that I have on hand in a lighter, sort of “Wedgewood” blue. This is one image I found online that I rather liked. I will sew the side seams closed on mine, and I simply must have a braid to embellish the neckline. I have also seen (somewhere!) sleeves added to a ruana. I’m intriuged by that. I’ll have to do some sampling.

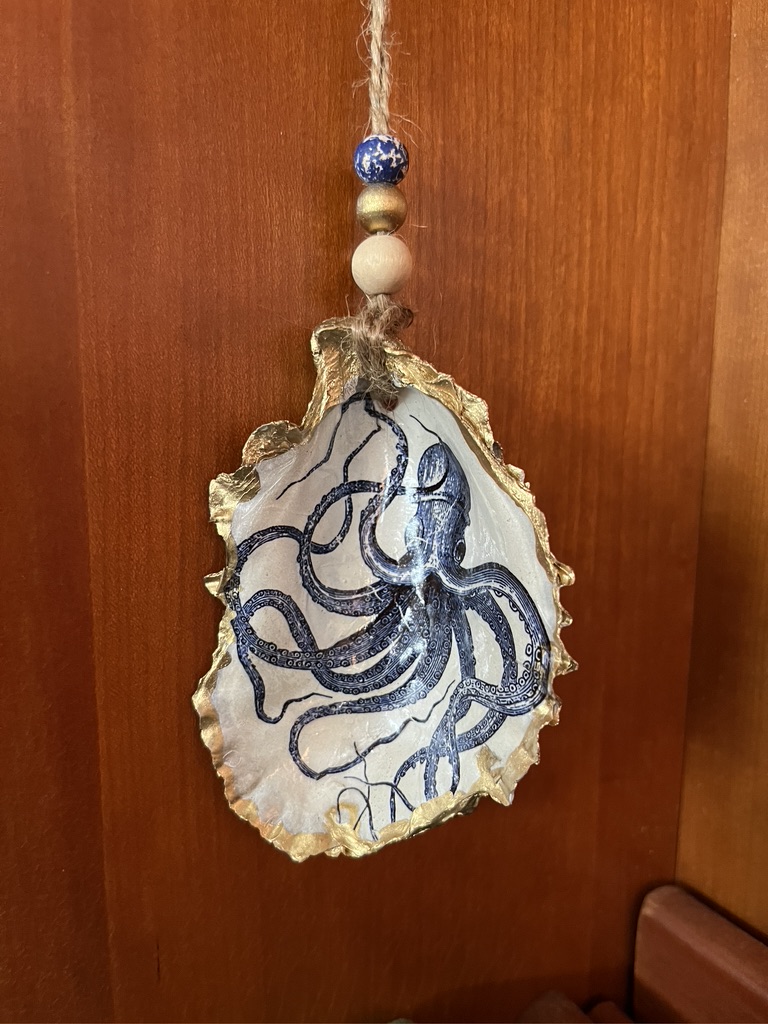
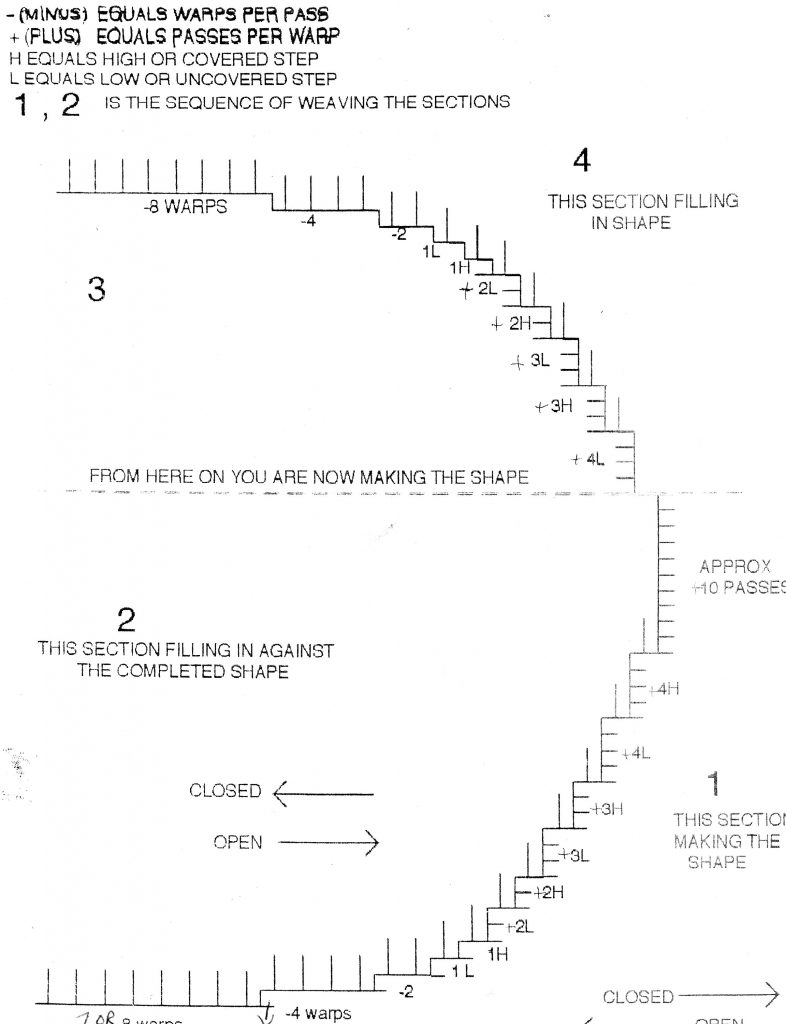
Now that we’re here in Deshaies I have got a photo of the church that identifies this village for me, and which I’ve wanted to add to my Caribbean tapestry. I took the photo this morning. I will be finishing up on an octopus and a few fish before I tackle my view of Guadeloupe by weaving this charming church. Of course, I need to eliminate all the clutter in the foreground and show the full height of the mountain behind. Poetic license.

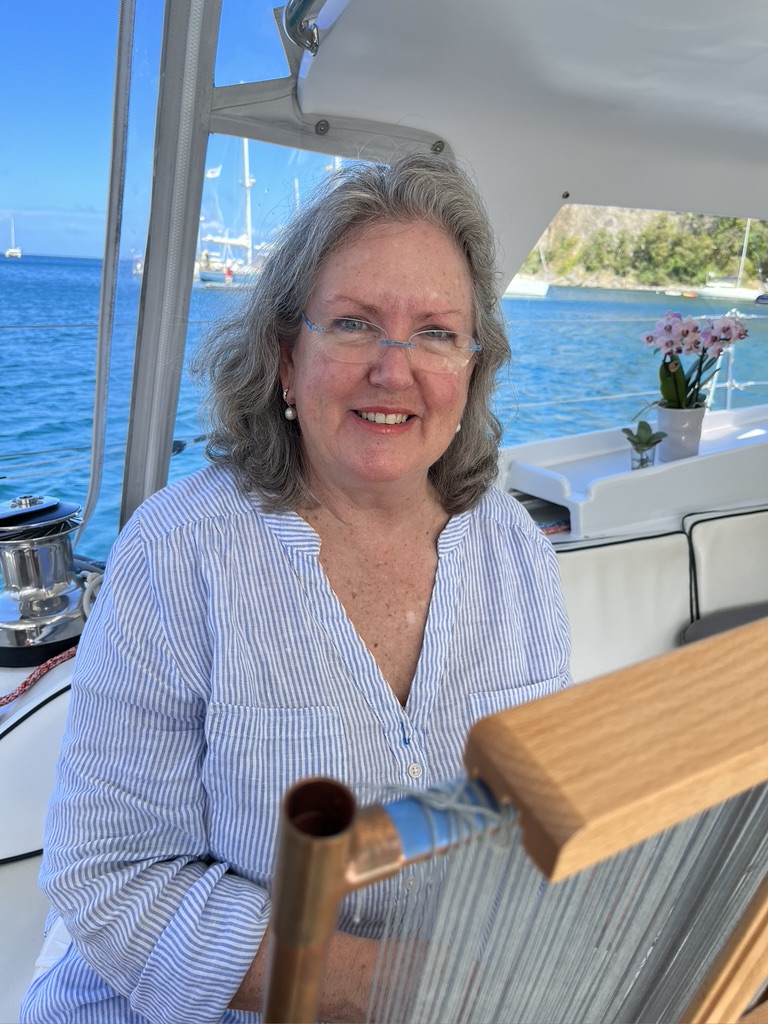
I need a photo of myself (horrors!) for an upcoming date on Textiles and Tea. I sent in a photo of me holding the Archie book, in which I was actually hiding behind the book. HGA rejected that, so I’m faced with getting another photo. Bob took this one this morning. I hope it will work. I’m still trying to hide, this time behind my loom, but it’s less obvious.

That’s the news from here. Bring on February, when we’ll head down island to Dominica and Martinique. Before that lies Les Saintes at the southern end of Guadeloupe, which we would never miss.

Views of the New Venue

Like many people, my work space is my living space onboard. I’ve posted plenty of photos over the years of projects underway in the main saloon or cockpit of Pandora when she herself is not underway! I cannot work when we are sailing, only when we are anchored or at a dock.

Here’s a look at how I manage my projects onboard. This is where most of my supplies are stored. This 3-shelf cabinet extends back further than I can illustrate in a photo. This year it is holding three knitting projects–the hot water bottle cover and two sweaters– my little Nano 2 e-spinner plus merino/silk fiber to spin, a rather large supply of tapestry yarn for weaving as well as another pile linen yarns for experimenting on a new tapestry design, and various tools. I have two copper pipe frame looms onboard, and they are stored in the hanging locker that holds Bob’s clothes. They couldn’t possible fit in my hanging locker, and luckily Bob is a very good sport about my need for equipment and stash!

On the bottom right of this photo there is a folded maple contraption that is my new tapestry stand! I have great expectations that this will make weaving onboard more comfortable. There will photos in the future.

Here are two little gems that hold tools. The first is a wonderful woven envelope by Lucienne Coifman (of rep weave fame), who is a member of my weaving guild. I have a number of small items from her that she makes from samples. Her hand finishing is exquisite.

There is a embroidered loop for the button similar to the loops that hold the scissors in the next photo. Lucienne’s finishing work is equal to her fine weaving.

Then I have this small tin full of handy tools.

This is the best small tool kit I’ve ever owned. It even has a ridiculously tiny pair of scissors. Can you see them? On the upper right of the tin, with pink handles. You can see that there is a tape measure, a needle gauge and various needles, along with a small crochet hook for picking up dropped stitches (although I never pick up stitches that way). What you can’t see are various stitch markers.

Having extra knitting needles onboard along with tools is worth far more than their tiny weight and size. Ellen, who started the knitting group, has given me a little envelope of dental floss threaders which will get added to this tin.

We’ve also had a change in venue for two days last week, which merits showing. Life onboard can get pretty small. I’ve always called it “Living small, with a big view.” Back in November when all of the sailboats that rallied together arrived in English Harbour, the national parks administration here threw a celebratory dinner to commemorate the arrival of so many sailboats. You can see some great photos of this on Bob’s blog. At that event the Minister of Tourism gave Bob the gift of a two-night stay at the historic Copper and Lumber Inn that is part of Nelson’s Dockyard. It’s a place where the Tot Club meets weekly, and this is a photo I took when Bob invited the fleet of our boats to be guests at a tot.

Tots take place in the courtyard of the Inn. I have only been up on the balcony once, last year, to get a similar photo before the tot ceremony began. This year it was a thrill to actually get to stay in this beautiful, historic spot.

There were three large double windows, which had stunning views. In the previous photo the drapes are drawn because the light completely washed out the interior. But of course the views were the best part!

Copper and Lumber is particularly beautiful at night. Above the entrance are the three windows of our room.

And back on Pandora, we have some new views this year. I brought one Christmas ornament from home since I wasn’t ready to give up the holiday when we came back here.

We also found orchids for sale at the local market! We could not resist getting one since we left our little family of phalaenopses and a paphiopedilum at home in the care of Melody and Chris.

I’ll close with a video Bob took of how my little Nano 2 spins. I am enjoying it, and I’m using the time to think about how to proceed with the tapestry experiment I want to try. Soon.

Life onboard is well underway this year. I hope it will be productive.

The Act of Making

Over the years Bob has described me as ‘goal oriented.’ He seems to think that I am overly focused on finishing things, and even perhaps that I define my ‘success’ in the number of finished projects I complete in a year. I’ve never felt this defines me, and only recently have I realized what might be a better description of my compulsions. I need to be making things. It is wonderful therapy for me to spend a day in my home studio working toward some finished item. It’s not the finished project that entices me nearly as much as the act of spending a day using my skills to make something. It’s definitely the process of making over the having of a finished object that motivates me, but I will admit that finishing things feels great! I have spent a wonderful six weeks this fall engaged in making.

I have been working on some tiny baskets during the past few weeks, each one only 2″ in diameter. My favorite supplier of basket materials is DELS in Freetown, Massachusetts. Their in-house scrimshander (a female, so perhaps scrimshandress?) did the lovely scrimshaw for the handles of my baskets. The scrimshaw is done on old piano keys. The unfinished one in the foreground is one of three I’m making for my three young grandchildren. These did not get finished due to not having enough waxed linen. They are made with bleached staves and weavers which makes them look a little like ivory. I have scrimmed piano keys for these as well, candy canes on the two baskets with red waxed linen, and blue snowflakes on the basket with blue waxed linen, plus the children’s names and the years they were born. These little baskets are woven in 2/2 twill (over 2, under 2) while the adult baskets are woven in plain weave with natural cane and weavers. I only finished two of the three needed for the grandchildren, so these will have to wait until next year. It is what it is!

This year I needed three hand made presents for the various groups I go to throughout the year. One is my lace group, and that was the first holiday party that took place this month. I am the least skilled lace maker in this group, so I certainly wasn’t going to make any lace for a present. Also, I am incredibly slow at making lace! I opted to make a cover cloth which is used to protect lace while you are not working on it. This was a completely machine made item, embellished on an embroidery machine and then machine sewn to a lining. Still, the placement of the embroidered bobbins took me hours to do. That’s another skill I am inexperienced at accomplishing. The embroidery pattern was for one bobbin, and I wanted three placed almost the way I got them positioned on the fabric.

The lining fabric came from Spoonflower and has a wonderful array of lace making images in the print–bobbins, tatting shuttles, bits of lace and tatting.

The small group within my large statewide weaving guild also had a holiday party for which we needed to bring a present. The theme was to make something out of a scrap of fabric. A small treasure bag is what was recommended. Well, since I don’t make clothing, I don’t have scraps! I decided to make a tiny tapestry and a bit of kumihimo and somehow turn them into a bag. This became the most therapeutic process over the span of three afternoons. I enjoyed every minute of making this bag.

The tiny tapestry, sett at 12 epi, uses a technique for ‘couching’ that I learned this summer in a workshop with Fiona Hutchison. Wrapping and couching a larger diameter weft that floats on the surface of the tapestry creates a wonderfully dimensional effect. I’ll be using this technique more and more. After weaving the small piece, I enjoyed making the kumihimo braid and then machine sewing the small bag which brought the whole thing together. I am happy with the project, which is the best part of enjoying the process of making–being satisfied with the end result!

The last thing I made was a set of four pot holders. This was by far the least enjoyable project. I won’t make many more of these, although I am frequently drawn the patterns you can create in a potholder. This was the pattern I made in the “Potholder Wizard” program.

I made four of these, two each with a light background and a reversed dark background. Here are two of them.

And so the holiday season has started. I’m content that I carved out enough time to make things and that these went to people who expected to receive a handmade gift rather than to those who might not want this kind of present! It was time well spent for me to indulge my love of making, and giving the gifts to other makers was an additional perk.

It’s time to head back downstairs to begin wrapping the presents for family and friends. These are mostly bought items. A couple of them are handmade by others, and then there are my tiny baskets which will go to my two sons and their partners, and then eventually the bleached ones will go to my grandchildren.

I’ll close with a personal holiday image. Here is one of our grand-dogs on a walk with our son on the Columbia campus in New York, taken by our wonderful Melody.

Today is the first day of Hanukah, and it’s less than a week until Christmas. Whatever you celebrate in this season I wish you time for making and time for giving. I’ll be back in the new year, in a very different setting.

Fullness

This morning I am sitting in my favorite chair knitting. There is coffee. The sun is brilliant in spite of the low temperatures. Last night we had a hard frost. Time to finish harvesting lettuce and cilantro.

I have only written blog posts in my my mind for the past couple of months. Life has been exciting and full in ways I’ve haven’t experienced before. I have dreamed of being my own person for decades, when the kids were independent, when I was not tied to Bob’s working schedule. That time seems to have arrived!

In the photo above I am working on a hot water bottle cozy. I’ve never had a hot water bottle before, but now I do. I’ve been thinking about all the people in the world who will be cold this winter, far colder than I ever am. I wonder if any of us will ever have the luxury of constant heat and endless water again. Even though I know that I still live in the incredible lap of luxury, I want to ensure that I am warm in bed at night…at least for a short while, until the water bottle cools. A hot water bottle seems just the ticket, and this cozy, designed by Kate Davies, caught my eye. I am using her yarn as well. The natural grey is “Ooskit” in colorway “Horkel.” (Don’t ask me to translate. I have no idea!) The white is “Schiehallion” in colorway “Crowdie.” You can find the cozy pattern and the yarn on Kate’s website, KDD&Co.

I’ve spent a lot of time traveling during the summer and fall, and I’ve been teaching tapestry classes and giving talks about the book I published about Archie Brennan. It’s been an exhilarating time for me. At the moment I have a few days to relax before the holiday chaos begins. It’s almost Thanksgiving and I am counting my blessings from the past two seasons.

I went to Convergence in July for the first time in what feels like a lifetime. I connected with some old friends and finally met some friends I’ve only known through the internet. I got to spend some private time with Robbie LaFleur and Katherine Buenger, and I had a wonderful sprang class with Carol James. I traveled by car all the way from Connecticut to Tennessee with an old friend, and that gave us time to catch up with all the things we’ve missed about being together since before the pandemic. It was all good!

Schiffer Publishing had a booth in the vendor’s hall, and they sold out all their copies of the book I wrote with Archie Brennan!

This is Carol James wearing one of her amazing sprang woven designs. I don’t think I’ll ever figure out how to make clothing out of sprang, but I am trying to learn these color manipulations.

I came home with a lot of ideas and inspiration from everything I saw at Convergence, and I gave a short program on it to one of my smaller weaving groups in October. It helped me keep the embers burning on my own ideas.

I drove straight to Massachusetts when I got home from Convergence, in order to take a workshop with Fiona Hutchison. Her wonderful ideas and techniques have got me going in a new direction. I have wanted to meet her, and I got way more than I expected!

I taught four tapestry classes over the summer and fall. Two of them were 8-week classes, and two were 3-day workshops. One of the workshops was the first time I have taught at someone’s house. That was a great experience, all of us being in the comfort of someone’s home which lends itself to a more personal experience for both students and teacher. It was late September, the weather was delightfully mild, and the colors in this part of Connecticut were already blazing (although not in this particular photo.). What a lovely setting to teach a class!

During one of my classes in Hartford I also hosted Katherin Weber when she gave a workshop for my guild. It was a busy time, with me leaving for my class while another house guest and good friend drove Katherin to the guild class each day. I never turn down an opportunity to host a teacher because it’s the best way to learn more about weavers and what makes them who they are. Katherin was no exception.

Some of you may remember that I have been struggling to weave paper placemats after having a successful experience weaving ‘paper towels.’ The warp for these projects have been a mix of natural and bleached linen. The weft is paper yarn from Habu. For the towels I used a pale green paper yarn that was interesting and did not break my weaving budget. When I planned the placemats I was pulled to the indigo paper yarn that was a bit dear for my comfort level. The first round did not make me happy. Remember this?

After two placemats where I could not see the Greek Key pattern unless I had just the right light and held the camera on just the right angle, I dug through my stash to find something else. I have a ton of linen yarn, and this seemed a perfect blue. In the back of my mind I wondered about dyeing the rest of the paper yarn a slightly darker blue with indigo. This is better obviously, but I was disappointed not to be using my precious indigo dyed paper yarn.

Then in October my smaller weaving group had a dye day. They used MX dyes on cellulose fibers, but they also had an indigo vat going. Yippee! I brought the remains of my paper yarn and gave the vat a try. My yarns were the first ones in the vat that day, and the color was strong. I only left the yarn in for five minutes, and I got a much deeper color than I wanted. Hey, that’s life when you’re not an experienced dyer!

And here is my third attempt at the placemats I’ve been envisioning since I wove the ‘paper towels’ over two years ago. Some things take time. At this point I had to make a new warp and tie on to the old, not my favorite exercise! They are not the color I’ve seen in my head for a long time now, but they are interesting. I love the inconsistency of the color most of all, which is traditionally called “abrash,” from Farsi, meaning “rainbow.” Sometimes you don’t get what you want, but I am happy that I got something interesting.

A lot has happened over the course of the summer and fall–half a year! I’ve had two surgeries (both successful), we have a newly renovated kitchen, I’ve taught and traveled and spent time in the gardens and with my grandchildren. Along the way I’ve done a little lace, some basketry and some knitting. It’s been a very full time, and I feel very blessed. Of course, I’d always like to have more finished projects to show for my time. Pipe dreams for sure.

Weaving Circles

Such adventures I am having this summer! The entire month of July was focused on weaving, and a lot of it was tapestry. Lucky me! I am indulging in a couple of weeks of recuperation right now, because last winter while I was far from home and missing all my weaving compatriots, I signed up for everything I could find online–and it all happened in July. Now I realize that I no longer have the energy of a 30-something so I need a bit of down time to recharge my batteries!

Yesterday I saw Rebecca Mezoff’s most recent blog post. It’s about weaving circles in tapestry. It was perfect timing for me to see since I’d just finished teaching a beginning tapestry class at the Weaving Center at Hartford Artisans, and we ended the course by weaving part of a circle. I think Rebecca’s idea would work well for weaving a small circle on just a few warp threads. In the long run I think weaving angles, curves, and circles involves a lot of attention to the turns made to create the shape. Turns that occur on low warps, ie an uncovered warp where the turn happens, will make a smoother line.

Some of these circles ‘read’ better than others, and those are the ones that had more turns on a low than on a high. Rebecca also talks about weaving a rather long straight area at the sides of a circle. This is what we Wednesday Group weavers call the ‘ears’ of the circle. If you don’t weave enough of the flat side you’ll end up with an oval when you have woven further up the circle. On the other hand, sometimes those long runs turn into something that looks like ears! Here is a close-up of the ‘ears’ on the pink circle from the photo above.

There is a lot to consider when weaving angles or curves. During my tenure in the Wednesday Group, Archie Brennan made a diagram of the process of weaving a circle for us. I now share it with my students, knowing he’d want it passed on to others. It’s complicated and takes quite a bit practice, but ultimately it’s worth putting in the practice time in spades!

The key to reading this diagram is that a minus sign before the number (-4) means how many warp threads to move over for the next pass. A positive number (+3) describes how many passes to make turning on the same warp thread before moving to the next warp for the next pass.

For beginning students this exercise serves two important purposes. This is the first time students ink on to their warps. Archie always recommended using a Sharpie pen called “Rub a Dub,” which only comes in black. That can be a bit worrisome if you are weaving with a white weft, but I’ve never had any bleeding of ink occur, althought I haven’t woven much white. Archie did use a lot of white and off-white, and that is why he recommended this particular pen. Students learned to ink on in the Gobelins manner, which is to place the warp on a flat surface to bring the warps into one plane, such as placing the portable loom on a book or a piece of wood, with the cartoon situated where needed behind the warp. The process is then to lift each warp thread individually and mark however many dots on that thread are indicated by the cartoon. Then move to the next warp thread. The technique of making the dots is to hold the pen still against a warp thread while twirling the warp thread with the other hand in order to make a small mark that encircles the warp. This way, if the warps should begin to turn during weaving you will still see a clear mark.

The second part of the exercise is to weave the partial circle that is now inked on the warp. You weave the background first, and each turn you make involves a choice of turning on a high or a low. Mostly you’ll be turning on every warp in this example, which has a warp sett of 4 epi. For the flat bottom I’d be sure to turn on a low, and if possible I’d try to move over by an even number of warps for the second turn, so it would also be on a low. That will give the flat bottom that Rebecca mentions in her post. After that I’ll mostly likely be turning on every warp thread, and as the curve gets steeper I’ll be making multiple turns on each warp thread. This is where I will want more turns on the lows than on the highs, as they build. So after a warp that I’ve chosen to weave two passes on a low, I would never weave more than two passes on the adjacent high. Once I’ve got a low that needed three passes I would then be open to weaving three passes on a high. And so on…

This is a lot of information, given quickly. There is always more than one way to accomplish something, but since I value Archie Brennan’s suggestions above most others, I wanted to share this! It does require practice! Have a go!

Scroll to Top