ArgoKnot

Author name: ozweaver

Silence

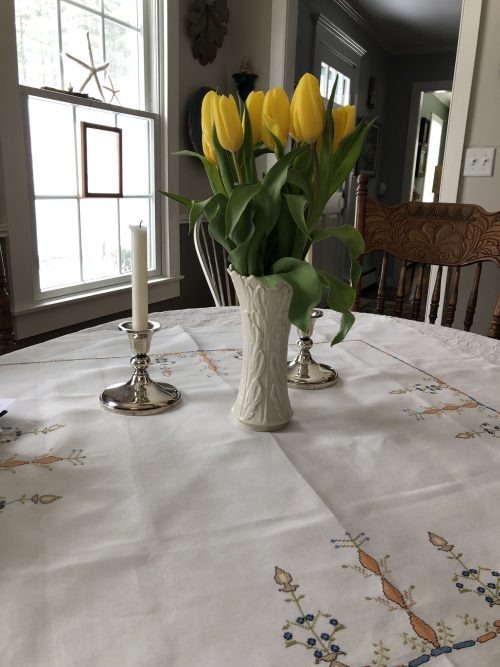
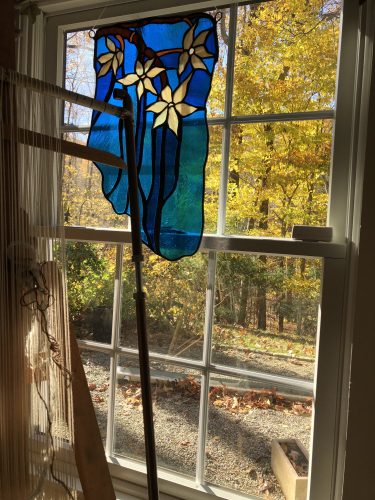
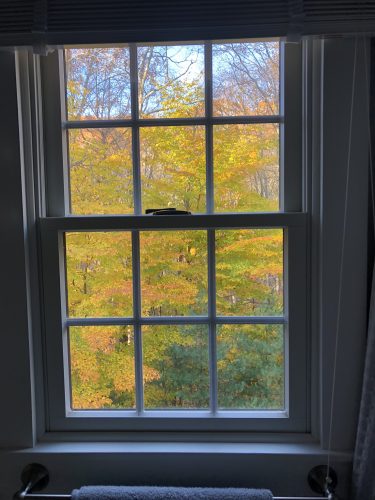
It’s March 2nd,  and I’m sitting at my kitchen table watching the snow fall on an already white landscape.  I’ve got a white on white tablecloth under my laptop and a vase of bright yellow tulips that reminds me that the landscape will soon be full of vibrant colors.

IMG_2171

Where did the time go between November and now?  I can’t answer that well, but I can report that a lot of creative juices have been flowing, even if they were mostly in the form of inspiration from other people’s creative output!  I’ve been silent for a few months now, letting it all sink in.  And it’s been fairly quiet here.  There is nothing like a blanket of snow to muffle the noise of life.  I live on a quiet street where only three other families drive up this road.  And let me tell you!–winter here is a lot quieter than when Bob and I are living on a boat in the Caribbean. The wind blows night and day there, and it’s noisier than you’d imagine!

It’s been good to be at our land home this winter.  It has given us time to spend with our newborn grand-twins, Rhett and Emme.  Along with their older sister Tori, our son and his wife now have a trio of kids whose initial letters in their names happen to create the word TRE (Tori, Rhett, Emme).  They are quite the threesome! Tre O5borns!

IMG-8470

A recount of what I’ve been doing since November might appear a bit schizoid as well as boring.  So many of us who love textiles work with it in numerous ways.  So I’ve been spinning some muga silk on my new Jensen wheel, and weaving on a new-to-me Baby Wolf  combby (not going well), and knitting (also a failed project), and struggling with a new Torchon pattern in bobbin lace.  I hope these setbacks and failed projects mean I am growing in these areas.  It’s been a long time since I’ve had a knitting failure.  The mishap is in the way the fabric drapes and the sweater fits–or rather, doesn’t fit.  It is huge!  I’m determined to master my quirky computer loom, but I’m not there yet.  I think I have worked out all the mis-steps on the Torchon pattern , and for that I have to thank Jill from my lace group.  And so….I lurch on….

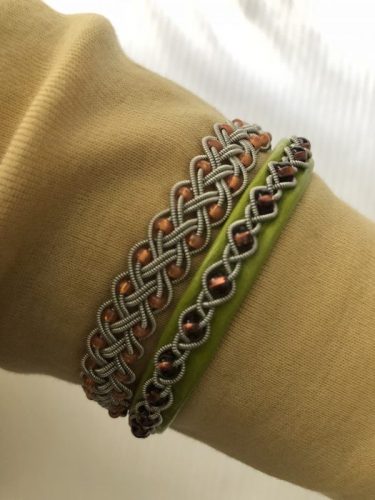
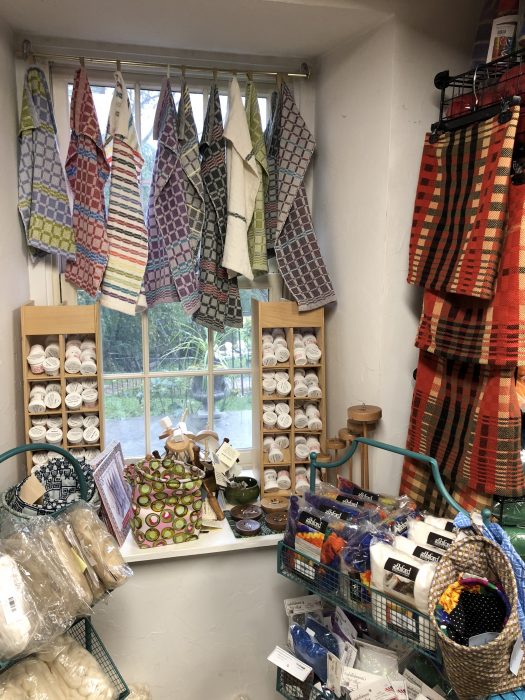
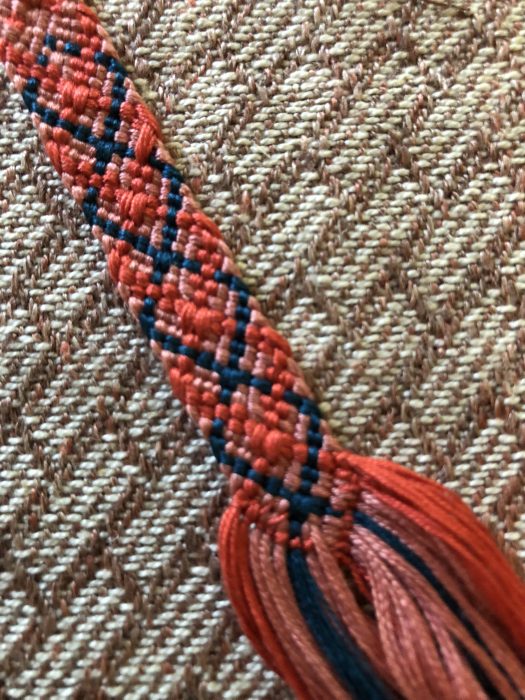
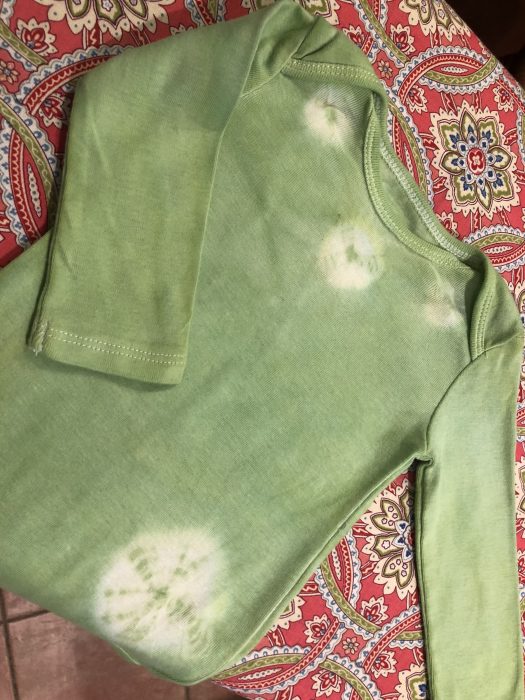
Here are some photos of the deflected weave project that I’m using as my first project on the Baby Wolf combby. This was the first experiment.  I used the same two colors for weft that are in the warp. It’s a lovely pattern, but a bit boring colorwise.

IMG_1944

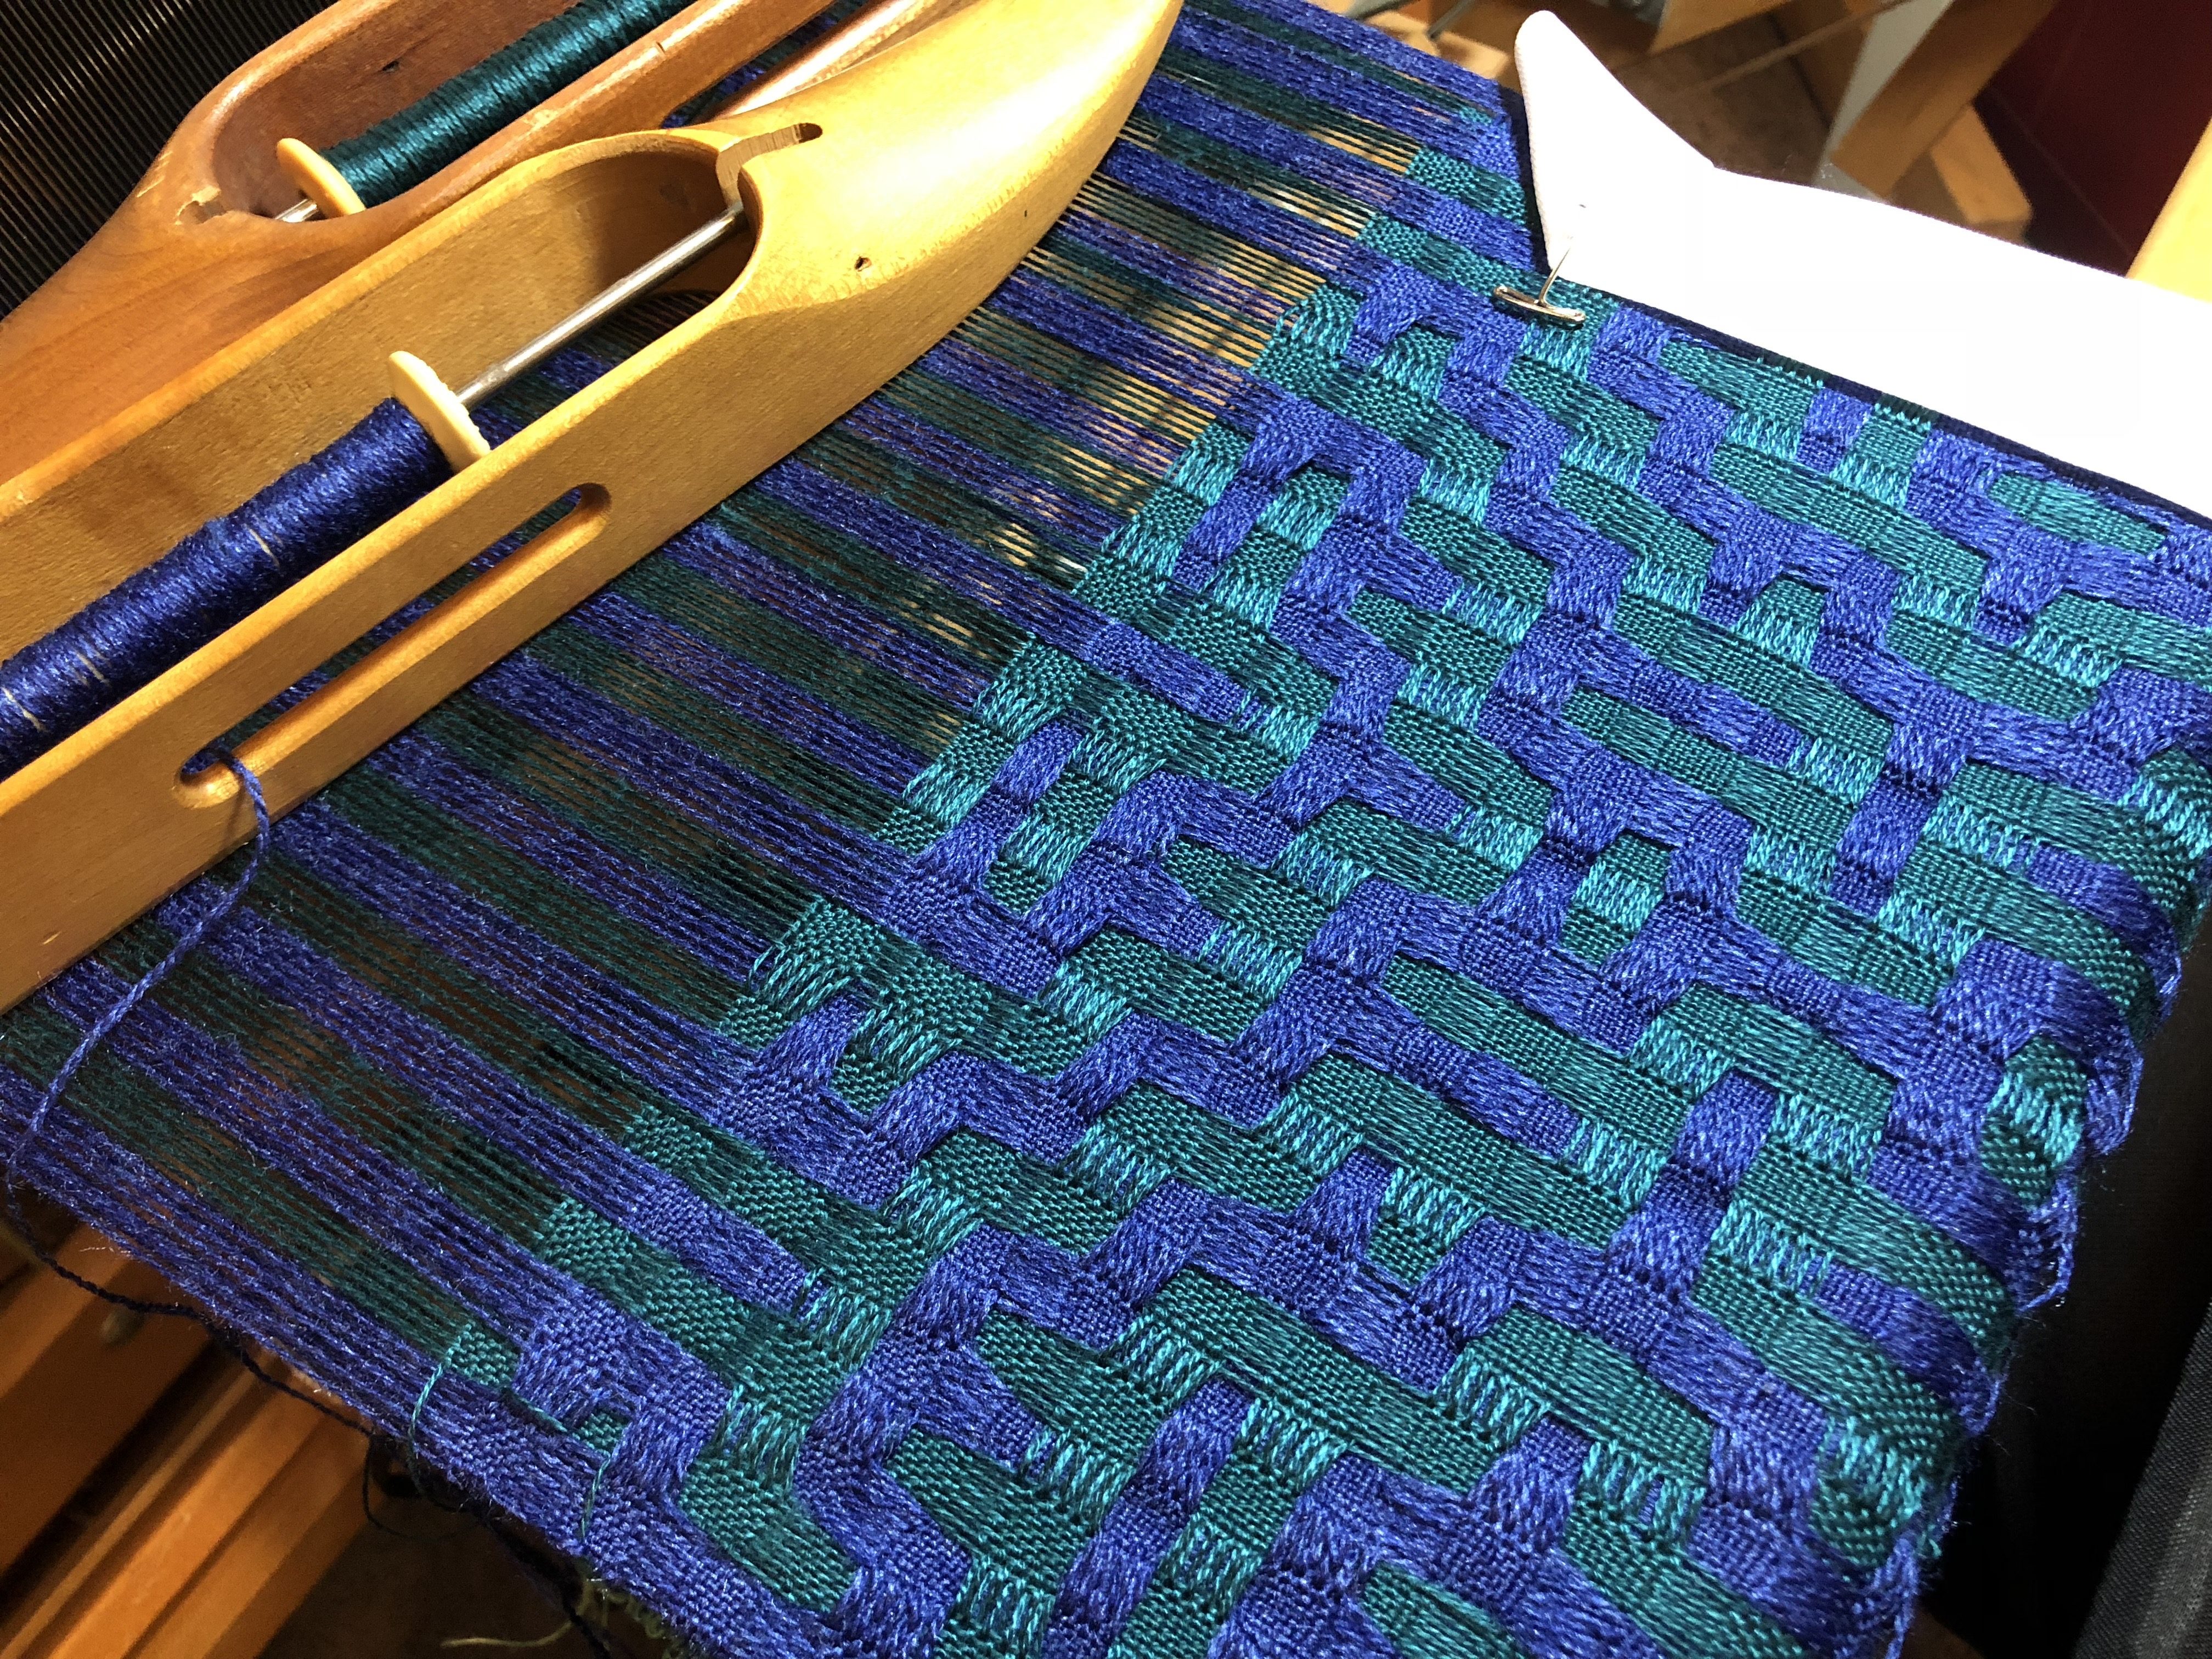
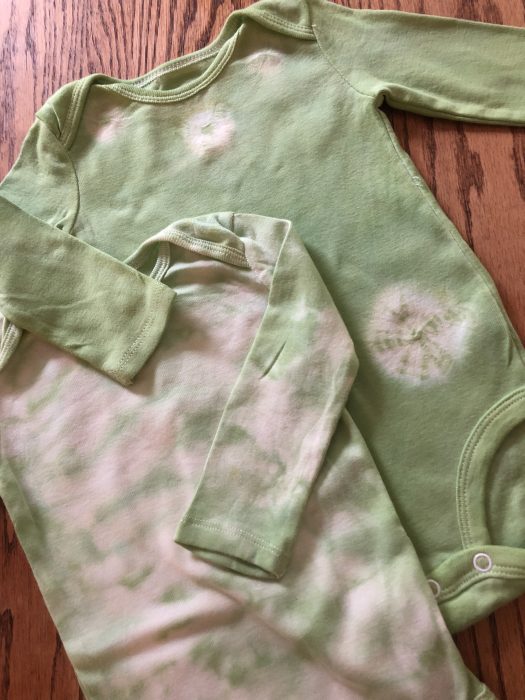
On the 2nd experiment I decided to increase the color play.  There are seven colors of weft weaving through the two color warp.

IMG_1986

Now I’m experimenting with two colors of weft that are different from the two colors in the warp.  I think I will like it best.  It’s on hold for now because I’m having so many problems with the combby.  It is often a ‘two steps forward, one step back’ kind of process.  Surely it’s got to get more reliable!

Once I have my dobby problems under better control I will write up a bit about this pattern.  It is Janney Simpson’s design that was published about two years ago in “Handwoven” magazine.

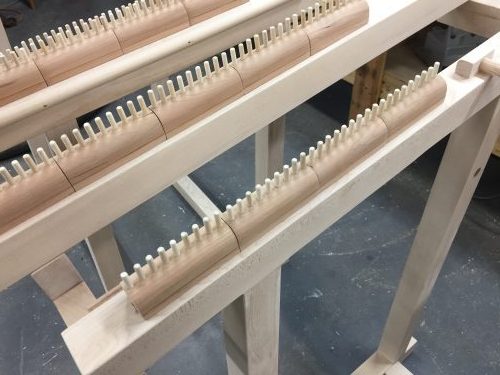
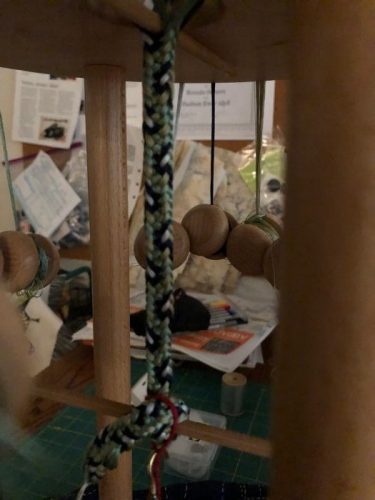
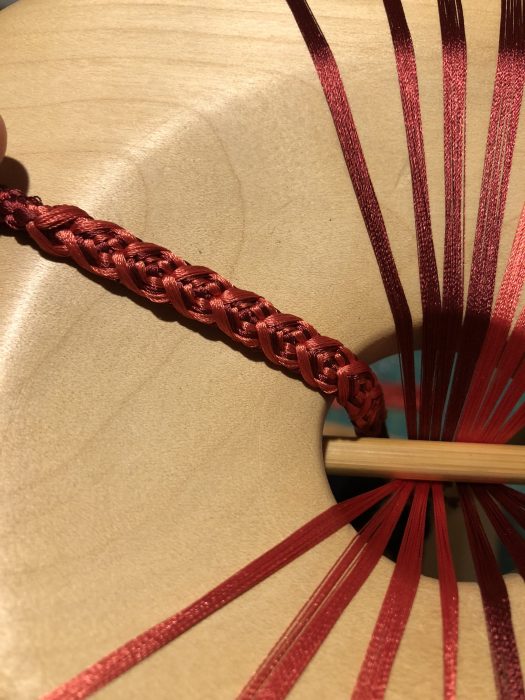
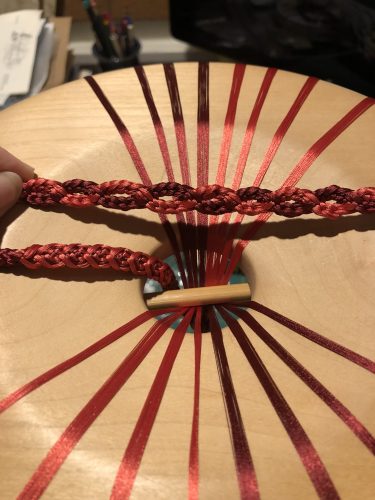
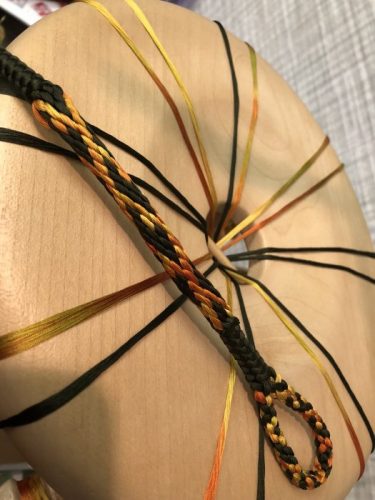
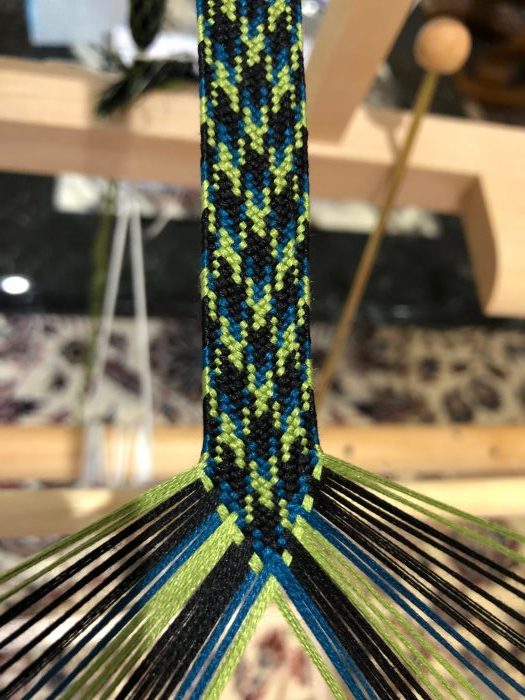
Bob is making great use of our time home this winter.  He is tackling a number of projects that have been on my wish list for a while.  He asked me to prioritize what I wanted done, and I chose having him build a taka dai as the #1 item.  He is making two because, like weavers, if you’re going to make one, you might as well make at least another!  These are from Rodrick Owen’s shop drawings, and they are nearing completion!

IMG-8492

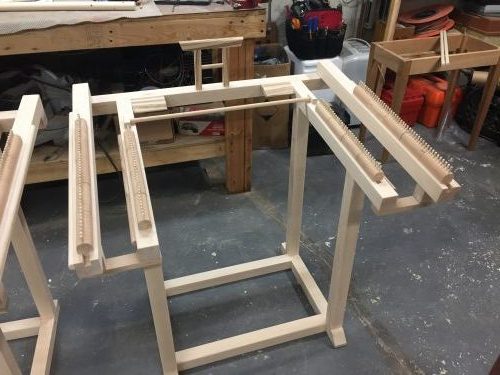
This is a complicated project.  Just look at all the details Bob had to work through.  Although he’s had a rather long hiatus from building anything of this magnitude, he got right back into it like a pro.

IMG_2062

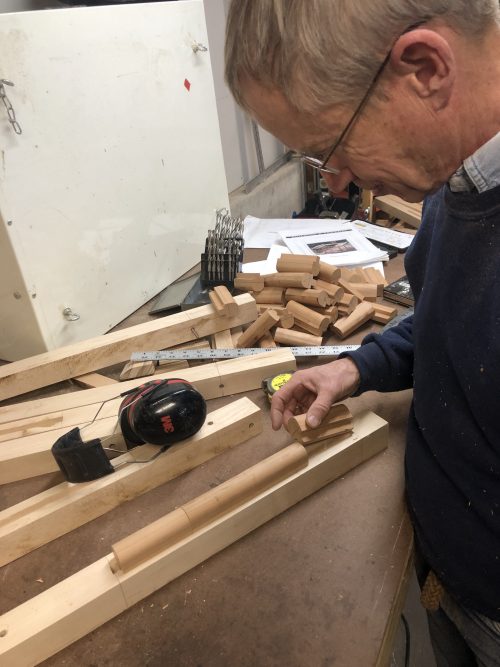
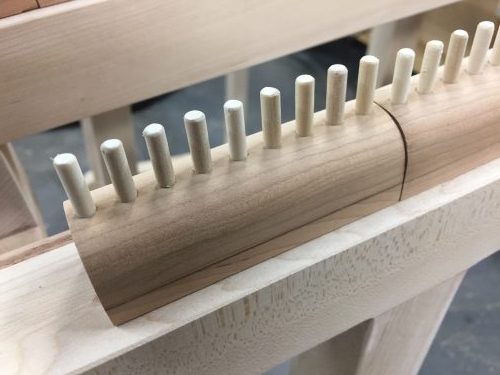
He had to make 40 koma for two taka dai, and each koma has nine pins in it.  They all fit together beautifully!

IMG-8490

IMG-8491

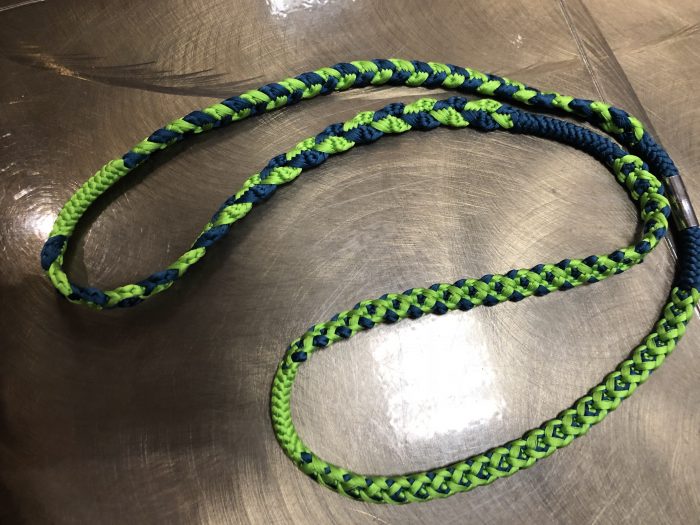
Bob made the tori out of zebra wood.  The completed braid moves over the tori and winds onto the cloth beam at the back of the taka dai as the braiding progresses. The other zebra wood parts are the sword rests, which hold open the shed as I braid.  Beautiful touches!

IMG_2105

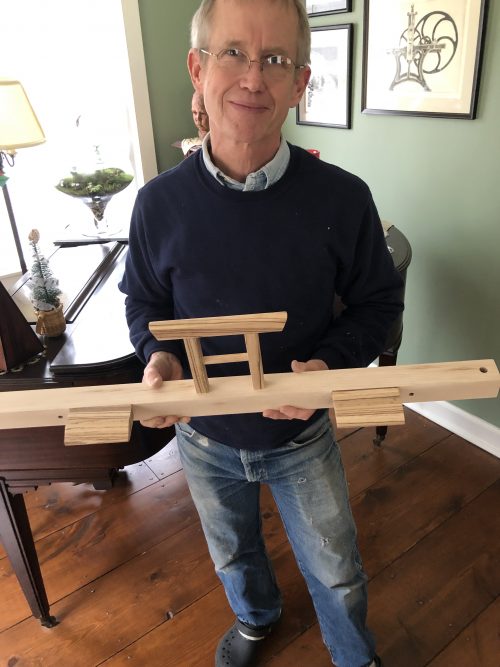
He’s just about ready to put a finish on the two taka dai.  Although I’ve been fairly impatient for him to finish, it’s gone amazingly faster than waiting for one from Braider’s Hand.… I’m on the waiting there– 21 months.  I’ve lost track of how many months I have left, but there are some braiders out there who don’t yet know they’ve just moved up one notch on the waiting list.

I’d better make a warp soon so that I’m ready to weave when the finish dries!  Silk or cotton?  I’ve got some very fine cotton (maybe 40/2) that has a silk-like sheen to it, and I’ve got a fair stash of 60/2 silk.  I also have bundles of kumihimo silk, but it irks me that the cut silks are so short in length.

Now that I’m back online here, I’ll do a few more posts in the next few days.  I’ll describe the deflected double in more detail and give some links to good information about that technique.

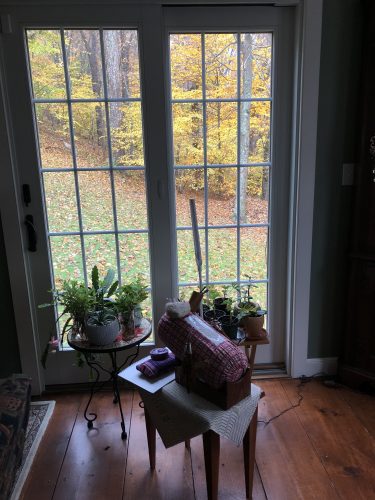
Bob and I have done a number of things together this winter that are already great memories.  It’s been a banner winter, but I welcome spring!  It’s already occurring inside the house…mostly due to this old amaryllis specimen we’ve had for decades.

IMG-8498

More soon…..IMG_1967


Autumn Distractions

The views from various windows in the house have been thoroughly distracting!  Sometimes I just stand and look while the minutes tick past.  How weird is it to take photos of my windows?

The Living room, where I have my new spinning wheel and my lace pillows.

IMG_1743

I love the brilliant yellow, even through lace curtains.

IMG_1759

The kitchen sink

IMG_1746

My studio where my friend’s wonderful stained gla enhances the autumn show.

IMG_1747

Even from the upstairs hall bathroom, the colors stop me in my tracks when I come up the stairs or pass this view on my way heading downstairs.

IMG_1751

We are bathed in yellow light that has shifted from chartreuse to brilliant yellow/orange and now into deeper orange and russet.

Up the street is a red house with a bright red maple in the front lawn.  Last week the lawn was covered in bright red leaves.  Which was brighter?  The leaves on the tree or the leaves on the ground?

IMG_1769

1-IMG_1769

Okay, one last photo before I move on….

IMG_1760

I’ve been thinking about weaving with braids.  I rather like the snake skin braid I made a few weeks back, so I’ve been considering how to use it in a tapestry design.  I thought a woven image of dry, cracked earth with some kumihimo snakes woven in flying shuttle technique would be interesting.  Bob thinks it sounds creepy.  Perhaps he’s right, but it may still appeal to me.

IMG-1416

Well, I  have a few other things to do before I get distracted with this!


Autumn Energy

It’s the first Saturday in November, and on this dark morning the autumn colors are glowing!  New England may have long winters (and equally long summers), but you just can’t beat the wonderful change of seasons here.

IMG_1722

IMG_1723

Tonight we’ll change our clocks back to standard time, and we’ll have some morning light for a few weeks before we head into the short days of winter.  Tuesday is election day, and Thanksgiving won’t be far behind.

At this time of year I have a surplus of energy and good intentions.  October was a great time for me to take a long weekend class at Red Stone Glen and then attend the 2nd annual kumihimo conference called the Gathering.  I returned home from both with some new skills and lots of ideas for using those skills.  What would the world be without teachers?

This is a shot of my class with Makiko Tada at the Gathering.  We were learning a braid structure that she designed, called “Baby Bamboo”–Takenoko Tedori.  The little chevron type figures in the braid suggest young bamboo shoots.

IMG_1729

Mikiko is on the far right, in the front.  I enjoy her teaching style, which is to give each student just enough info to set off on a journey to figure out some important tenets of braiding.  It’s frustrating for sure to learn this way, but you can’t beat the thrill of discovering something on your own when it finally clicks!

Based on the movements that create Takenoko Tedori, we were to figure out how to make two smaller braids that could separate and rejoin, like buttonholes; and how to manipulate the color sequence into other patterns using the same movements.

This is Makiko’s sample braid that we studied in class.  At the top of the photo is the section of the Takenoko Tedori that she taught us.  Right below is the buttonhole variation that we had to figure out on our own.  Below that are the variations that are based on changing the color positions of the tama and tweaking at the braid movements slightly.

IMG_1713

For me, the biggest learning curve in this class were the plain color sections that separate the pattern sections.  Those plain color areas are done by carrying one set of colors in the core while braiding only one color on the outside.  I just happened to take a class on core braiding the previous day, but we had used core stands to achieve this.  A core stand allows you to hang the unused tama above the working area where you actually braid.  It’s a marvellous solution for keeping the core color out of the way as your braid.  In Makiko’s class we did not have core stands, and she taught us how to braid by moving the UN-used tama along with the tama you want to braid.  It was a mind boggling to do.  The tama that carry the core move with the active tama, then have to get moved in the opposite direction to get out of the way of the tama that are actively braiding, and it was pretty hard to keep track of which direction I actually needed to go while doing this!  It is considerably easier to do at home, with no other classmates, no background noise, and maniacal concentration on the braid.  Whew!

Here is a small section of braid where I have manipulated the pattern by rearranging the color order of the tama.

IMG_1744
And here is a section of buttonholes.

IMG_1745

In the previous day’s class, taught by Rosalie Neilson, we learned to do core braiding with the aid of a core stand.  Here is the braid I made in that class.  I learned something brilliant in that class about how to save a braid to continue in future.  Take off the tama and replace with ‘easy-bobs,’ then put each element on a foam braiding disc in the order they were in on the marudai.  Later, you can put the whole thing back on the marudai.

IMG_1708


1-IMG_1730 crop

I learned some wonderful skills at this event, and spent time infused with good food and terrific camaraderie!

1-IMG_1731I also took one class that was just pure fun–making two bracelets in the Sami style of braided tin and beads on a reindeer leather base, with reindeer antler used for closures.  Our teacher was Katherine Buenger from Minnesota. Do you know the Sami?  They are the people who live above the arctic circle in Norway, Sweden, Finland and Russia.  They are the foundation of our wonderful fairy tales of father Christmas and his reindeer-driven sleigh.

Here are my two bracelets.  Who knew that reindeer leather could be dyed?  I could not resist the bright green!

IMG_1698

So I’ve returned home full of ideas for incorporating braids into my tapestry work.  I realize now it will be some time before I feel ready to tackle my large PMoW (Portuguese Man of War) idea, so in the meantime I intend to play with the concept of braids in tapestry.  It will be good experience.  I’d better get a lot of work done in the coming weeks, when there is still light in the morning and the autumn scenes continue to amaze me.

IMG_1720


A Weekend at Red Stone Glen

It was a near-perfect weekend for a long drive to central Pennsylvania, where two friends and I took a class at Tom Knisely’s new weaving studio called Red Stone Glen.  It’s a bucolic setting, far from the rush of nearby Harrisburg–except on Saturday nights when there is some kind of race car track nearby that makes quite a racket until about 9pm.  In the stillness of the woods it is quite a surprising background sound!

This is the main house, where the weaving classes take place and where you can shop.

IMG_1671

Isn’t this just the spot to have lunch and admire the view across the valley to the distant hills.

IMG_1672

IMG_1674

Julia, Clare and I were taking a class on the taka dai with Rodrick Owen and Terry Flynn, in the smaller farmhouse down the long driveway from the main house.  We had a large room for the three of us upstairs on the right side of the house.  The room goes from the front to back of the house.  We had a private bath in that room as well.  The mornings and nights were chilly, but I was determined to have coffee outside each morning–totally worth it!

IMG_1670

The back of the farmhouse has some lovely views as well.

IMG_1666

There was fog each morning.

IMG_1667

Oh yeah, and the class we took was great!  We were so busy working that I didn’t take enough time to get photos of that! This class took place in the farmhouse.

IMG_1660

Rodrick is watching Clare braid.

IMG_1661

One of the staffers took a photo of all of us together on Phyllis’ phone. Those are all of Rodrick’s braids on the table!

IMG_1665

Rodrick always travels with a treasure trove of the braids he has made over the years.

IMG_1658

IMG_1659

When you’re not working in class you can shop on the lower level of the main house.  These are the samples from the book 18 towels on Four Warps.

IMG_1673

Here are three of the four braids I’ve made lately (one has gone awol, but I hope it’s still somewhere in my studio).  The braid on the left is one of the first braids to make since it is plain weave with a color and weave effect known as log cabin.  I made that on Clare’s taka dai during the summer.

The braid on the right is unfinished because I plan to put it back on the taka dai today to continue making it.  It is a twill such an interesting pattern.

The middle braid was quite a bit harder.  I was making some weaving mistakes and getting an interesting pattern….you know the adage “a mistake made over and over is a new pattern!”  Well, I wanted to make the example in Rodrick’s book, so in the 2nd half of this braid I have corrected my mistake.  The beginning of this braid is a technique called braiding from the point so that there is no fringe at this end.  Terry Flynn helped me with that, and she also helped me learn how to do a hemstitch finish at the other end.  This is a technique that Terry figured out how to add to the ends of braids.

IMG_1675

This is a close up of the correct part of this braid.

IMG_1676

You can see how it has two lattice work areas in different colors that weave through the background color.  All these braids were made with 60/2 silk on cones from WEBs.  I don’t have a lot of color choices in my stash, and I was not particularly happy with these colors.

Figuring out how to get a wide variety of colors without taking out a 2nd mortgage is a challenge in making kumihimo!  For the moment I will have to make do with what I have!

Take a look at the Red Stone Glen website and see if you don’t find plenty of temptations in their class choices.  I hope to go back in March!

October Day at Six Paca Farm

Clever name, right?  Six Paca Farm.  Each new cria born on the farm gets named after a brew.  It was a soft October day, well ahead of the height of fall color, heavy with the coming rain.

IMG_1652

Joe introduced to us to some of the females and the quickly growing brood of cria.  Patriot is the youngest of the herd, born on Memorial Day.  He is a cutie!

IMG_1631

There are 37 alpaca on the farm at the moment.  They live in a bucolic setting in Bozrah, Connecticut.  Along with the farm, there is a nice shop full of alpaca things–from yarn to finished garments and hats/mittens/socks, and items from other local farms, such as cheese, milk, meat.  The owner Linda is a gracious host!  She set up tables and chairs under an awning for us to enjoy the lunches we brought, and she had coffee going, both at the farm and her mill that is just down the road.

The alpacas came out of the barn in small groups.  They weren’t entirely sure about visitors at first.

IMG_1628

They each had such unique features.

IMG_1651

Eventually they all came out and enjoyed some attention.

IMG_1653

It’s clear that Joe loves these animals, and they love him.

IMG_1634

IMG_1648

He told us so much about raising alpacas–their life span, what they eat, how to keep them healthy on a farm, pregnancy and gestation (11 months!), weaning the babies, and breeding for soft fiber and color.

IMG_1639

Prior to visiting the farm, we met at the mill down the street.  Linda owns the mill and the farm, and she started the mill about 9 years ago, when she was tired of waiting for her fiber to be processed at outside mills.  Back then it might take as long as 9 months to get her alpaca yarns back from a mill.  Now that she takes outside orders at her own mill, she says it sometimes still takes about 9 months to get her own fiber processing done.

Linda (behind the desk) is giving us some background information before go into the mill.

IMG_1610

All her mill equipment is brand new.  She bought equipment from all over the world and learned to use it as quickly as she could.  The picker is from New Zealand.  The carder is from Italy.

This is a pretty fancy washing station.  There are seven separate bins, each with a heating element and a drain.

IMG_1612

Freshly washed fiber is about to go through the carder.

IMG_1615

She dyes fiber as well.

IMG_1613

Her carder produces a semi worsted roving.  These rovings are being sent through the pin carder.

IMG_1617

Then comes spinning….IMG_1620

…and plying

IMG_1622

We couldn’t resist fondling the end product, even though we were told that this particular yarn was not the best quality alpaca fibers.  It was still soft!

IMG_1624

Last week I dyed two onesies to give to our grand-twins, Emme and Rhett.  Barbara from my small weavers’ group gave them to me when we all met for our annual dye day.  I was not able to stay and dye, so I brought them home.  In my dye stash I have a color I love called ‘wasabi.’  It’s a ProChem MX dye.  I thought it was the perfect name–and color– for a couple of babies who are peas in the same pod.  This is Emme’s.

IMG_1591

and Rhett’s too.

IMG_1593

When we got back from our visit to the kids and grandkids, I decided to make a project I’d once made ages ago.  A few decades ago my embroidery guild in New Jersey asked each member to make a tote bag for small projects. It was so clever.  You start with a store-bought placemat and coordinating napkin.  It’s a quick project and feels a bit like a magic trick when it’s done.

IMG_1604

I’ll post more photos and the instructions for this when I return from my next jaunt.

I’m heading off again for another fun workshop.  I’ll be at Red Stone Glen for the weekend to take a class with Rodrick Owen on the taka dai.  Remember my practice pieces from the summer in preparation for this class?  If not, you can see them here and here.  I haven’t seen Rodrick in 20 years.  It’s going to be fun, and I only have about a year left to wait for me own taka dai.  Patience….

Scroll to Top