ArgoKnot

Fine Craft

Deflected Doubleweave, as promised

When deflected doubleweave first became a ‘thing’ I was not interested.  Back then it seemed to me that people wove this technique in stark contrasts, pushing the ‘deflected’ bit as far as possible.  I remember lots of black white, heavily felted textiles that looked pretty unpleasant to my ‘delicate’ sensibilities!

Times do change, and this technique has been calling to me for several years now.  Everything has its time, doesn’t it?  Since I now live in an area where there is a wonderful DDW teacher, as well as a non-profit weaving center where a few accomplished weavers design beautiful patterns that are woven by trained weavers, I have been inundated by beautiful pieces of Deflected Doubleweave. (Check out Hartford Artisans for a unique organization where experienced weavers train locals who are considered visually impaired, to weave an array of wonderful textiles.)

The teacher is Janney Simpson.  You can find her article and beautiful DDW scarf in the Nov/Dec 2016 issue of handwoven.  You can also read about her interesting collaboration with weavers in Micronesia.  I signed up to take a local workshop with her, and then had to miss it at the last minute.  Nevermind about that–she gave me the workshop notebook and the yarns she wanted me to use for warp– a deep green merino/silk zephyr and a deep teal 10/2 tencel.  When I finally got down to it, the project went swimmingly well, apart from the glitches of using a new-to-me Baby Wolf with combby.  Since then I’ve done a little a gathering of other DDW resources.  I’ve done this to have as a reference for future.  If it helps you too, I’m pleased.

Here is the link to Interweave’s digital magazine that includes Janney’s DDW article. If you already have Handwoven magazines in your library, Janney’s article is in the Nov/Dec 2016 issue.

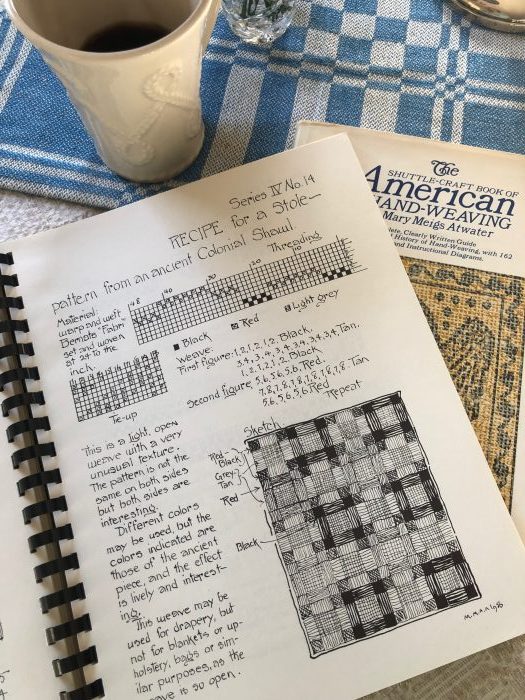
And perhap before I get any further down this rabbit hole, I should define this technique.  Here is a definition from Madelyn van der Hoogt: “In double weave two layers are usually woven simultaneous, a top and a bottom, while in deflected double weave warp and weft threads of each layer are interlaced. The result is one pattern that produces 2 different looks, one on each side.”

Alice Schlein writes about many weaving explorations.  You can find her DDW experiments on her blog Weaverly.

In one of Alice Schlein’s DDW posts, she mentions using a linen/cotton yarn from Gist.  Alice documents her weaving samples and even the wet finishing.  Very helpful!

A visit to Gist’s website shows they offer a kit for making these two colorways for a wool/alpaca blend scarf.  They offer the pattern as a free download, but I could not find it–only a link to a DDW pattern by Elizabeth Hill that I already own.

The pattern from Gistyarn is based on this baby blanket pattern from WEBS.   I bought this pattern and look forward to making blankets for my three grandchildren sometime in the near future.

Elizabeth Hill has made a couple of videos showing the technique for dealing with selvedges while weaving DDW.  This is a 2-shuttle weave, and one of the wefts does not go all the way to the selvedges.  You have to decide how to handle that.  Janney teaches a method of having two selvedges on each side that I happen to prefer.  Elizabeth Hill demonstrates that here.

In another video Elizabeth demonstrates the method that Madelyn van der Hoogt uses.

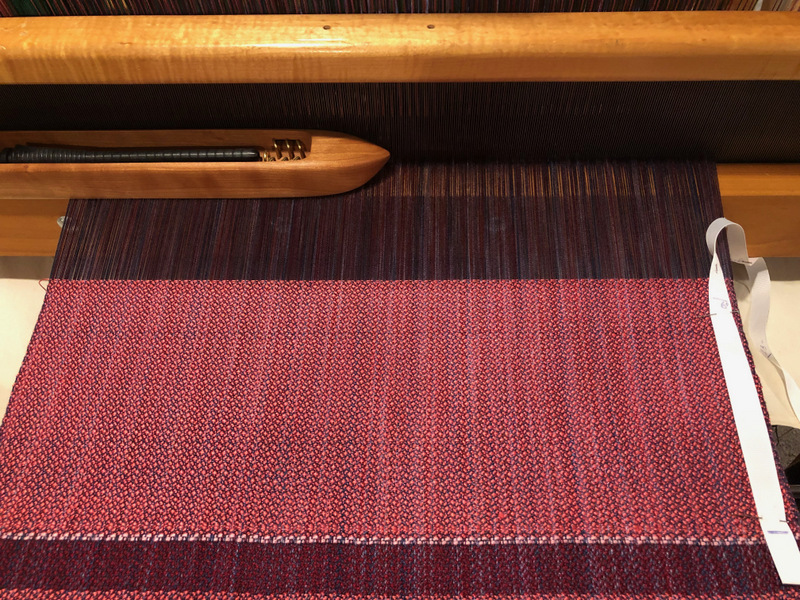
I you do a google image search you’ll find lots to enjoy and consider in planning your own DDW adventure–same is true for looking on Pinterest.  The DDW time has come for me.  I still have plenty of warp left on my first project in this technique, and lots of ideas for how to proceed with the warp that’s left.  I just need to spend time tweaking at the combby on that loom to get it to play well with me!  Here are my first three samples from that warp.

IMG_1944

If two colors are good, wouldn’t seven be better?  maybe….maybe not….

IMG_1986

How about two colors that are different (but in same color family) as the warp?  Hmm…this photo is not accurate.  I’ll have to try again when I get this loom working.  So far, it has been quite fiddly.

IMG-2298

More soon….


Long awaited Taka Dai

In the late 80s I discovered the Japanese technique of making braids on a marudai.  I took a class from a woman in NJ, where I spent a day as the only student in the class at the teacher’s house.  I no longer remember much about it…. I have no idea where I drove for this class, and no idea if I then bought a marudai or if that came years later, when I met Rodrick Owen.  The teacher for that first class was Charlene Marietti.  She was excellent and helped me make some beautiful braids that day.  I’m quite pleased to find that she writes a blog called Filamenti.

Here are the braids I made that day, a lifetime ago! Charlene supplied all the materials, from the marudai and tama to the threads I used for braiding.  She had some fun braiding materials, such as rayon ribbon, chainette, and metallics.  These braids have to be about 35 years old now.

IMG-2226 (1)

I made braids for a few years before ever taking another class.  Eventually, probably in the late 90s, I met Rodrick Owen and was very lucky to get to study with him in quite some depth since he occasionally stayed at my house between the classes he taught at the Weavers’ Place, in Maryland,  and  classes in the NY-metro area.  During his free time, he generously gave me some excellent guidance.  In some of the classes I took after this point, some of the students were using taka dai to make more involved flat braids.  These included twills and double weave braids. I was very intrigued.  At some point–early 2000s?– I bought Rodrick’s plans for making a taka dai so that Bob could make one for me.

Along the way I tried a few ‘shots’ on other people’s taka dai.  I began to think I’d never have one.  Time passed and I eventually stopped braiding except very occasionally, and that was about 25 years ago!  Then last year, about this time, I learned that I’d just missed the first meeting of the newly formed American Kumihimo Society.  Two weaving friends of mine in my new home state had gone to it.  They both did a lot of braiding on the maru dai and also both owned taka dai. Over last summer, Clare let me weave several braids on her taka dai.  Once a week for a couple of months I went to her house on Thursdays to weave.  What a terrific opportunity for me!

These are the braids I wove on Clare’s taka dai.

I joined to the AKS so I could participate in the 2nd annual conference and meeting.  I also found that Rodrick is still teaching in the US, and that Terri Flynn is still connected to him although she had long ago given up her store front business, Weavers’ Place.  I decided to put my name on the waiting list for a taka dai at Braiders’ Hand.  They are made to Rodrick’s original shop drawings.  I attended the AKS conference in Florida, and also took a weekend class on the taka dai with Rodrick and Terri at Red Stone Glen in Pennsylvania.
I wrote about both those events here and here.

For the workshop at Red Stone Glen, I was able to rent a taka dai from Terri, and it was wonderful to get to delve in to the techniques used in weaving on this equipment.  That waiting list for a taka dai from Braiders’ Hand had grown to almost 2 years by the time I signed on for one.  While Bob was reorganizing his woodworking shop he found the maple pieces he had pre-cut decades ago in order to make a taka dai.  We both went on a hunt for the shop drawings I had bought back when he started this project.  Were with my kumihimo books?  Were they somewhere in Bob’s shop? During that hunt, I also bought plans from Carol Franklin, just in case we didn’t find Rodrick’s (which I thought were now unavailable), but it was immediately obvious to Bob that Rodrick’s plans were considerably different.  In order to continue with what he’d already started he’d need to find those original plans.

Needles to say, since I am making my first warp for my taka dai, Bob did find Rodrick’s shop drawings.  Bob keeps things pretty organized so I wasn’t too surprised when he found them, all these later and in a different house from when he began this project!

I’ve taken photos and a couple of videos along the way.  Neither Bob or I took note of the date he began this project years ago….or even the date he re-engaged with it!  He thinks he’s been working on it for about two months, off and on.  Thank you Rodrick for making these plans available, and Clare who took at least a dozen phone calls from us asking her to check various measurements on her taka dai (from Braiders’ Hand) against the plans, and to Dave at Braider’s Hand who also answered a number of questions.

Here it is ready for use!

IMG-2215

And some of its wonderful details–like the zebra wood Tori and sword pads.

IMG-2216

Bob made 44 koma, each with 9 pins.  I will keep 22 of them, and whoever gets the other taka dai will get the rest, which means we’ll each have four extra koma. Oh yeah, did I forget to mention that he made two taka dai??  There were a number of complicated parts to this thing–and jigs to set–so Bob figured if he had to do all that, he might as well make two.  Do you know someone who wants one?  Send me a message!

IMG-8530

Look at the difference before and after the finishing oil!

IMG-8525

Today Bob is focusing on making my weaving sword and a raddle.  The sword has a lot of shaping required so that the edges are as sharp and smooth as possible for beating in each weft.  It’s cherry.  I can’t wait to see that beautiful grain once there’s a finish on it!

IMG-8541

I’m about to make a warp for my first braid on my own taka dai!  Last year I bought this wonderful group of fine cottons from our guild stash called “Weftovers.”  There is a beautiful sheen on these cotton threads.  They are very fine!

IMG-2221

So it’s time to get busy making that warp.  I’m either going to use 7 colors to make #12 from Rodrick’s book Making Kumihimo….
IMG-2224

….or I’ll choose two colors and make #25.  I want to get my bearings with my new taka dai before I delve back into the more challenging designs.

IMG-2225

Time to make a warp!


Silence

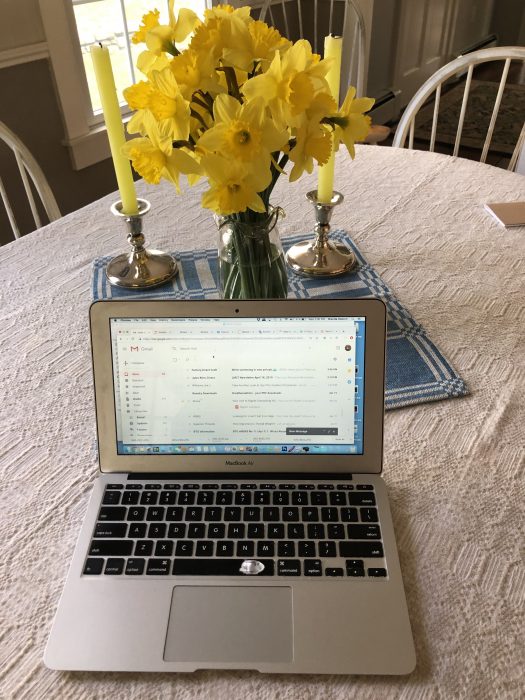
It’s March 2nd,  and I’m sitting at my kitchen table watching the snow fall on an already white landscape.  I’ve got a white on white tablecloth under my laptop and a vase of bright yellow tulips that reminds me that the landscape will soon be full of vibrant colors.

IMG_2171

Where did the time go between November and now?  I can’t answer that well, but I can report that a lot of creative juices have been flowing, even if they were mostly in the form of inspiration from other people’s creative output!  I’ve been silent for a few months now, letting it all sink in.  And it’s been fairly quiet here.  There is nothing like a blanket of snow to muffle the noise of life.  I live on a quiet street where only three other families drive up this road.  And let me tell you!–winter here is a lot quieter than when Bob and I are living on a boat in the Caribbean. The wind blows night and day there, and it’s noisier than you’d imagine!

It’s been good to be at our land home this winter.  It has given us time to spend with our newborn grand-twins, Rhett and Emme.  Along with their older sister Tori, our son and his wife now have a trio of kids whose initial letters in their names happen to create the word TRE (Tori, Rhett, Emme).  They are quite the threesome! Tre O5borns!

IMG-8470

A recount of what I’ve been doing since November might appear a bit schizoid as well as boring.  So many of us who love textiles work with it in numerous ways.  So I’ve been spinning some muga silk on my new Jensen wheel, and weaving on a new-to-me Baby Wolf  combby (not going well), and knitting (also a failed project), and struggling with a new Torchon pattern in bobbin lace.  I hope these setbacks and failed projects mean I am growing in these areas.  It’s been a long time since I’ve had a knitting failure.  The mishap is in the way the fabric drapes and the sweater fits–or rather, doesn’t fit.  It is huge!  I’m determined to master my quirky computer loom, but I’m not there yet.  I think I have worked out all the mis-steps on the Torchon pattern , and for that I have to thank Jill from my lace group.  And so….I lurch on….

Here are some photos of the deflected weave project that I’m using as my first project on the Baby Wolf combby. This was the first experiment.  I used the same two colors for weft that are in the warp. It’s a lovely pattern, but a bit boring colorwise.

IMG_1944

On the 2nd experiment I decided to increase the color play.  There are seven colors of weft weaving through the two color warp.

IMG_1986

Now I’m experimenting with two colors of weft that are different from the two colors in the warp.  I think I will like it best.  It’s on hold for now because I’m having so many problems with the combby.  It is often a ‘two steps forward, one step back’ kind of process.  Surely it’s got to get more reliable!

Once I have my dobby problems under better control I will write up a bit about this pattern.  It is Janney Simpson’s design that was published about two years ago in “Handwoven” magazine.

Bob is making great use of our time home this winter.  He is tackling a number of projects that have been on my wish list for a while.  He asked me to prioritize what I wanted done, and I chose having him build a taka dai as the #1 item.  He is making two because, like weavers, if you’re going to make one, you might as well make at least another!  These are from Rodrick Owen’s shop drawings, and they are nearing completion!

IMG-8492

This is a complicated project.  Just look at all the details Bob had to work through.  Although he’s had a rather long hiatus from building anything of this magnitude, he got right back into it like a pro.

IMG_2062

He had to make 40 koma for two taka dai, and each koma has nine pins in it.  They all fit together beautifully!

IMG-8490

IMG-8491

Bob made the tori out of zebra wood.  The completed braid moves over the tori and winds onto the cloth beam at the back of the taka dai as the braiding progresses. The other zebra wood parts are the sword rests, which hold open the shed as I braid.  Beautiful touches!

IMG_2105

He’s just about ready to put a finish on the two taka dai.  Although I’ve been fairly impatient for him to finish, it’s gone amazingly faster than waiting for one from Braider’s Hand.… I’m on the waiting there– 21 months.  I’ve lost track of how many months I have left, but there are some braiders out there who don’t yet know they’ve just moved up one notch on the waiting list.

I’d better make a warp soon so that I’m ready to weave when the finish dries!  Silk or cotton?  I’ve got some very fine cotton (maybe 40/2) that has a silk-like sheen to it, and I’ve got a fair stash of 60/2 silk.  I also have bundles of kumihimo silk, but it irks me that the cut silks are so short in length.

Now that I’m back online here, I’ll do a few more posts in the next few days.  I’ll describe the deflected double in more detail and give some links to good information about that technique.

Bob and I have done a number of things together this winter that are already great memories.  It’s been a banner winter, but I welcome spring!  It’s already occurring inside the house…mostly due to this old amaryllis specimen we’ve had for decades.

IMG-8498

More soon…..IMG_1967


Autumn Distractions

The views from various windows in the house have been thoroughly distracting!  Sometimes I just stand and look while the minutes tick past.  How weird is it to take photos of my windows?

The Living room, where I have my new spinning wheel and my lace pillows.

IMG_1743

I love the brilliant yellow, even through lace curtains.

IMG_1759

The kitchen sink

IMG_1746

My studio where my friend’s wonderful stained gla enhances the autumn show.

IMG_1747

Even from the upstairs hall bathroom, the colors stop me in my tracks when I come up the stairs or pass this view on my way heading downstairs.

IMG_1751

We are bathed in yellow light that has shifted from chartreuse to brilliant yellow/orange and now into deeper orange and russet.

Up the street is a red house with a bright red maple in the front lawn.  Last week the lawn was covered in bright red leaves.  Which was brighter?  The leaves on the tree or the leaves on the ground?

IMG_1769

1-IMG_1769

Okay, one last photo before I move on….

IMG_1760

I’ve been thinking about weaving with braids.  I rather like the snake skin braid I made a few weeks back, so I’ve been considering how to use it in a tapestry design.  I thought a woven image of dry, cracked earth with some kumihimo snakes woven in flying shuttle technique would be interesting.  Bob thinks it sounds creepy.  Perhaps he’s right, but it may still appeal to me.

IMG-1416

Well, I  have a few other things to do before I get distracted with this!


Autumn Energy

It’s the first Saturday in November, and on this dark morning the autumn colors are glowing!  New England may have long winters (and equally long summers), but you just can’t beat the wonderful change of seasons here.

IMG_1722

IMG_1723

Tonight we’ll change our clocks back to standard time, and we’ll have some morning light for a few weeks before we head into the short days of winter.  Tuesday is election day, and Thanksgiving won’t be far behind.

At this time of year I have a surplus of energy and good intentions.  October was a great time for me to take a long weekend class at Red Stone Glen and then attend the 2nd annual kumihimo conference called the Gathering.  I returned home from both with some new skills and lots of ideas for using those skills.  What would the world be without teachers?

This is a shot of my class with Makiko Tada at the Gathering.  We were learning a braid structure that she designed, called “Baby Bamboo”–Takenoko Tedori.  The little chevron type figures in the braid suggest young bamboo shoots.

IMG_1729

Mikiko is on the far right, in the front.  I enjoy her teaching style, which is to give each student just enough info to set off on a journey to figure out some important tenets of braiding.  It’s frustrating for sure to learn this way, but you can’t beat the thrill of discovering something on your own when it finally clicks!

Based on the movements that create Takenoko Tedori, we were to figure out how to make two smaller braids that could separate and rejoin, like buttonholes; and how to manipulate the color sequence into other patterns using the same movements.

This is Makiko’s sample braid that we studied in class.  At the top of the photo is the section of the Takenoko Tedori that she taught us.  Right below is the buttonhole variation that we had to figure out on our own.  Below that are the variations that are based on changing the color positions of the tama and tweaking at the braid movements slightly.

IMG_1713

For me, the biggest learning curve in this class were the plain color sections that separate the pattern sections.  Those plain color areas are done by carrying one set of colors in the core while braiding only one color on the outside.  I just happened to take a class on core braiding the previous day, but we had used core stands to achieve this.  A core stand allows you to hang the unused tama above the working area where you actually braid.  It’s a marvellous solution for keeping the core color out of the way as your braid.  In Makiko’s class we did not have core stands, and she taught us how to braid by moving the UN-used tama along with the tama you want to braid.  It was a mind boggling to do.  The tama that carry the core move with the active tama, then have to get moved in the opposite direction to get out of the way of the tama that are actively braiding, and it was pretty hard to keep track of which direction I actually needed to go while doing this!  It is considerably easier to do at home, with no other classmates, no background noise, and maniacal concentration on the braid.  Whew!

Here is a small section of braid where I have manipulated the pattern by rearranging the color order of the tama.

IMG_1744
And here is a section of buttonholes.

IMG_1745

In the previous day’s class, taught by Rosalie Neilson, we learned to do core braiding with the aid of a core stand.  Here is the braid I made in that class.  I learned something brilliant in that class about how to save a braid to continue in future.  Take off the tama and replace with ‘easy-bobs,’ then put each element on a foam braiding disc in the order they were in on the marudai.  Later, you can put the whole thing back on the marudai.

IMG_1708


1-IMG_1730 crop

I learned some wonderful skills at this event, and spent time infused with good food and terrific camaraderie!

1-IMG_1731I also took one class that was just pure fun–making two bracelets in the Sami style of braided tin and beads on a reindeer leather base, with reindeer antler used for closures.  Our teacher was Katherine Buenger from Minnesota. Do you know the Sami?  They are the people who live above the arctic circle in Norway, Sweden, Finland and Russia.  They are the foundation of our wonderful fairy tales of father Christmas and his reindeer-driven sleigh.

Here are my two bracelets.  Who knew that reindeer leather could be dyed?  I could not resist the bright green!

IMG_1698

So I’ve returned home full of ideas for incorporating braids into my tapestry work.  I realize now it will be some time before I feel ready to tackle my large PMoW (Portuguese Man of War) idea, so in the meantime I intend to play with the concept of braids in tapestry.  It will be good experience.  I’d better get a lot of work done in the coming weeks, when there is still light in the morning and the autumn scenes continue to amaze me.

IMG_1720


Scroll to Top